Mazda CX-5 Service & Repair Manual: Speaker Grille Removal/Installation
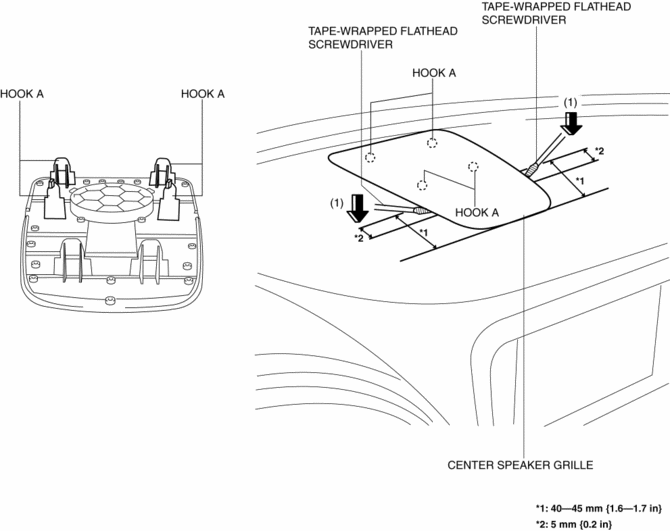
Center Speaker Grille
1. Insert a tape-wrapped flathead screwdriver into shown in the figure and remove hooks A in the direction of arrow (1).
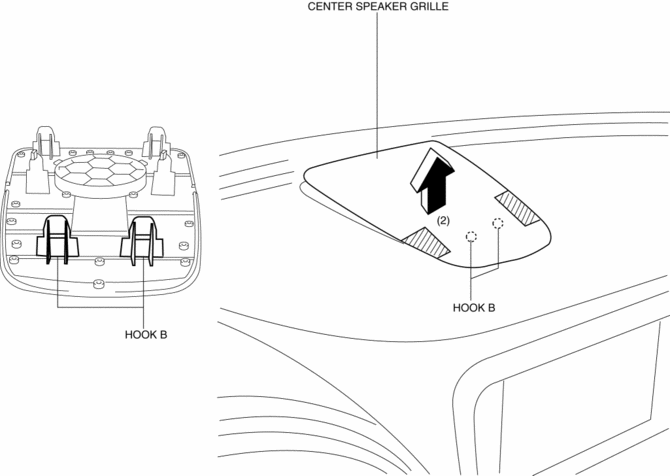
2. Take the shaded area shown in the figure, and remove the center speaker grille in the direction of arrow (2) while detaching hooks B.
3. Install in the reverse order of removal.
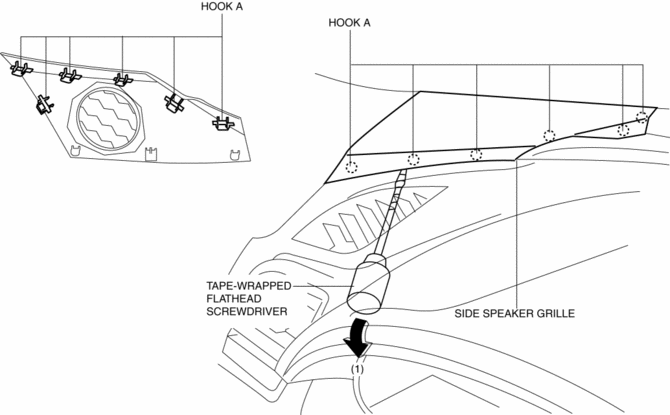
Side Speaker Grille
1. Insert a tape-wrapped flathead screwdriver into the service hole and remove hooks A in the direction of arrow (1).
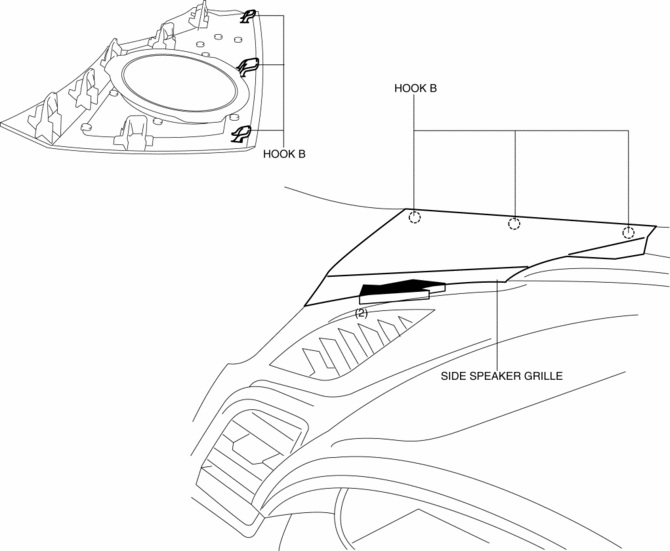
2. Pull the side speaker grille in the direction of the arrow (2), and remove the side speaker grille while detaching hooks B.
3. Install in the reverse order of removal.
 Sirius Satellite Radio Unit Removal/Installation
CAUTION:
The audio unit communicates with the SIRIUS satellite radio unit and records
the presence/non-presence of the SIRIUS satellite radio unit when the ignition
is switched to ACC or ...
 Speaker [With Bose®]
Purpose
Converts the audio signal from the audio unit to sound.
High quality sound is provided for the driver and passengers.
Function
Full-range speakers, which can output ...
Other materials:
Front Lower Arm Inspection
1. Remove the front lower arm..
2. Inspect the front lower arm for bending or damage, and the front lower arm
ball joint for excessive looseness.
If there is any malfunction, replace the front lower arm.
3. Rotate the front lower arm ball joint stud 5 times. Install the
SST ...
Outside the United States/Canada
Government regulations in the United States/Canada require that automobiles meet
specific emission regulations and safety standards. Therefore, vehicles built for
use in the United States/Canada may differ from those sold in other countries.
The differences may make it difficult or even impossi ...
Throttle Position (TP) Sensor Inspection
Voltage Inspection
CAUTION:
The inspection cannot be performed with this method correctly if there is
a malfunction of the APP sensor or throttle valve actuator. Verify that no DTCs
related to the APP sensor or throttle valve actuator are stored before the inspection.
NOTE:
...
