Mazda CX-5 Service & Repair Manual: Front Fender Junction Removal [Panel Replacement]
Symbol Mark

Removal Procedure
1. Drill the 3 locations shown in the figure.
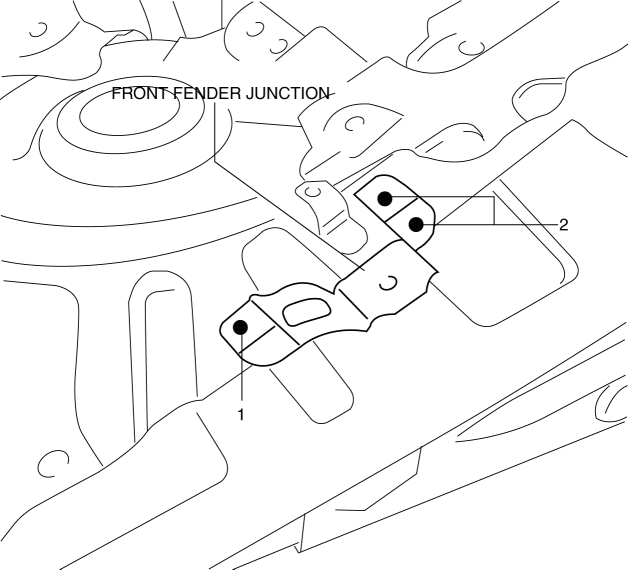
2. Remove the front fender junction.
 Front Fender Junction Installation [Panel Replacement]
Symbol Mark
Installation Procedure
1. When installing new parts, measure and adjust the body as necessary to conform
with standard dimensions.
2. Drill holes for the plug welding before inst ...
 Front Fender Panel Removal/Installation
1. Disconnect the negative battery cable..
2. Remove the following parts:
a. Front bumper.
b. Front combination light.
c. Front bumper slider.
d. Front over fender.
3. Remove bolts A and f ...
Other materials:
PCM Removal/Installation
CAUTION:
There are two types of PCM settings. If the incorrect PCM is installed, it
could cause interference with engine control.
When replacing the PCM, verify the first four digits of the part number indicated
on the PCM label before replacement, and replace the PCM with one ...
Front Door Latch And Lock Actuator Removal/Installation
1. Perform the front door glass preparation..
2. Disconnect the negative battery cable..
3. Remove the following parts:
a. Inner garnish.
b. Front door trim.
c. Inner handle.
d. Front door glass.
e. Front door module panel.
f. Front door key cylinder.
4. Remove the door lock knob c ...
Seat
Outline
Front seat
A manual seat or power seat has been adopted on the driver's seat.
A seat warmer system has been adopted on the front seats. (with seat warmer
system)
A manual seat has been adopted on the front passenger's seat.
A side air bag module is ...
