Mazda CX-5 Service & Repair Manual: Front Fender Junction Installation [Panel Replacement]
Symbol Mark

Installation Procedure
1. When installing new parts, measure and adjust the body as necessary to conform with standard dimensions.
2. Drill holes for the plug welding before installing the new parts.
3. After temporarily installing new parts, make sure the related parts fit properly.
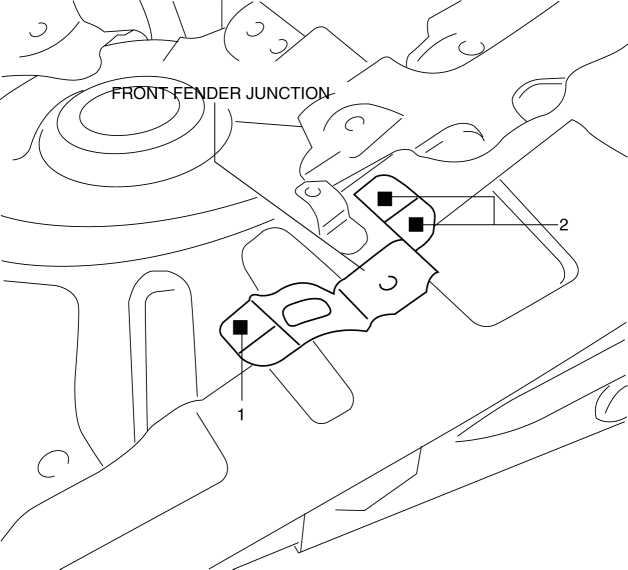
4. Plug weld the 3 locations shown in the figure.
 Front Bumper Removal/Installation
CAUTION:
Affix the protective tape to the position (vehicle body side) shown in the
figure to prevent scratches and damage.
1. Disconnect the negative battery cable..
2. Remov ...
 Front Fender Junction Removal [Panel Replacement]
Symbol Mark
Removal Procedure
1. Drill the 3 locations shown in the figure.
2. Remove the front fender junction. ...
Other materials:
Washer Motor Inspection
1. Disconnect the negative battery cable..
2. Set the front over fender aside..
3. Set the mudguard (RH) aside..
4. Remove the front bumper..
5. Disconnect the washer motor connector from the washer motor.
6. Disconnect the windshield washer hose from the washer motor.
7. Disconnect the ...
Engine Control System
Outline
L-jetronic*1 and D-jetronic*2 type detectors have been combined for intake
air amount detection, improving the accuracy of the intake air amount measurement.
MAF sensor adopted
MAP sensor adopted
IAT sensor No.1 and No.2 adopted
...
Oil Pressure Switch Inspection
1. Switch the ignition ON (engine off) and verify that the oil pressure warning
light is illuminated.
2. Start the engine and verify that the oil pressure warning light turns off.
If the oil pressure warning light is not illuminated or remains illuminated,
inspect the wiring harness ...
