Mazda CX-5 Service & Repair Manual: Shift Panel Removal/Installation
ATX
1. Disconnect the negative battery cable..
2. Selector lever to neutral position.
3. Remove the front console box..
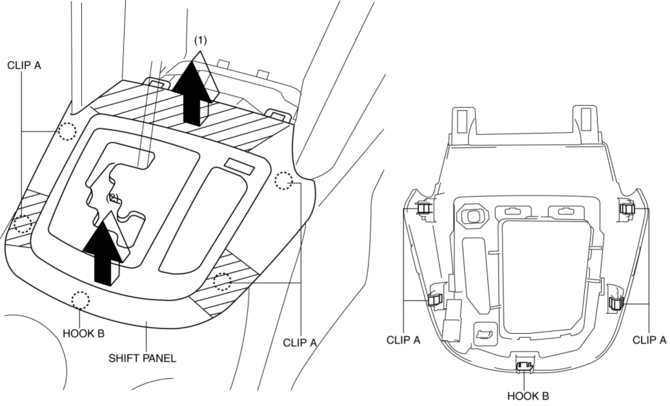
4. Take the shaded area shown in the figure, and remove the shift panel in the direction of the arrow in the order of (1), (2) while detaching clips A, hook B.
5. Disconnect the connector.
6. Install in the reverse order of removal.
MTX
1. Remove the front console box..
2. Remove the shift lever knob..
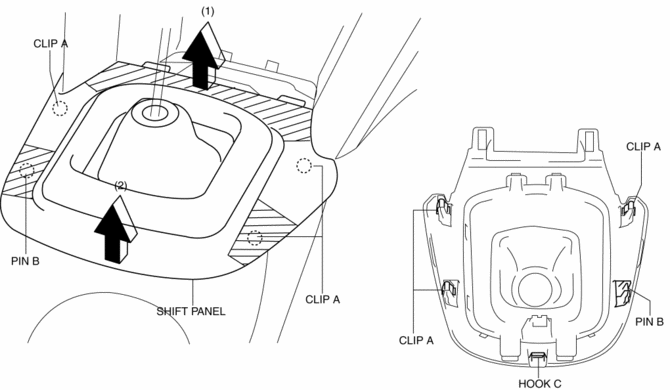
3. Take the shaded area shown in the figure, and remove the shift panel in the direction of the arrow in the order of (1), (2) while detaching clips A, pin B, hook C.
4. Install in the reverse order of removal.
 Repairable Range Of Polypropylene Bumpers [Plastic Body Parts]
The three types of damaged bumpers shown below are considered repairable. Although
a bumper which has been damaged greater than this could also be repaired, it should
be replaced with a new one be ...
 Side Wall Removal/Installation
1. Pull the side wall in the direction of the arrow in the order of (1), (2)
and remove it while detaching hooks A and clip B.
2. Pull the side wall in the direction of the arrow (3) and remov ...
Other materials:
Air Cleaner Element Inspection
1. Remove the air cleaner element..
2. Inspect the following items:
Has the replacement interval past?
Is the air cleaner element soiled, damaged, or bent?
Are the air cleaner case and the air cleaner element correctly sealed?
Is the correct air cleaner element inst ...
Shift Solenoid No.1 [Fw6 A EL, Fw6 Ax EL]
Purpose/Function
Shift solenoid No.1 adjusts the hydraulic pressure in the low clutch circuit
based on the current demand from the TCM according to the vehicle conditions.
Construction
Shift solenoid No.1 is installed to the solenoid control valve body.
Shift solenoid ...
Purge Control
Outline
An appropriate amount of evaporative gas is fed into the intake manifold
by the purge solenoid valve operation according to the engine operation conditions.
This ensures driveability and prevents release of evaporative gas into the atmosphere.
The PCM drives the purge so ...
