Mazda CX-5 Service & Repair Manual: Transfer Oil Seal Replacement [Fw6 Ax EL]
Transfer oil seal (LH)
1. Drain the transfer oil..
2. Remove the transfer from the vehicle..
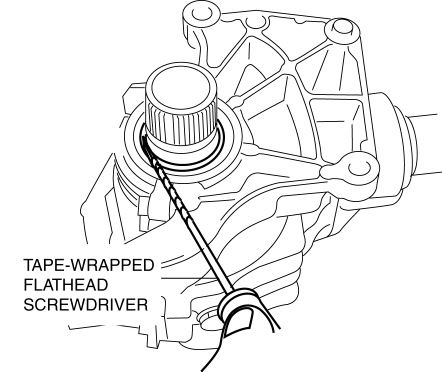
3. Insert a tape-wrapped flathead screwdriver into the lip area of the oil seal (LH) as shown in the figure and remove the oil seal (LH).
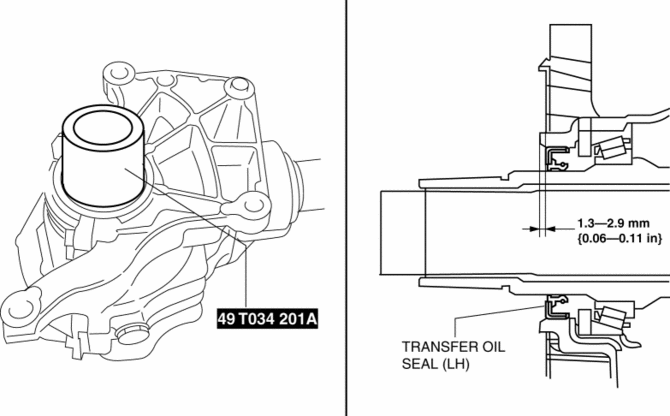
4. Using the SST
and a hammer, tap the new seal into place.
5. Apply the lip of the oil seal with transfer oil.
6. Install the transfer to the vehicle..
7. Add the specified amount and type of oil..
Transfer oil seal (RH) No.1
1. Remove the front drive shaft (RH)..
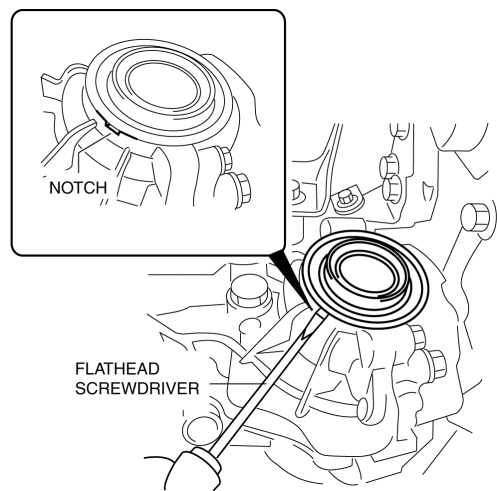
2. Insert a flathead screwdriver into the notch of the transfer and remove the oil seal (RH) No.1.
3. Using the SST
and a hammer, tap the new seal into place.

4. Coat the lip of the oil seal with transfer oil.
5. Install the front drive shaft (RH)..
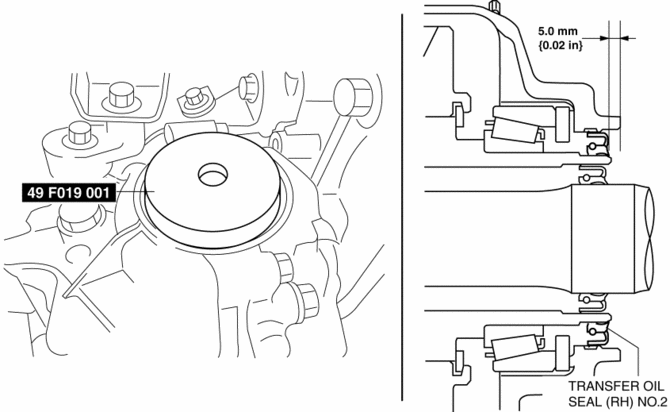
Transfer oil seal (RH) No.2
1. Drain the transfer oil..
2. Remove the front drive shaft (RH)..
3. Remove the transfer oil seal (RH) No.1..
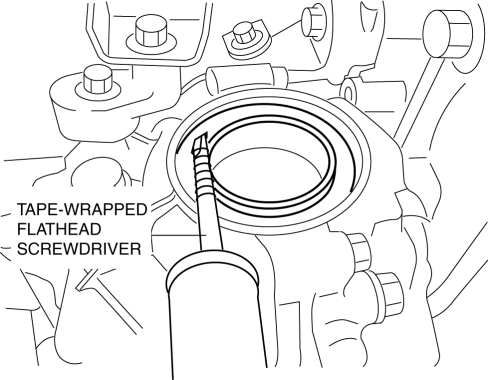
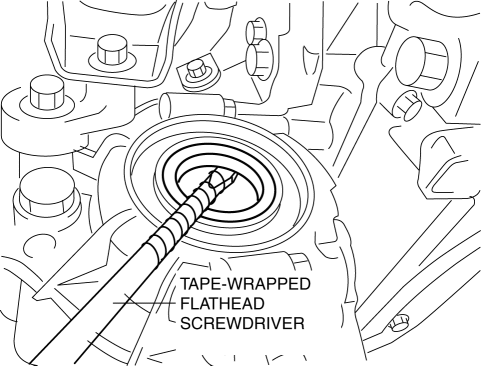
4. Insert a tape-wrapped flathead screwdriver into the lip area of the oil seal (RH) No.2 as shown in the figure and remove the oil seal (RH) No.2.
5. Using the SST
and a hammer, tap the new seal into place.
6. Apply the lip of the oil seal with transfer oil.
7. Install the transfer oil seal (RH) No.1..
8. Install the front drive shaft (RH)..
9. Add the specified amount and type of oil..
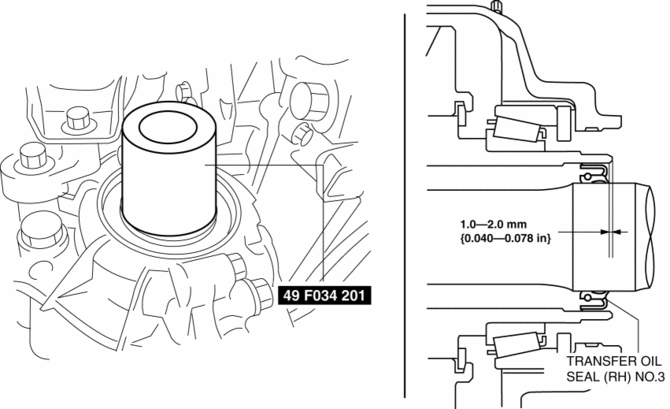
Transfer oil seal (RH) No.3
1. Drain the transfer oil..
2. Remove the front drive shaft (RH)..
3. Remove the transfer oil seal (RH) No.1..
4. Remove the oil seals using a tape-wrapped flathead screwdriver.
5. Using the SST
and a hammer, tap the new seal into place.
6. Apply the lip of the oil seal with transfer oil.
7. Install the transfer oil seal (RH) No.1..
8. Install the front drive shaft (RH)..
9. Add the specified amount and type of oil..
 Transfer Oil Replacement [Fw6 Ax EL]
1. Remove the front under cover No.2..
2. Remove the drain plug with the washer.
3. Drain the oil into a suitable container.
4. Tighten the drain plug with a new washer.
Tightening ...
 Transfer Removal/Installation [Fw6 Ax EL]
CAUTION:
Performing the following procedures without first removing the front ABS
wheel-speed sensor may possibly cause an open circuit in the harness if it is
pulled by mistake. Before ...
Other materials:
Oil Pan Removal/Installation
WARNING:
Hot engines and engine oil can cause severe burns. Turn off the engine and
wait until it and the engine oil have cooled.
A vehicle that is lifted but not securely supported on safety stands is dangerous.
It can slip or fall, causing death or serious injury. Never work ...
Oil Control Valve (OCV) [Skyactiv G 2.0]
Purpose, Function
The OCV switches the oil passage to the hydraulic variable valve timing actuator
to control the opening/closing period of the exhaust valve.
Construction
The OCV is installed to the exhaust camshaft cap (No.1).
The OCV consists of a spool valve wh ...
Blind Spot Monitoring (Bsm) Off Indicator Light
Purpose
The BSM OFF indicator light informs the driver that the Blind Spot Monitoring
(BSM) system is turned off or there is a malfunction in the system.
Function
The instrument cluster illuminates the BSM OFF indicator light based on the
BSM system off signal sent via a CA ...
