Mazda CX-5 Service & Repair Manual: Floor Side Panel Removal [Panel Replacement]
Symbol Mark

Removal Procedure
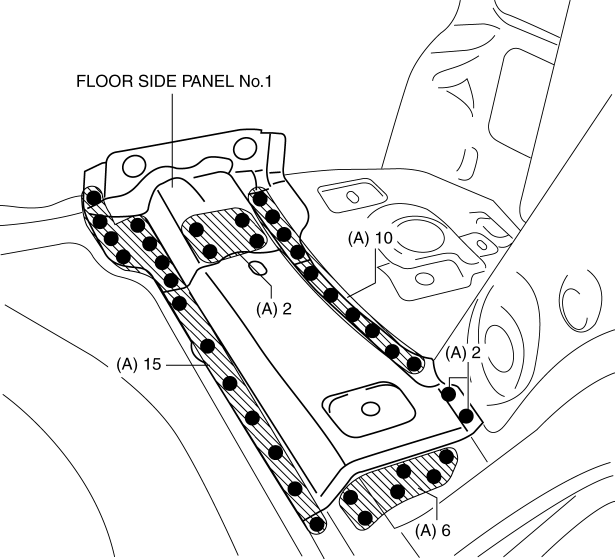
1. Drill the 35 locations indicated by (A) shown in the figure, then remove the floor side panel No.1.
2. Drill the 5 locations indicated by (B) shown in the figure.
3. Drill the 4 locations indicated by (C) from rear wheel housing shown in the figure.
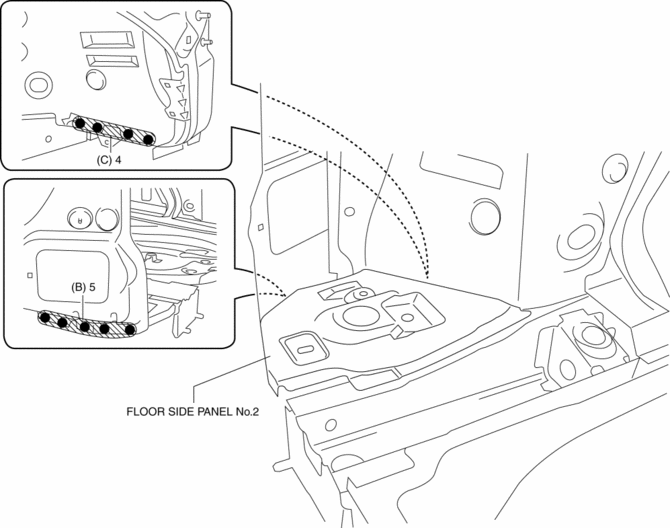
4. Remove the floor side panel No.2.
 Floor Side Panel Installation [Panel Replacement]
Symbol Mark
Installation Procedure
1. When installing new parts, measure and adjust the body as necessary to conform
with standard dimensions.
2. Drill holes for the plug welding before inst ...
 Floor Under Cover Removal/Installation
1. Lift up the vehicle.
2. Remove bolts A.
3. Remove fasteners B.
4. Remove the floor under cover No.1.
5. Remove nuts C.
6. Remove fasteners D.
7. Remove bolts E.
8. Remove the ...
Other materials:
Shift And Select Mechanism [C66 M R]
Purpose, Function
The shift and select mechanism moves the shift fork to change gears according
to the operation of the shift lever in the cabin.
Construction
Shift control module
The moving parts of the shift control module are vertically positioned..
In th ...
Room Straight Line Dimensions (3) [Dimensions]
Point symbol
Designation
Hole diameter or bolt or nut size mm {in}
A
Rear seat installation hole
?14 {0.55}
B
D-pillar trim installation hole
?8.6 {0.34}
...
Fuel Pressure Sensor
Purpose/Function
Detects the fuel pressure in the fuel distributor as basic information for
mainly determining the fuel injection amount.
Detects the fuel pressure in the fuel distributor and inputs it to the PCM
as a fuel pressure signal.
Construction
Installed on ...
