Mazda CX-5 Service & Repair Manual: Rear Door Speaker Removal/Installation
Without Bose®
NOTE:
-
If the procedure is performed while holding the front door speaker cone, it could deform the cone causing a malfunction. Therefore, perform the procedure while holding any part other than the cone.
1. Disconnect the negative battery cable..
2. Remove the rear door trim..
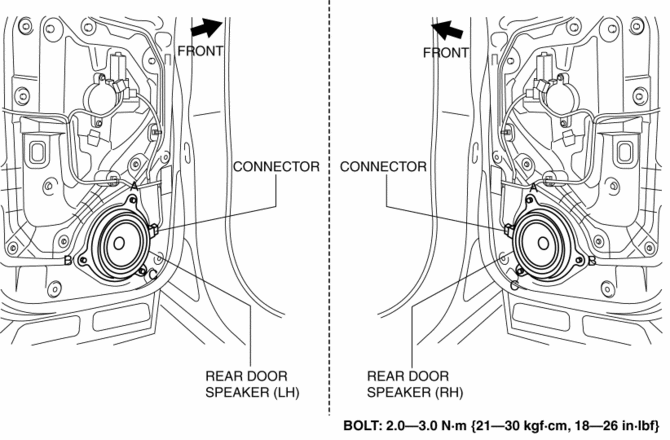
3. Disconnect the connector.
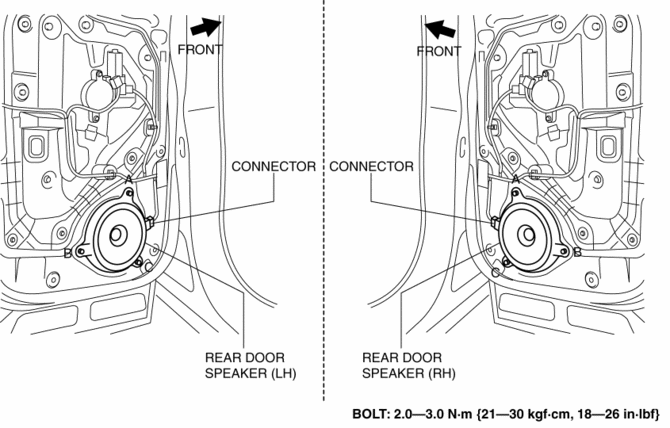
4. Remove the bolts in alphabetical order.
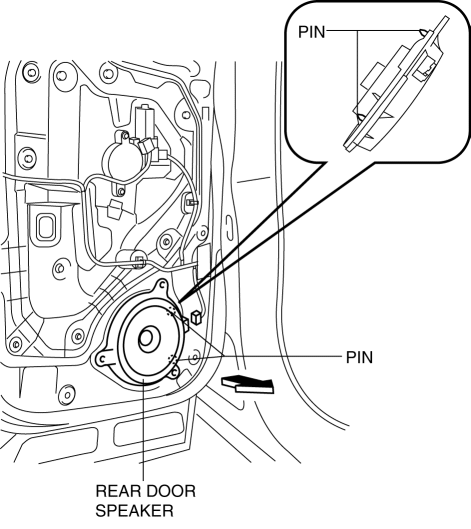
5. Pull the rear door speaker in the direction of the arrow shown in the figure and remove it while detaching the pins.
6. Install in the reverse order of removal.
With Bose®
1. Disconnect the negative battery cable..
2. Remove the rear door trim..
3. Disconnect the connector.
4. Remove the bolts in alphabetical order.
5. Pull the rear door speaker in the direction of the arrow shown in the figure and remove it while detaching the pins.

6. Install in the reverse order of removal.
 Rear Door Speaker Inspection
1. Disconnect the negative battery cable..
2. Remove the rear door trim..
3. Disconnect the rear door speaker connector..
4. Verify that the resistance between the rear door speaker terminals is ...
 Rear Mount Camera
Purpose, Function
The rear mount camera shoots the conditions at the rear of the vehicle in
color, and after converting the video signal, it outputs the signal to the audio
unit. (with co ...
Other materials:
Non Return Valve Inspection
WARNING:
Fuel is very flammable liquid. If fuel spills or leaks from the pressurized
fuel system, it will cause serious injury or death and facility breakage. Fuel
can also irritate skin and eyes. To prevent this, always complete the “Fuel
Line Safety Procedure”, while referring ...
Condenser Inspection
1. Inspect the condenser for cracks, damage, and oil leakage.
If there is any malfunction, replace the condenser.
2. Visually inspect for bent fins for clogging of foreign material.
If any fins are clogged, remove the foreign material.
3. Visually inspect for bent fins.
...
Low Engine Coolant Temperature Indicator Light (Blue)/High Engine Coolant Temperature
Warning Light (Red)
Purpose
Low engine coolant temperature indicator light (blue)
The low engine coolant temperature indicator light (blue) notifies the driver
that the engine coolant temperature is low and vaporization of the fuel is difficult.
High engine coolant temperature warning light (red)
...
