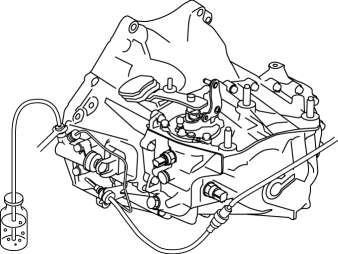
Mazda CX-5 Service & Repair Manual: Clutch Fluid Replacement/Air Bleeding [C66 M R]
CAUTION:
-
Do not allow clutch fluid to get on a painted surface. Clutch fluid contains properties which can dissolve the paint. If clutch fluid gets on a painted surface, wash it off with water immediately and wipe the area off completely.
-
Do not mix different types of clutch fluid, otherwise the clutch may not operate normally.
-
Do not reuse old clutch fluid, otherwise the clutch may not operate normally.
NOTE:
-
A common reserve tank is used for the clutch system and brake system.
1. Remove the front under cover No.2..
2. Remove the reserve tank cap.
3. Drain the clutch fluid from bleeder screw.
4. Add new clutch fluid to the MAX mark of the reserve tank.
-
Clutch fluid
-
SAE J1703 or FMVSS116 DOT-3
5. Bleed the air from the clutch system.
CAUTION:
-
Keep the clutch fluid level in the reserve tank at 3/4 full or more during air bleeding.
a. Connect a vinyl tube to the bleeder screw.
b. Place the other end of the vinyl tube in a clear container, and fill clutch fluid in the container during air bleeding.
c. Working with two people, one loosens the bleeder screw.
d. The other person depresses the clutch pedal to full stroke taking approx. 3 s or more, and then holding the pedal depressed.
e. After waiting approx. 5 s or more, tighten the bleeder screw.
f. Return the clutch pedal slowly taking 3 s or more while suppressing the spring force.
g. Wait approx. 5 s or more.
h. Continue to perform air bleeding (Steps (3) - (7)) until no air comes from the vinyl tube.
i. Fill the reserve tank to MAX mark with the clutch fluid.
-
Clutch fluid
-
SAE J1703 or FMVSS116 DOT-3
6. Install the reserve tank cap.
7. Install the front under cover No.2..
 Clutch Fluid Leakage Inspection [C66 M R]
CAUTION:
Do not allow clutch fluid to get on a painted surface. Clutch fluid contains
properties which can dissolve the paint. If clutch fluid gets on a painted surface,
wash it off with ...
 Clutch Master Cylinder Removal/Installation [C66 M R]
CAUTION:
Secure the steering wheel using tape or a cable to prevent the steering shaft
from rotating after disconnecting the steering shaft. If the steering wheel
rotates after the steer ...
Other materials:
Presilencer
Purpose, Function
Reduces the exhaust noise.
Construction
The presilencer is installed to the rear of the TWC.
2WD
AWD
The presilencer consists of the filters, stuffing and wool-stainless.
2WD
AWD
...
Tires
For reasons of proper performance, safety, and better fuel economy, always maintain
recommended tire inflation pressures and stay within the recommended load limits
and weight distribution.
WARNING
Using Different Tire Types:
Driving your vehicle with different types of tires is dangerous. It ...
Air Bag Module And Pre Tensioner Seat Belt Disposal Procedures [Two Step Deployment
Control System]
WARNING:
A live (undeployed) air bag module, pre-tensioner seat belt or lap pre-tensioner
seat belt may accidentally operate (deploy) when it is disposed of and cause
serious injury. Always refer to the “AIR BAG MODULE AND PRE-TENSIONER SEAT BELT
DEPLOYMENT PROCEDURES” and dispo ...
