Mazda CX-5 Service & Repair Manual: Non Return Valve Inspection
WARNING:
-
Fuel is very flammable liquid. If fuel spills or leaks from the pressurized fuel system, it will cause serious injury or death and facility breakage. Fuel can also irritate skin and eyes. To prevent this, always complete the “Fuel Line Safety Procedure”, while referring to the “BEFORE SERVICE PRECAUTION”.
-
A person charged with static electricity could cause a fire or explosion, resulting in death or serious injury. Before draining fuel, make sure to discharge static electricity by touching the vehicle body.
1. Complete the “BEFORE SERVICE PRECAUTION”..
2. Disconnect the negative battery cable..
3. Using the following procedure:
-
6:4 split type
-
Remove the rear seat cushion..
-
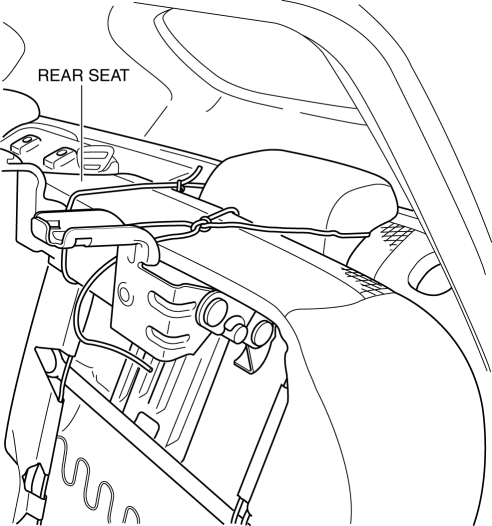
4:2:4 split type
-
Set the rear seat aside as shown in the figure..

4. Remove the fuel pump unit..
5. Drain the fuel from the fuel tank to the position where the non-return valve is visible..
NOTE:
-
Non-return valve is integrated in the fuel tank.
-
The non-return valve is normally closed by the spring force.
6. Verify that the non-return valve is closed.
-
If the non-return valve is stuck open and does not open even when pulled up by a finger, replace the fuel tank..
 Miller Cycle Engine
Outline
The Miller cycle engine is a high-efficiency engine which achieves high fuel
economy performance by obtaining a high-expansion ratio.
The Miller cycle engine achieves a high- ...
 Non Return Valve
Purpose, Function
Assures safety by preventing fuel from returning to the fuel filler opening.
Construction
The non-return valve cannot be removed as it is installed inside the fue ...
Other materials:
Front Map Light
Purpose
The front map lights shine light at the front of the vehicle interior.
Function
The front map lights illuminate when the map light switch is turned on.
Illuminates according to the lock condition of the driver's door and open/close
conditions of the doors u ...
Floor Side Panel Removal [Panel Replacement]
Symbol Mark
Removal Procedure
1. Drill the 35 locations indicated by (A) shown in the figure, then remove the
floor side panel No.1.
2. Drill the 5 locations indicated by (B) shown in the figure.
3. Drill the 4 locations indicated by (C) from rear wheel housing shown in the
figure. ...
Electric Variable Valve Timing Control
Outline
The PCM determines the optimum intake valve timing according to the engine
operation conditions, and sends the motor drive signals to the electric variable
valve timing driver. With the adoption of the electric drive system, variable
intake valve timing can be controlled with ...
