Mazda CX-5 Service & Repair Manual: Rear Differential Disassembly
WARNING:
-
The engine stand is equipped with a self-lock mechanism, however, if the rear differential is in a tilted condition, the self-lock mechanism could become inoperative. If the rear differential unexpectedly rotates it could cause injury, therefore do not maintain the rear differential in a tilted condition. When turning the rear differential, grasp the rotation handle firmly.
1. Disassemble in the order indicated in the table.

|
1 |
Differential oil temperature sensor |
|
2 |
Rear cover (See Rear Cover Disassembly Note.) |
|
3 |
Rear differential component (See Rear Differential Component Disassembly Note.) |
|
4 |
Side bearing outer race |
|
5 |
Adjusting shim |
|
6 |
Spacer |
|
7 |
Oil seal (Coupling component) |
|
8 |
Locknut (See Locknut Disassembly Note.) |
|
9 |
Drive pinion (See Drive Pinion Disassembly Note.) |
|
10 |
Collapsible spacer |
|
11 |
Bearing inner race (front bearing) |
|
12 |
Bearing inner race (rear bearing) (See Bearing Inner Race (Rear Bearing) Disassembly Note.) |
|
13 |
Spacer |
|
14 |
Bearing outer race (See Bearing Outer Race Disassembly Note.) |
|
15 |
Differential carrier |
|
16 |
Ring gear (See Ring Gear Disassembly Note.) |
|
17 |
Pin |
|
18 |
Pinion shaft |
|
19 |
Pinion gear |
|
20 |
Side gear |
|
21 |
Thrust washer |
|
22 |
Side bearing inner race (See Side Bearing Inner Race Disassembly Note.) |
|
23 |
Gear case |
|
24 |
Oil seal (side gear) |
Rear Cover Disassembly Note
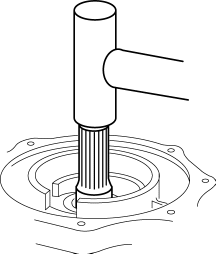
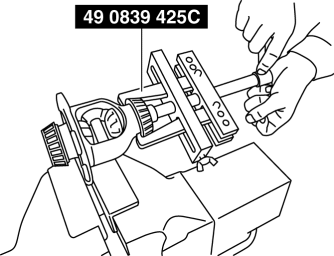
1. Install the SSTs
to the engine stand.
2. Install the rear differential to the SSTs
.
3. Remove the rear cover.
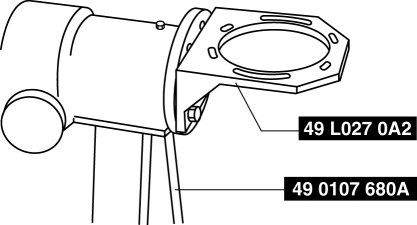
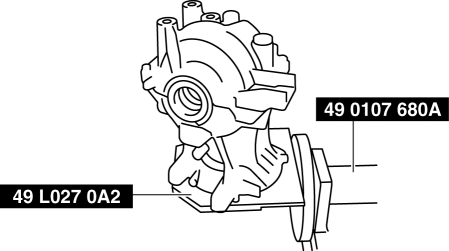
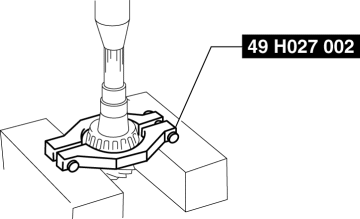
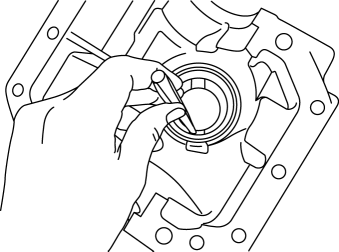
Rear Differential Component Disassembly Note
1. If the rear differential component cannot be removed by hand, remove the rear differential component using the SSTs
.
2. Mark or otherwise distinguish between the removed left and right adjusting shims, spacers and side bearing outer races so that they are not mixed up at the time of reassembly.
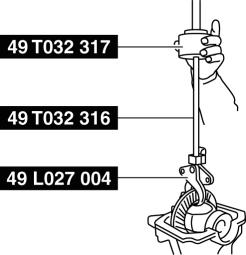
Locknut Disassembly Note
1. Remove the locknut using the SSTs
.
Drive Pinion Disassembly Note
1. Remove the drive pinion by lightly tapping with a copper hammer.
Bearing Inner Race (Rear Bearing) Disassembly Note
1. Remove the bearing inner races (rear bearing) using the SST
and a press.
Bearing Outer Race Disassembly Note
1. Remove the bearing outer races using the 2 grooves in the carrier and alternately tapping the sides of the races with a brass bar.
Ring Gear Disassembly Note
1. Secure the gear case in a vice and remove the bolts.
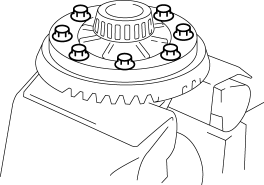
2. Lightly tap around the ring gear using a plastic hammer to remove the ring gear from the gear case.
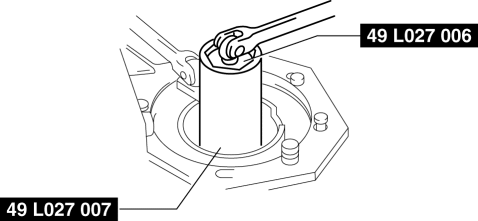
Side Bearing Inner Race Disassembly Note
NOTE:
-
Mark or otherwise distinguish between the left and right side bearings so that they are not mixed up at the time of reassembly.
1. Remove the side bearing inner races from the gear case using the SST.
 Rear Differential Assembly
WARNING:
The engine stand is equipped with a self-lock mechanism, however, if the
rear differential is in a tilted condition, the self-lock mechanism could become
inoperative. If the rea ...
 Rear Differential Removal/Installation
WARNING:
When replacing the coupling component, read the special character string
before installing a new coupling component and write it to the AWD control module
after replacement. The ...
Other materials:
Mirror Base Removal
1. Disconnect the negative battery cable..
2. Remove the rearview mirror. (without auto-dimming mirror).
3. Remove the auto-dimming mirror. (with auto-dimming mirror).
4. Wind each end of a wire around a bar.
WARNING:
Using the piano wire with bare hands can cause injury. Always ...
Warm Up Three Way Catalytic Converter (Wu Twc) Inspection
CAUTION:
Perform the following procedures, DTC P0421:00 is indicated only.
1. Connect the M-MDS to the DLC-2.
2. Start the engine and warm it up to normal operating temperature.
3. Turn off the engine.
4. Verify that the engine compression is within the specification..
If ...
Bumper Bracket Installation [Panel Replacement]
Symbol Mark
Installation Procedure
1. When installing new parts, measure and adjust the body as necessary to conform
with standard dimensions.
2. Drill holes for the plug welding 6 locations indicated by (A) and 3 locations
indicated by (C) shown in the figure, before installing the new ...
