Mazda CX-5 Service & Repair Manual: Front Pillar Removal [Panel Replacement]
Symbol Mark

Removal Procedure
CAUTION:
-
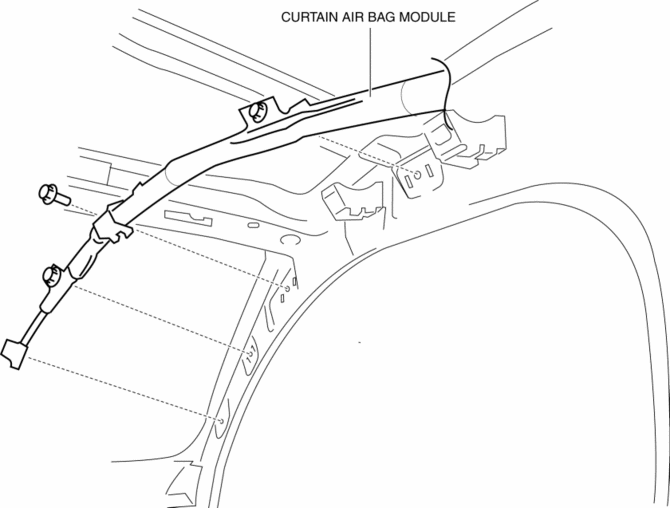
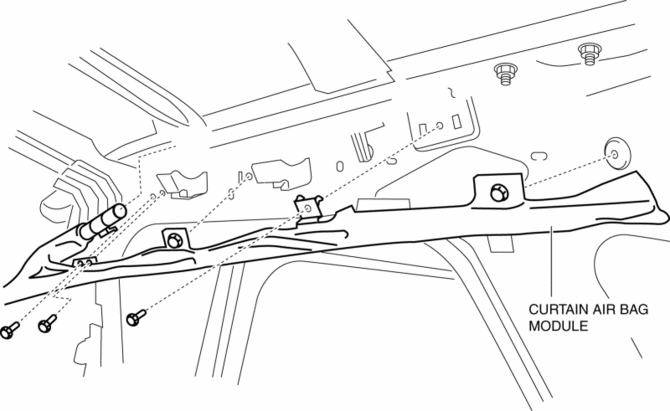
Remove the curtain air bag module to prevent damage before servicing.
Front-side
Rear-side
CAUTION:
-
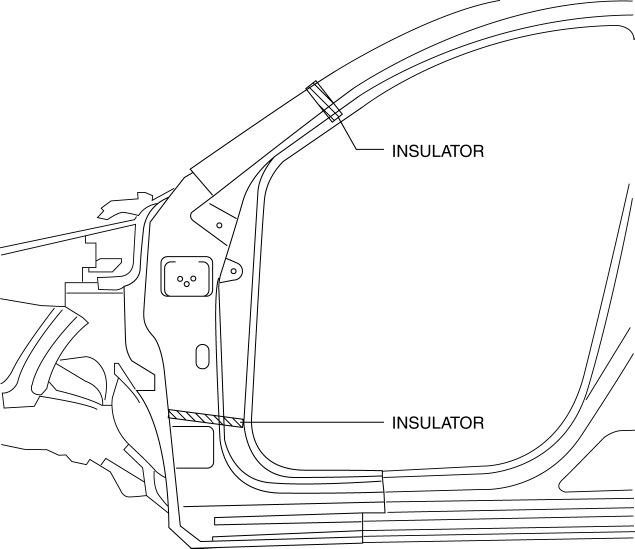
Avoid cutting with a blowtorch or similar tools as the insulator (shaded area) is flammable.
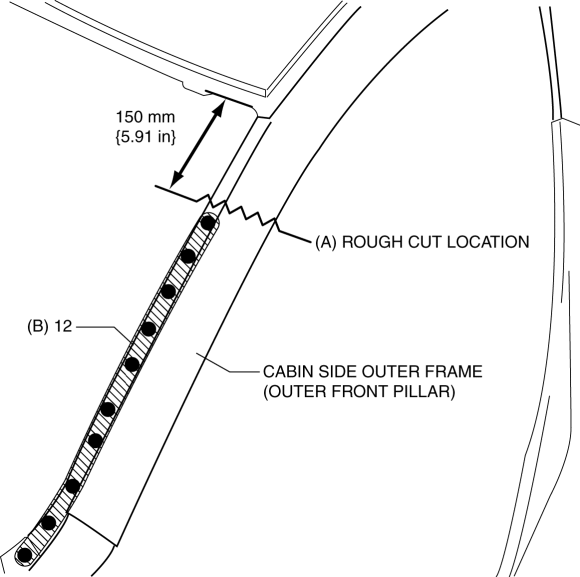
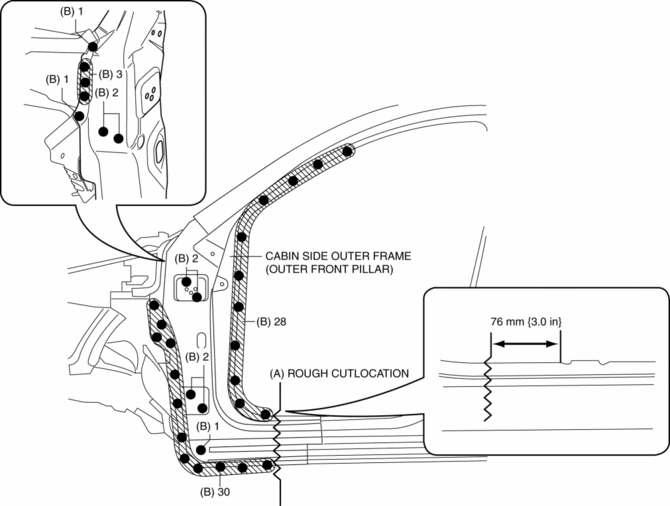
1. Rough cut the 2 locations indicated by (A) shown in the figure.
2. Drill the 82 locations indicated by (B) shown in the figure, then remove the cabin side outer frame (outer front pillar).
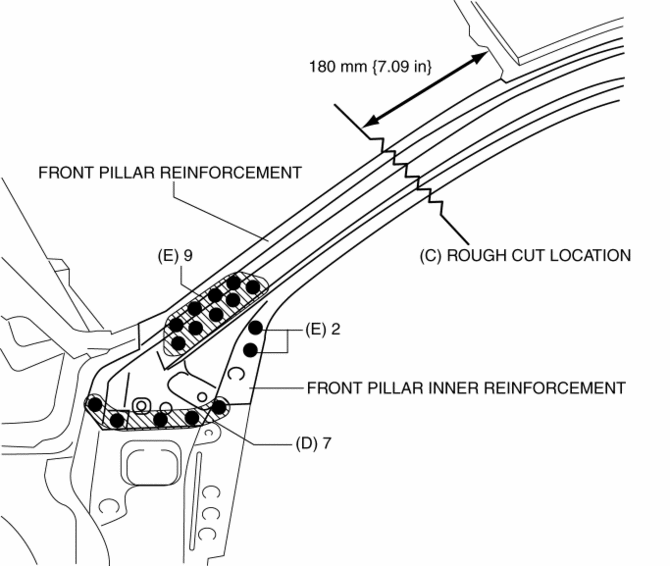
3. Rough cut area location indicated by (C) shown in the figure.
4. Drill the 7 locations indicated by (D) shown in the figure, then remove the front pillar reinforcement and front pillar inner reinforcement as a single unit.
NOTE:
-
When removing the front pillar reinforcement and the front pillar inner reinforcement separately, drill the 11 locations indicated by (E) shown in the figure.
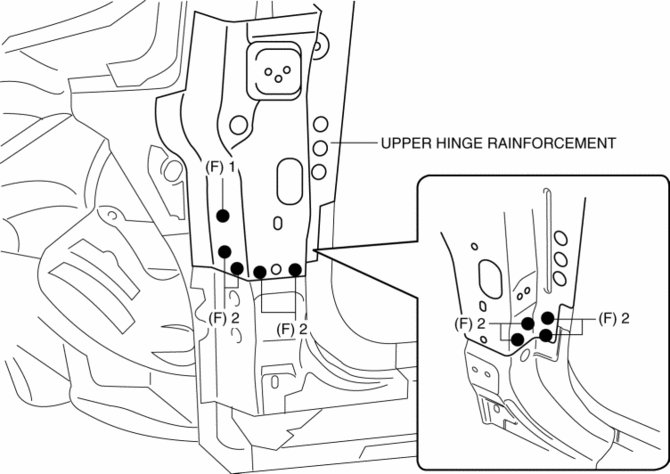
5. Drill the 9 locations indicated by (F) shown in the figure, then remove the upper hinge reinforcement.
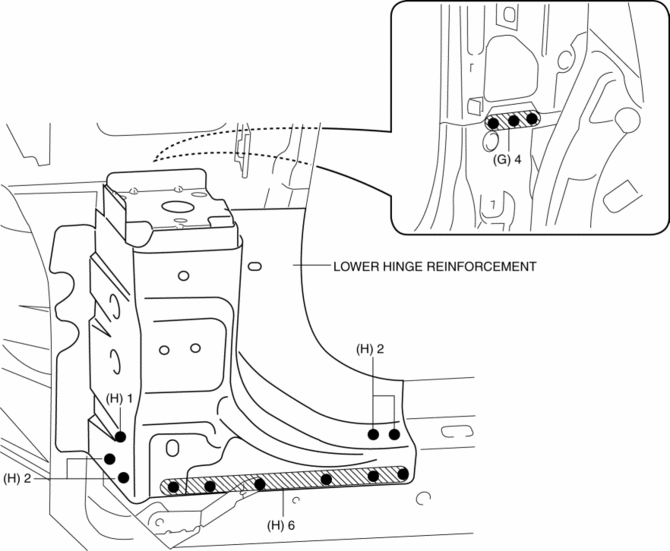
6. Drill the 4 locations indicated by (G) from the inside shown in the figure.
7. Drill the 11 locations indicated by (H) shown in the figure.
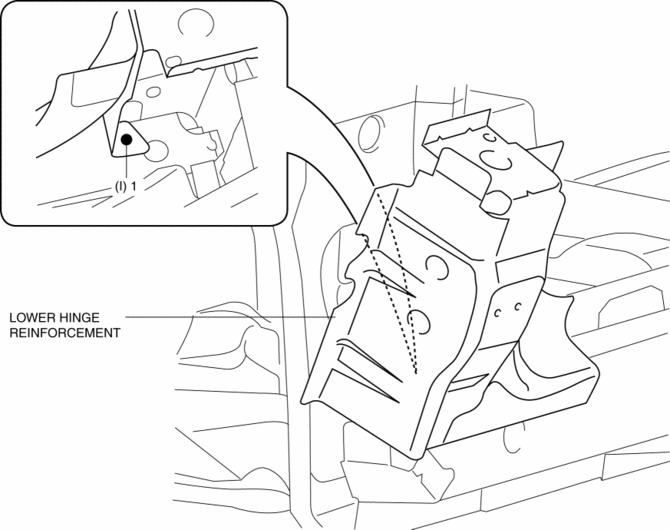
8. Drill the 1 location indicated by (I) shown in the figure, while peeling back the lower hinge reinforcement, then remove it.
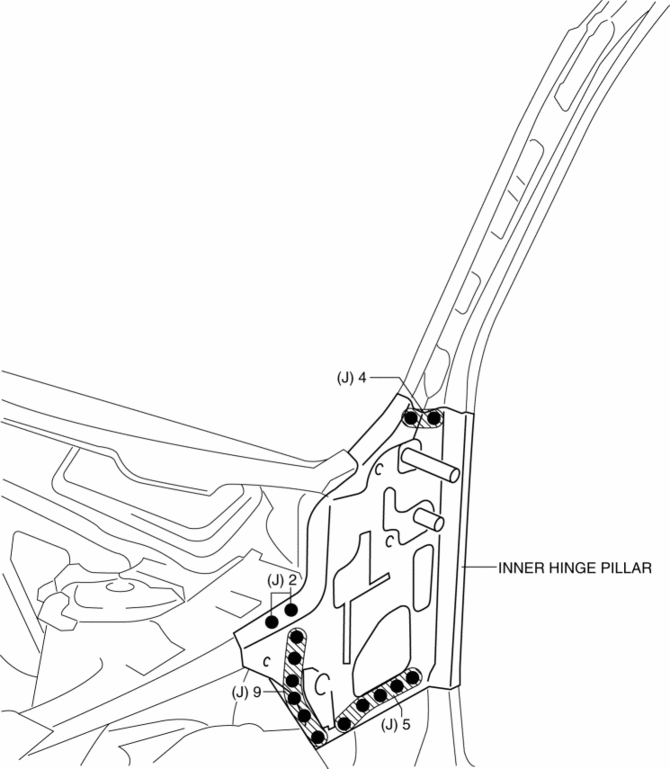
9. Drill the 20 locations indicated by (J) shown in the figure, then remove the inner hinge pillar.
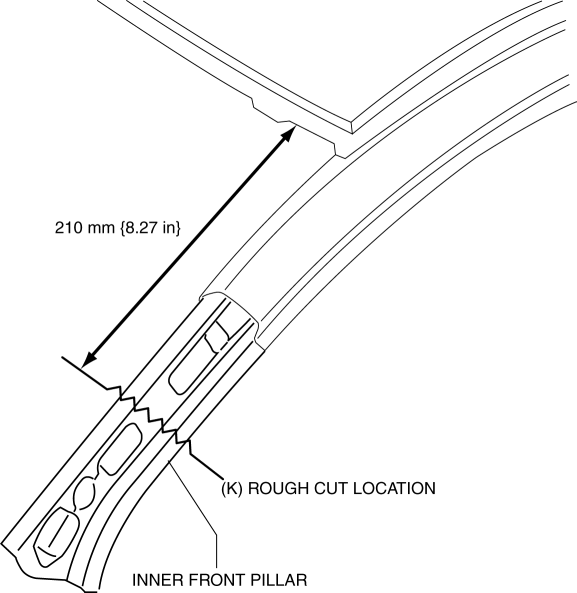
10. Rough cut the area location indicated by (K) shown in the figure.
11. Remove the inner front pillar.
 Front Pillar Installation [Panel Replacement]
Symbol Mark
Installation Procedure
1. When installing new parts, measure and adjust the body as necessary to conform
with standard dimensions.
2. Drill holes for the plug welding before inst ...
 Front Seat Cushion Frame Removal/Installation
WARNING:
Handling a side air bag improperly can accidentally operate (deploy) the
air bag, which may seriously injure you. Read the service warnings/cautions
in the Workshop Manual befor ...
Other materials:
Camshaft Position (CMP) Sensor Inspection
Intake CMP Sensor
Visual inspection
CAUTION:
When replacing the CMP sensor, make sure there is no foreign material on
it such as metal shavings. If it is installed with foreign material, the sensor
output signal will malfunction resulting from fluctuation in magnetic flux and
caus ...
Front Door Trim Disassembly/Assembly
Driver-side
1. Disassemble in the order shown in the figure.
1
Switch panel cover
2
Power window main switch
(See Power Window Main Switch, Power Window Subswitch And Lock Switch
Removal Note.)
3
Fastener
...
C Pillar Trim Removal/Installation
1. Disconnect the negative battery cable..
2. Remove the following parts:
a. Trunk board.
b. Trunk end trim.
c. Rear scuff plate.
d. Trunk side trim.
e. D-pillar trim.
3. Partially peel back the seaming welt.
4. Remove the fastener A.
5. Take the shaded area shown in the figure ...
