Mazda CX-5 Service & Repair Manual: Front Pillar Installation [Panel Replacement]
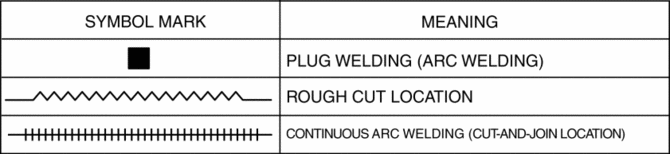
Symbol Mark
Installation Procedure
1. When installing new parts, measure and adjust the body as necessary to conform with standard dimensions.
2. Drill holes for the plug welding before installing the new parts.
3. After temporarily installing new parts, make sure the related parts fit properly.
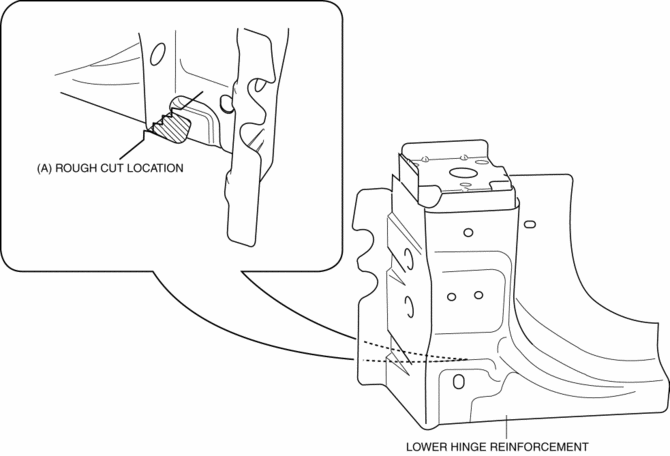
4. Rough cut the area location indicated by (A) shown in the figure.
CAUTION:
-
When the part with the rough cut side sill reinforcement, there is a possibility that vibration may occur. After the rough cut, temporarily attach the lower hinge reinforcement and check that the rough cut area does not interfere with the side sill reinforcement.
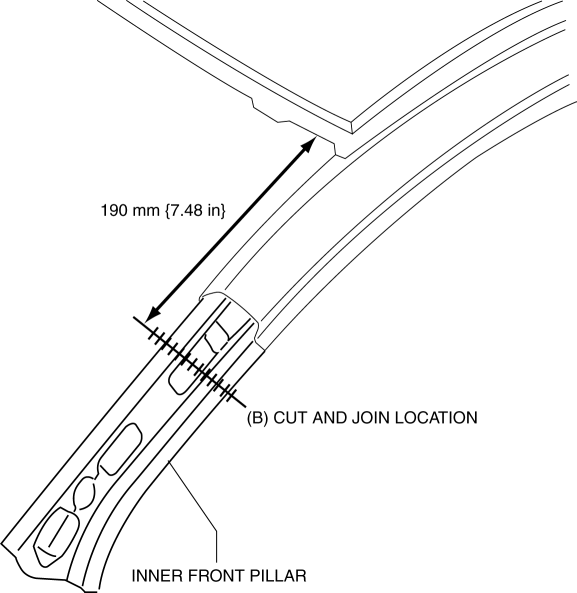
5. Cut and join the area location indicated by (B) shown in the figure, then install the inner front pillar.
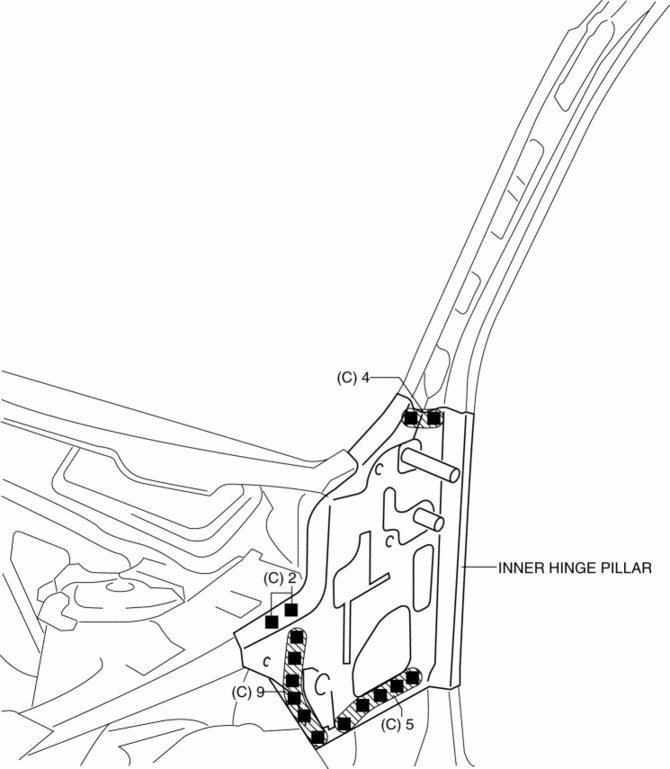
6. Plug weld the 20 locations indicated by (C) shown in the figure, then install the inner hinge pillar.
7. Plug weld the 4 locations indicated by (D) from the inside shown in the figure.
8. Plug weld the 11 locations indicated by (E) shown in the figure, then install the lower hinge reinforcement.
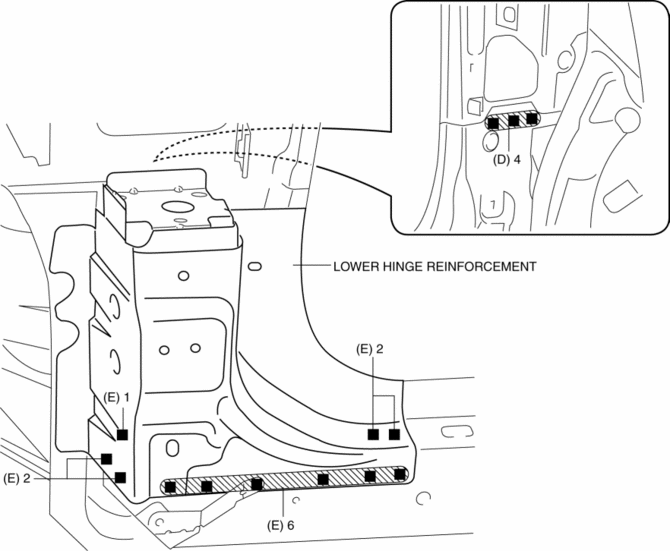
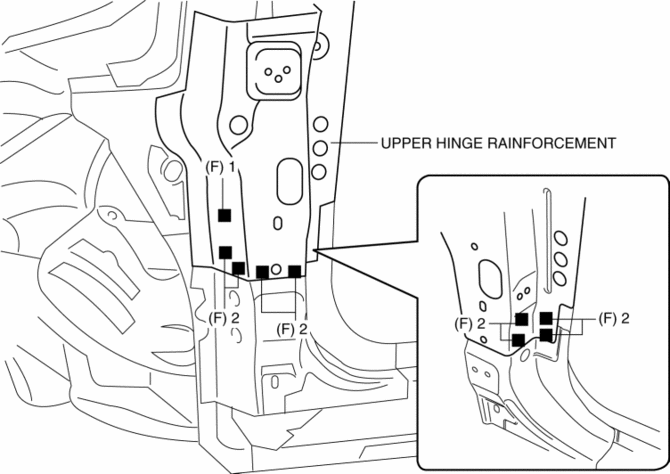
9. Plug weld the 9 locations indicated by (F) shown in the figure, then install the upper hinge reinforcement.
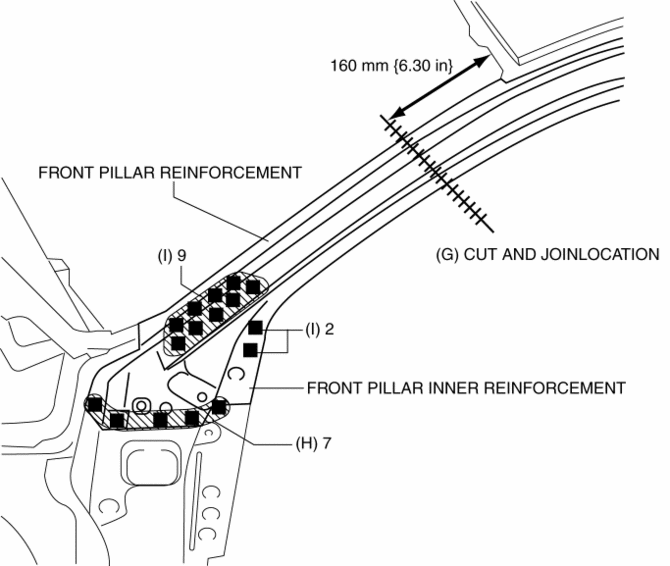
10. Cut and join the area location indicated by (G) shown in the figure.
11. Plug weld the 7 locations indicated by (H) shown in the figure, then install the front pillar reinforcement and front pillar inner reinforcement as a single unit.
NOTE:
-
When installing the front pillar reinforcement and the front pillar inner reinforcement separately, plug weld the 11 locations indicated by (I) shown in the figure.
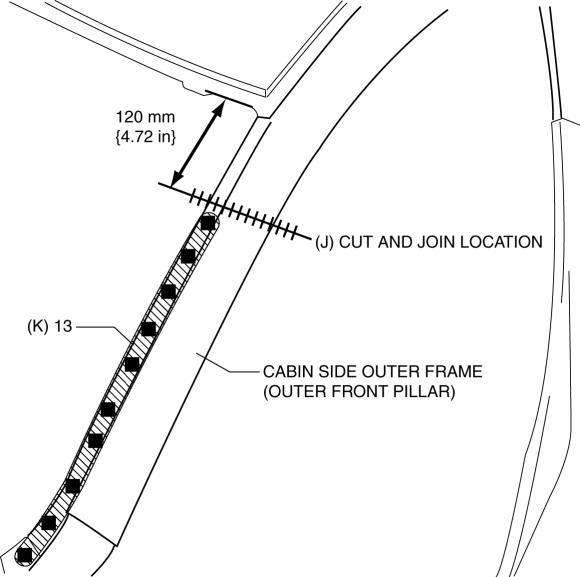
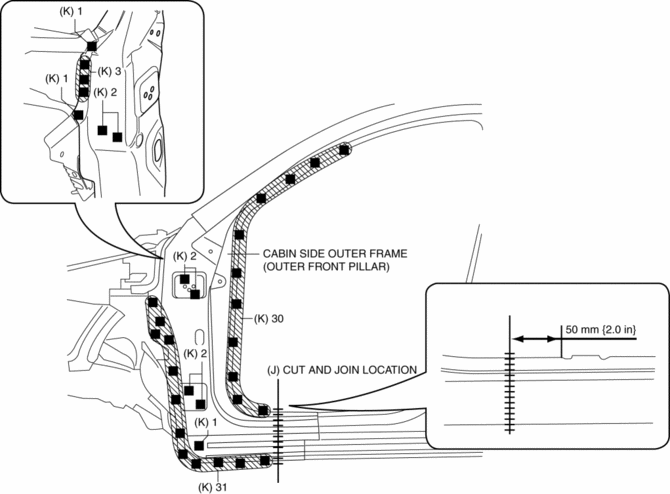
12. Cut and join the 2 locations indicated by (J) shown in the figure.
13. Plug weld the 86 locations indicated by (K) shown in the figure, then install the cabin side outer frame (outer front pillar outer).
 Front Frame (Rear) Removal [Panel Replacement]
Symbol Mark
Removal Procedure
1. Drill the 33 locations shown in the figure.
NOTE:
When drilling, do not drill a hole all the way through or there could be
a problem when installing ...
 Front Pillar Removal [Panel Replacement]
Symbol Mark
Removal Procedure
CAUTION:
Remove the curtain air bag module to prevent damage before servicing.
Front-side
Rear-side
CAUTION:
Avoid cutting with a bl ...
Other materials:
Rear Fender Panel Removal [Panel Replacement]
Symbol Mark
Removal Procedure
CAUTION:
Avoid cutting with a blowtorch or similar tools as the insulator (shaded
area) is flammable.
1. Rough cut the 3 locations indicated by (A) shown in the figure.
2. Drill the 90 locations indicated by (B) shown in the figure.
...
Drive Belt [Skyactiv G 2.0]
Purpose, Function
The drive belt transmits rotation force of the crankshaft pulley to the pulley
for the auxiliary parts.
Construction
The drive belt is installed to the front of the engine.
A V-ribbed belt has been adopted for the drive belt.
The wat ...
Oil Filter Replacement
WARNING:
Hot engines and engine oil can cause severe burns. Turn off the engine and
wait until it and the engine oil have cooled.
A vehicle that is lifted but not securely supported on safety stands is dangerous.
It can slip or fall, causing death or serious injury. Never work ...
