Mazda CX-5 Service & Repair Manual: Intake Air Temperature (Iat) Sensor
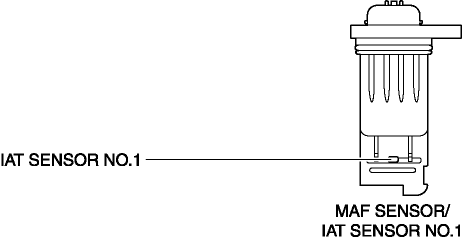
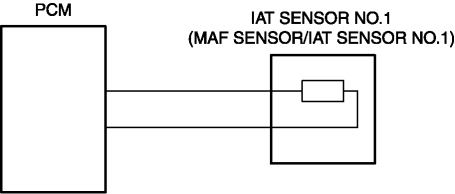
IAT Sensor No.1
Purpose/Function
-
Detects the IAT before it passes through the throttle body as basic information for mainly determining the fuel injection amount.
-
Detects the IAT before it passes through the throttle body and inputs it to the PCM as an IAT signal.
Construction
-
Built into the MAF sensor.
-
A cold resistor has been adopted as the detecting element for detecting the IAT.
Operation
-
Inputs the signal, which fluctuates according to the IAT after passing through the air cleaner, to the PCM.
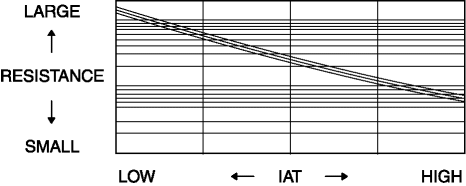
IAT sensor No.1 characteristic
Fail-safe
|
DTC No. |
Fail-safe function |
|
P0112:00 |
|
|
P0113:00 |
|
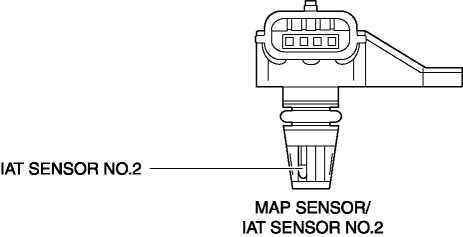
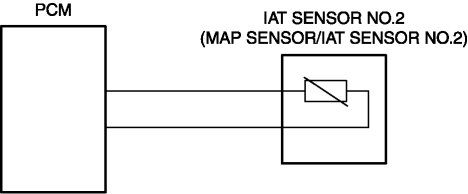
IAT Sensor No.2
Purpose/Function
-
Detects the IAT (in intake manifold) after it passes through the throttle body as basic information for mainly determining the fuel injection amount.
-
Detects the IAT (in intake manifold) after it passes through the throttle body and inputs it to the PCM as an intake air temperature signal.
Construction
-
Built into the MAP sensor.
-
A cold resistor has been adopted as the detecting element for detecting the IAT.
Operation
-
Inputs the signal, which fluctuates according to the IAT in the intake manifold, to the PCM.
IAT sensor No.2 characteristic

Fail-safe
-
Function not equipped.
 Intake Air Temperature (Iat) Sensor Inspection
IAT Sensor No.1
Resistance inspection
NOTE:
Because the IAT sensor No.1 is integrated in the MAF sensor, replacing the
IAT sensor No.1 includes replacement of the MAF sensor/IAT sensor No ...
 Intake Manifold Vacuum Inspection
1. Disconnect the evaporative hose No.3 (purge solenoid valve side) and install
the vacuum gauge..
2. Verify that the intake air hoses are installed securely.
3. Warm up the engine.
4. Measure ...
Other materials:
Side Air Bag Sensor [Standard Deployment Control System]
Purpose
The side air bag sensor detects an impact during a lateral collision.
Function
The side air bag sensor converts the detected impact to an electrical signal.
Construction
The side air bag sensor is built into the crash sensor.
Two side air bag sensors ...
Headlight High Beam Indicator Light
Purpose
Notifies the user that the headlights (HI) are illuminated.
Function
Illuminates when the headlight (HI) or parking illumination conditions are
met.
Construction
Displayed in the instrument cluster.
Operation
1. When the light switch is operat ...
Steering Gear And Linkage Assembly
CAUTION:
To prevent damage to the steering gear, secure it to the vise using a copper
plate or clean cloth.
1. Assemble in the order shown in the figure.
1
Steering gear
2
Mounting rubber
(See Mounting Rubber Assembly Not ...
