Mazda CX-5 Service & Repair Manual: Front Over Fender Removal/Installation
1. Remove fastener A.
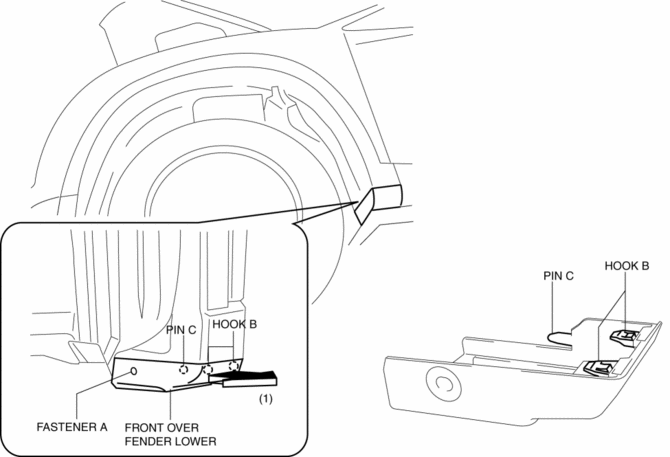
2. Pull the front over fender lower in the direction of the arrow (1) while removing hook B and pin C.
3. Remove fasteners D.
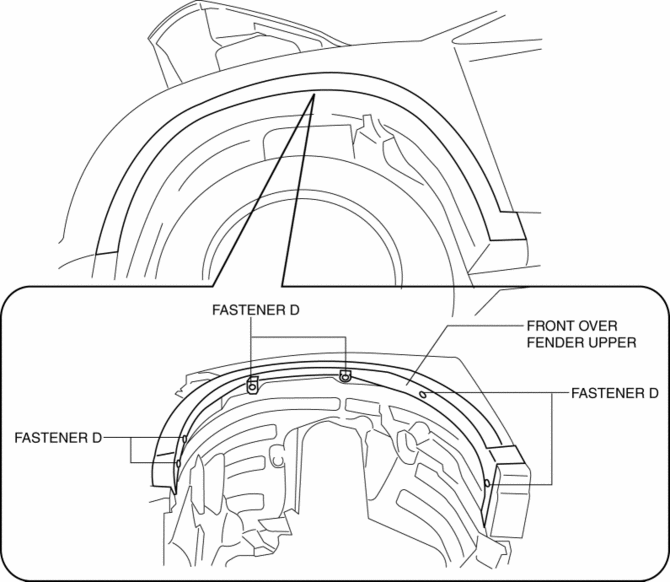
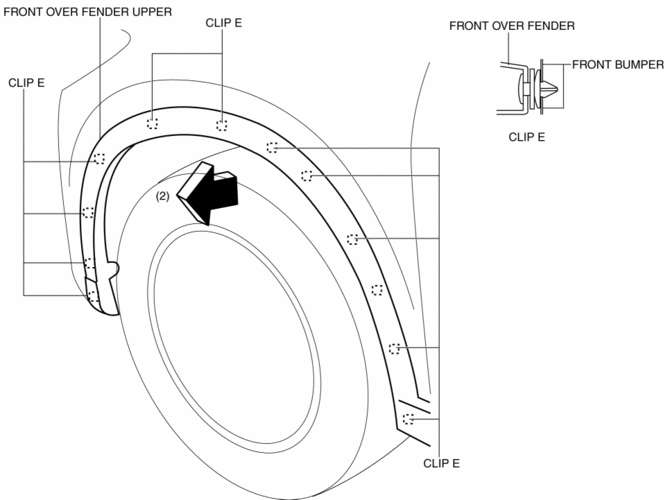
4. Pull the front over fender upper in the direction of the arrow (2) while removing clips E.
5. Install in the reverse order of removal.
 Front Fender Panel Removal/Installation
1. Disconnect the negative battery cable..
2. Remove the following parts:
a. Front bumper.
b. Front combination light.
c. Front bumper slider.
d. Front over fender.
3. Remove bolts A and f ...
 Front Under Cover No.1 Removal/Installation
1. Remove bolts A.
2. Remove screws B.
3. Remove fasteners C.
4. Remove the front under cover No.1 in the direction of the arrow in the order
of (1), (2) shown in the figure while detachin ...
Other materials:
Wiper/Washer System Personalization
A customize function has been adopted which switches the auto wiper system
between operable/inoperable.
Using Mazda Modular Diagnostic System (M-MDS)
The auto wiper function can be enabled or disabled using the Mazda Modular
Diagnostic System (M-MDS). Refer to the Workshop M ...
Heater, Ventilation And Air Conditioning
Abbreviation
AAS
Active Adaptive Shift
ABS
Antilock Brake System
ABDC
After Bottom Dead Center
ACC
Accessories
AFS
Adaptive Front Lighting System
...
Glass/Windows/Mirrors
Outline
The following glass has been adopted.
Windshield
Front door glass
Rear door glass
Rear door quarter glass
Quarter window glass
Rear window glass
Outer mirror glass
The following mirrors h ...
