Mazda CX-5 Service & Repair Manual: Engine Coolant Level Inspection
WARNING:
-
Never remove the cooling system cap or loosen the radiator drain plug while the engine is running, or when the engine and radiator are hot. Scalding engine coolant and steam may shoot out and cause serious injury. It may also damage the engine and cooling system.
-
Turn off the engine and wait until it is cool. Even then, be very careful when removing the cap. Wrap a thick cloth around it and slowly turn it counterclockwise to the first stop. Step back while the pressure escapes.
-
When you are sure all the pressure is gone, press down on the cap using the cloth, turn it, and remove it.
NOTE:
-
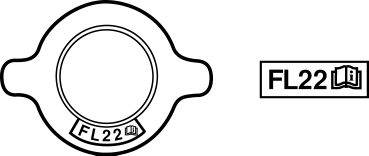
If the “FL22” mark is shown on or near the cooling system cap, use Mazda Genuine FL22 engine coolant.
-
FL22 type engine coolant is shipped as a diluted solution. Use the solution as is when replacing coolant.
1. Remove the cooling system cap.
2. Verify that the engine coolant is filled close to the top of the radiator filler neck.
-
If the engine coolant level is low, add engine coolant.
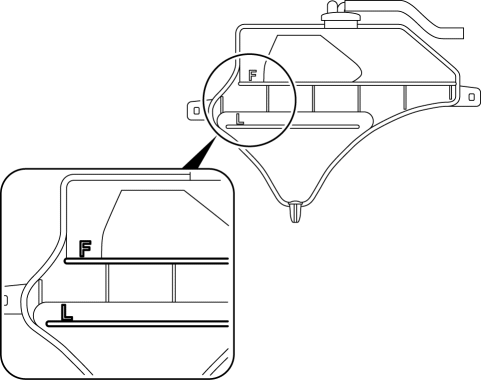
3. Verify that the engine coolant level in the coolant reserve tank is between the F and L marks.
-
If the engine coolant level is below the L mark, add engine coolant.
 Engine Coolant Leakage Inspection
WARNING:
Never remove the cooling system cap or loosen the radiator drain plug while
the engine is running, or when the engine and radiator are hot. Scalding engine
coolant and steam may ...
 Engine Coolant Protection Inspection
1. Measure the engine coolant temperature and specific gravity using a thermometer
and a hydrometer.
CAUTION:
Use engine coolant at a concentration that meets the environmental conditions ...
Other materials:
Glass Antenna
Purpose, Function
The RDS (Radio Data System) converts radio broadcast waves to electric signals
and sends the signals to the audio unit.
Construction
An antenna with excellent noise resistance has been adopted to the rear window
glass.
Fail-safe
Function n ...
High Clutch [Fw6 A EL, Fw6 Ax EL]
Purpose/Function
The high clutch operates in 4GR, 5GR, and 6GR and intermittently operates
the rear carrier by drive force from the turbine shaft.
For the high clutch, a centrifugal balance clutch has been adopted to prevent
clutch drag and to assure stabilized piston thrust in ...
Power Outer Mirror Switch Inspection
1. Disconnect the negative battery cable..
2. Remove the power outer mirror switch..
3. Verify that the continuity between the power outer mirror switch terminals
is as indicated in the table.
If not as indicated in the table, replace the power outer mirror switch..
...
