Mazda CX-5 Service & Repair Manual: D Pillar Reinforcement (Lower) Removal [Panel Replacement]
Symbol Mark

Removal Procedure
1. Drill the 8 locations shown in the figure.
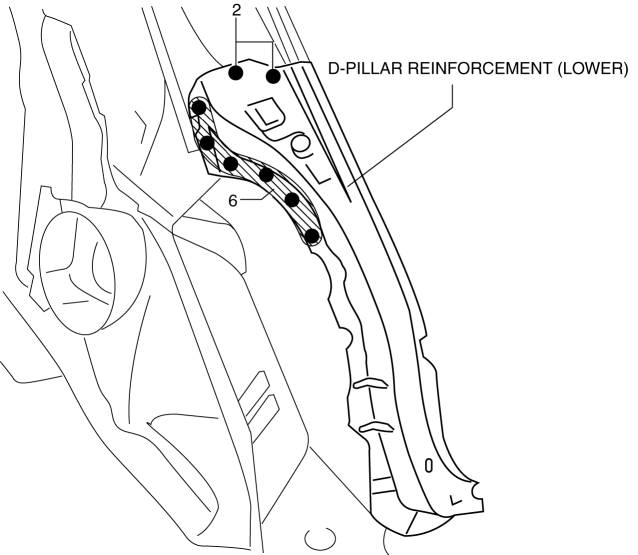
2. Remove the D-pillar reinforcement (lower).
 D Pillar Reinforcement (Lower) Installation [Panel Replacement]
Symbol Mark
Installation Procedure
1. When installing new parts, measure and adjust the body as necessary to conform
with standard dimensions.
2. Drill holes for the plug welding before inst ...
 Efficient Installation Of Body Panels
Checking Preweld Measurements And Watching
Align to the standard reference dimensions, based upon the body dimensions
illustration, so that new parts are installed in the correct position.
...
Other materials:
Headlight High Beam Indicator Light
Purpose
Notifies the user that the headlights (HI) are illuminated.
Function
Illuminates when the headlight (HI) or parking illumination conditions are
met.
Construction
Displayed in the instrument cluster.
Operation
1. When the light switch is operat ...
Cooling Fan Motor Inspection
Part Inspection
1. Verify that the battery is fully charged..
2. Disconnect the cooling fan motor connector (2 terminals).
3. Install a tester and battery to the cooling fan motor connector (2 terminals)
as shown in the figure.
4. Verify that each cooling fan motors operate smoothly at ...
Floor Covering Removal/Installation
1. Disconnect the negative battery cable..
2. Remove the following parts:
a. Front scuff plate.
b. Front side trim.
c. Rear scuff plate.
d. B-pillar lower trim.
e. Rear seat cushion.
f. Front seat.
g. Lower anchor of the front seat belt (without lap pre-tensioner seat belt).
h. La ...
