Mazda CX-5 Service & Repair Manual: Torque Box Installation [Panel Replacement]
Symbol Mark

Installation Procedure
1. When installing new parts, measure and adjust the body as necessary to conform with standard dimensions.
2. Drill holes for the plug welding before installing the new parts.
3. After temporarily installing new parts, make sure the related parts fit properly.
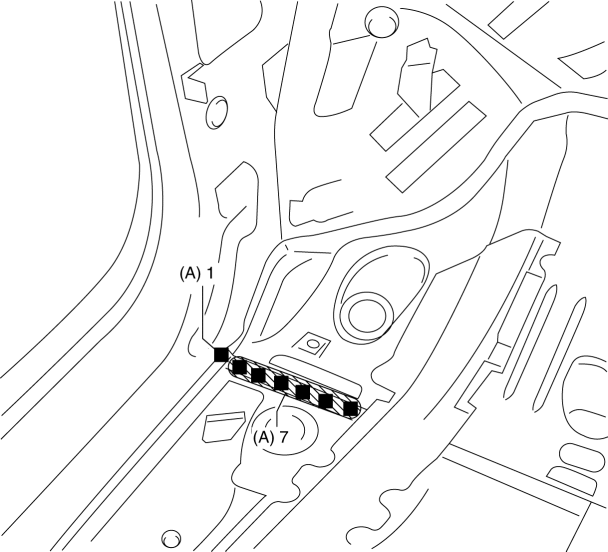
4. Plug weld the 8 locations indicated by (A) from the inside shown in the figure.
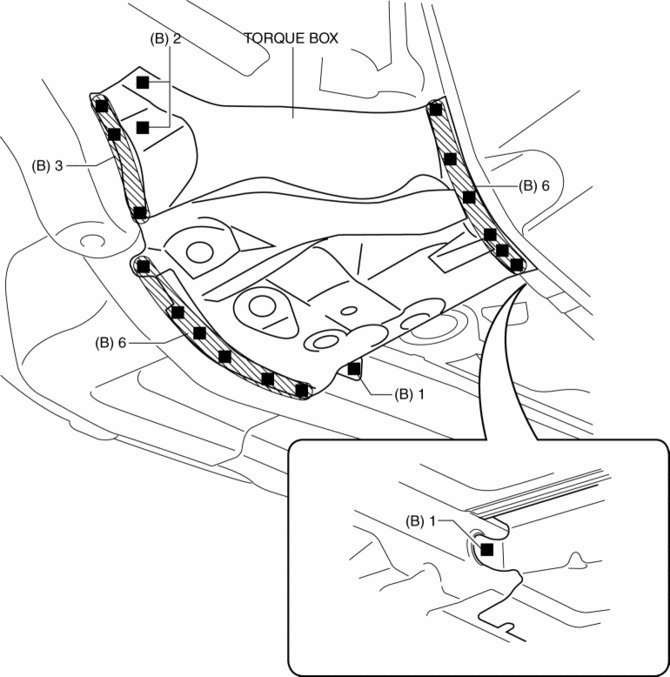
5. Plug weld the 19 locations indicated by (B) shown in the figure, then install the torque box.
 Side Member Removal [Panel Replacement]
Symbol Mark
Removal Procedure
1. Drill the 45 locations shown in the figure.
NOTE:
When drilling, do not drill a hole all the way through or there could be
a problem when installing ...
 Torque Box Removal [Panel Replacement]
Symbol Mark
Removal Procedure
1. Drill the 19 locations indicated by (A) shown in the figure.
NOTE:
When drilling the 19 locations indicated by (A) shown in the figure, do not
drill ...
Other materials:
Side Turn Light
Purpose
The side turn lights are used to signal vehicles/people at the side of the
vehicle that the vehicle is going to make a right or left turn.
Function
The side turn lights flash according to the operation of the turn or the
hazard switch.
Construction
Side ...
Rain Sensor
Outline
The rain sensor detects the amount of rainfall and calculates the wiper operation
speed, and outputs a windshield wiper control signal to the front body control
module (FBCM) to perform automatic wiper operation (auto wiper system) according
to the amount of rainfall.
...
Replace Electrical Battery
If the buttons on the transmitter are inoperable and the operation indicator
light does not flash, the battery may be dead.
Replace with a new battery before the transmitter becomes unusable.
CAUTION
● Make sure the battery is installed correctly.
Battery leakage could occur if it is no ...
