Mazda CX-5 Service & Repair Manual: Throttle Body
Purpose, Function
-
Opens/closes the throttle valve to adjust the amount of air supplied to the cylinder.
-
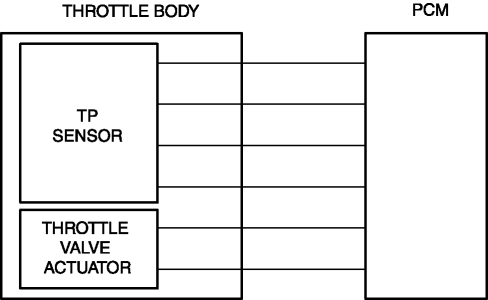
Opens/closes the throttle valve according to the control signal from the PCM.
Construction
-
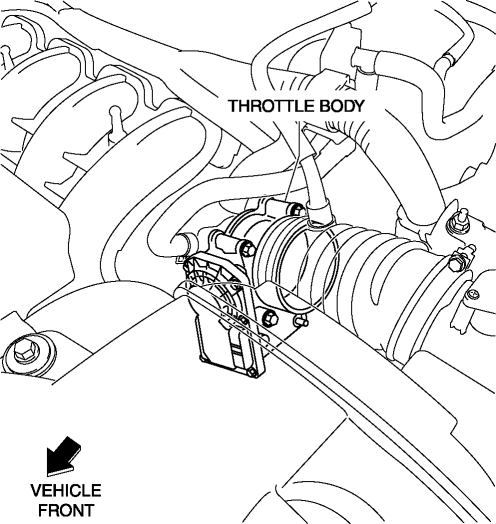
The throttle body is installed to the intake manifold.
-
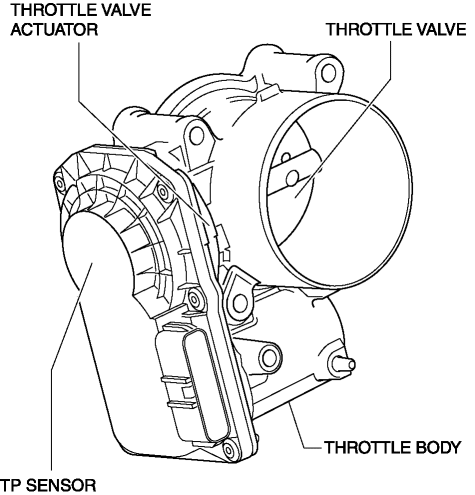
The throttle body consists of a throttle valve, throttle valve actuator, TP sensor, and return spring.
-
For the throttle position sensor, refer to CONTROL SYSTEM..
Operation
-
The throttle valve actuator opens/closes the throttle valve according to the control signal from the PCM. If there is a malfunction in the throttle valve actuator, the throttle valve is closed by the return spring in the throttle body.
-
For the drive-by-wire control, refer to CONTROL SYSTEM..
Fail-safe
|
DTC |
Fail-safe |
|
P2101:00 |
|
|
P2107:00 |
|
|
P2110:00 |
|
|
P2112:00 |
|
|
P2119:00 |
|
 Throttle Body Inspection
Resistance Inspection
1. Disconnect the negative battery cable..
2. Disconnect the throttle body connector.
3. Measure the resistance between throttle body terminals E and F.
Throttle bo ...
 Throttle Position (TP) Sensor Inspection
Voltage Inspection
CAUTION:
The inspection cannot be performed with this method correctly if there is
a malfunction of the APP sensor or throttle valve actuator. Verify that no DTCs
rel ...
Other materials:
Customer Assistance (Canada)
Satisfaction Review Process
Your complete and permanent satisfaction is of primary concern to Mazda. All
Authorized Mazda Dealers have both the knowledge and tools to keep your Mazda in
top condition. In our experience, any questions, problems, or complaints regarding
the operation of your Ma ...
Liftgate Removal/Installation
WARNING:
Removing the stay damper, liftgate hinge securing bolt, or liftgate without
supporting the liftgate may cause the liftgate to fall off and injure you. When
removing the stay damper, liftgate hinge, or liftgate, always use two persons
to perform the work.
1. Disconnect ...
Hood
WARNING
Always check that the hood is closed and securely locked:
A hood that is not closed and securely locked is dangerous as it could fly open
while the vehicle is moving and block the driver's vision which could result in
a serious accident.
Opening the Hood
1. With the vehicle parke ...
