Mazda CX-5 Service & Repair Manual: Starter Interlock Switch Removal/Installation [C66 M R]
1. Disconnect the negative battery cable..
2. Disconnect the starter interlock switch connector.
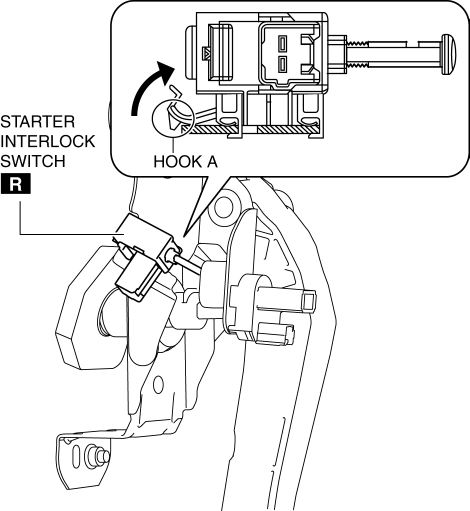
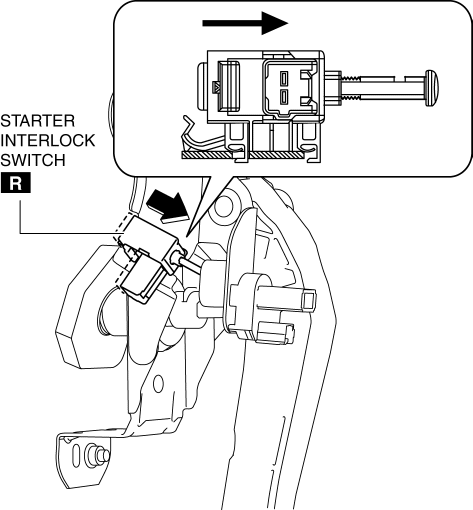
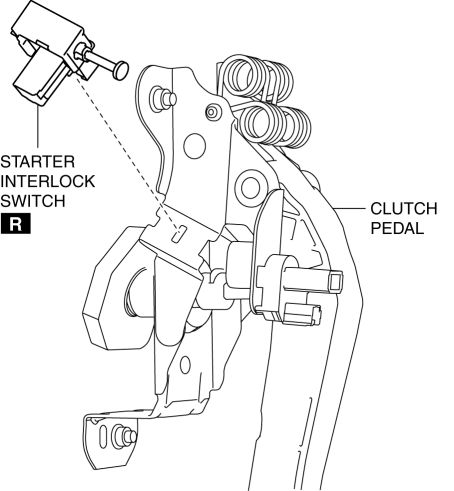
3. Remove the starter interlock using the following procedure:
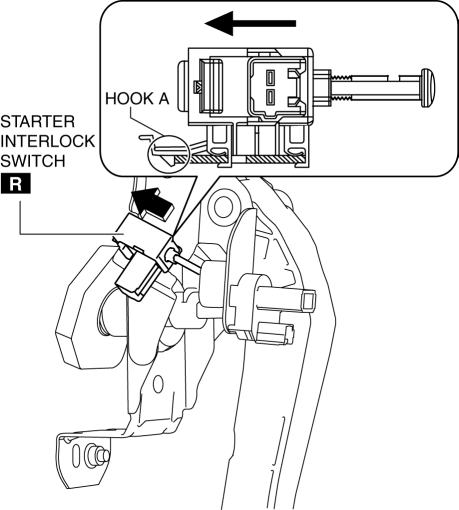
a. Detach hook A in the direction of the arrow shown in the figure.
b. Slide the starter interlock switch in the direction of the arrow shown in the figure.
c. Remove the starter interlock switch from the clutch pedal.
4. Install the starter interlock using the following procedure:
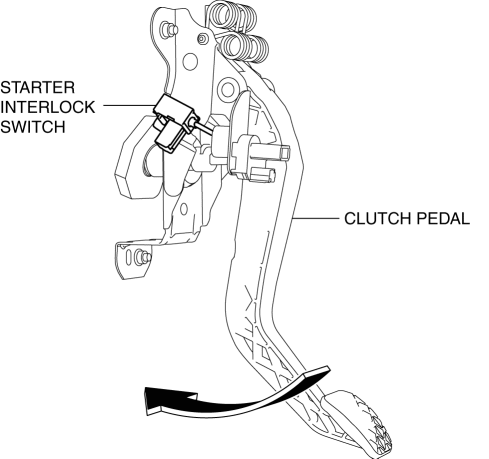
a. Insert hook B of the starter interlock switch into the clutch pedal hole.
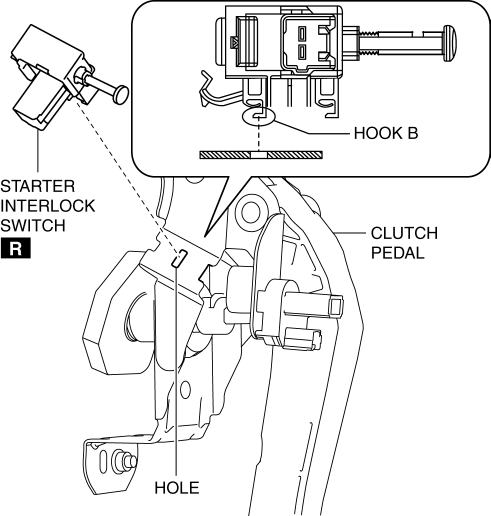
b. While pressing the starter interlock switch against the clutch pedal, slide the starter interlock switch until hook A is locked in the direction of the arrow shown in the figure.
5. Fully depress the clutch pedal in the direction of arrow, and verify that a click sound from the starter interlock switch is heard.
6. Install in the reverse order of removal.
7. Fully depress the clutch pedal, and verify that the engine starts.
 Starter Interlock Switch Inspection [Skyactiv G 2.0]
CAUTION:
Do not reuse the starter interlock switch if it is removed from the vehicle
even once. Replace with a new starter interlock switch when installing.
1. Disconnect the negative ...
 Starter Interlock Switch [Skyactiv G 2.0]
Purpose, Function
The starter interlock switch mechanism prevents vehicle surge when the engine
is started, enhancing safety. The engine cannot be started unless the clutch
is depressed.
...
Other materials:
Power Brake Unit Inspection
NOTE:
The following inspection methods are simple inspection methods to judge the
function of the power brake unit.
If there is any malfunction in the power brake unit, replace the power brake
unit as a single unit.
Without Using SST
Operation inspection
1. With the eng ...
Bluetooth®
Bluetooth® Hands-Free
When a Bluetooth® device (mobile phone) is connected to the vehicle's Hands-Free
unit via radio wave transmission, a call can be made or received by pressing the
talk button, pick-up button, hang-up button, or voice command on the steering wheel,
or by operating t ...
Controller Area Network (Can)
Outline
The AWD control module (CM) sends and receives data to and from other modules
via the CAN system. Refer to MULTIPLEX COMMUNICATION SYSTEM for a detailed explanation
of the CAN system..
Data sent
AWD system status
Data received
Engine speed
Engin ...
