Mazda CX-5 Service & Repair Manual: Liftgate Garnish Removal/Installation
1. Disconnect the negative battery cable..
2. Remove the following parts:
a. Liftgate upper trim.
b. Liftgate side trim.
c. Liftgate recess.
d. Liftgate lower trim.
3. Disconnect the connectors.
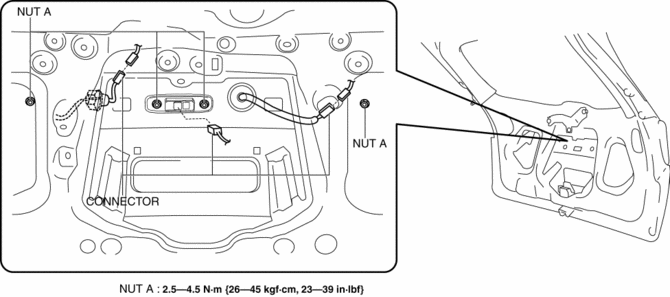
4. Remove nuts A.
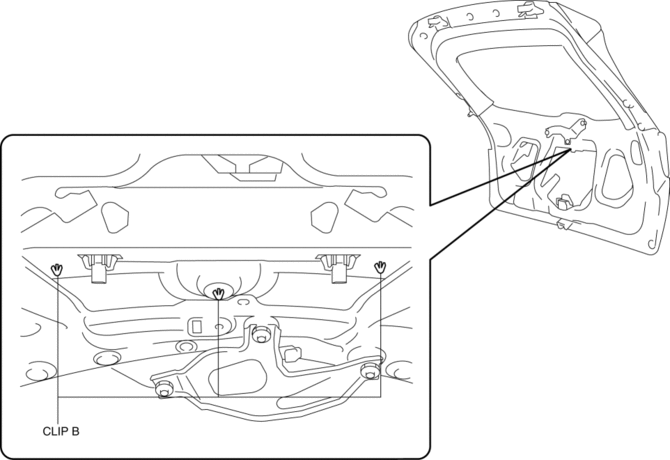
5. Detach clips B shown in the figure.
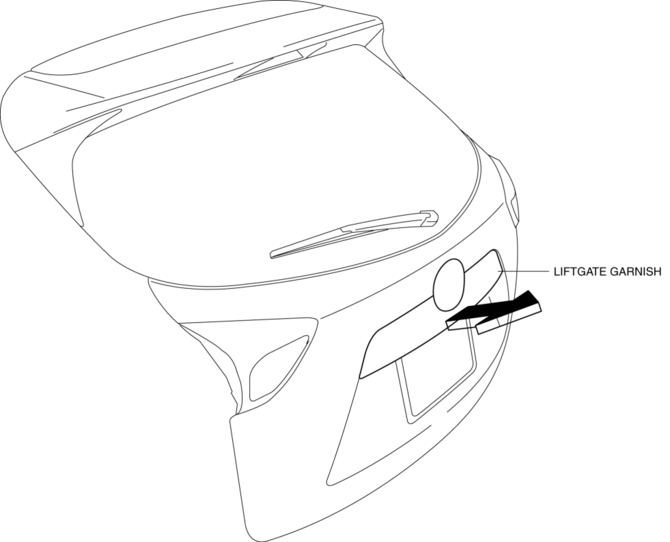
6. Remove the liftgate garnish shown in the figure.
7. Install in the reverse order of removal.
 Liftgate Adjustment
1. Measure the gap and height difference between the liftgate and the body.
2. Loosen the liftgate hinge installation bolts and adjust the liftgate.
Standard clearance
a: 5.2?7.2 mm { ...
 Liftgate Hinge Removal/Installation
1. Disconnect the negative battery cable..
2. Remove the following parts:
a. Rear scuff plate.
b. Trunk end trim.
c. Trunk side trim.
d. C-pillar trim.
e. D-pillar trim.
f. Liftgate.
3 ...
Other materials:
Front Door Hinge Removal/Installation
1. Disconnect the negative battery cable..
2. Remove the following parts:
a. Front bumper.
b. Front combination light.
c. Front bumper slider.
d. Front over fender.
e. Front fender panel.
f. Front door.
3. Remove in the order shown in the figure.
1
Bolt
...
Rear Seat Center Armrest Removal/Installation
1. Operate the push knob (RH) and lower the rear seat back (RH).
2. Remove screw A.
3. Remove the rear seat center armrest hinge cover (RH) in the direction of the
arrow (1) shown in the figure while setting hook A aside.
4. Remove bolt B.
5. Remove the rear seat center armrest in ...
Mass Air Flow (MAF) Sensor
Purpose/Function
Detects the intake airflow amount introduced into the cylinder as basic information
for mainly determining the fuel injection amount.
Detects the intake airflow amount introduced into the cylinder and inputs
it to the PCM as an intake airflow amount signal.
...
