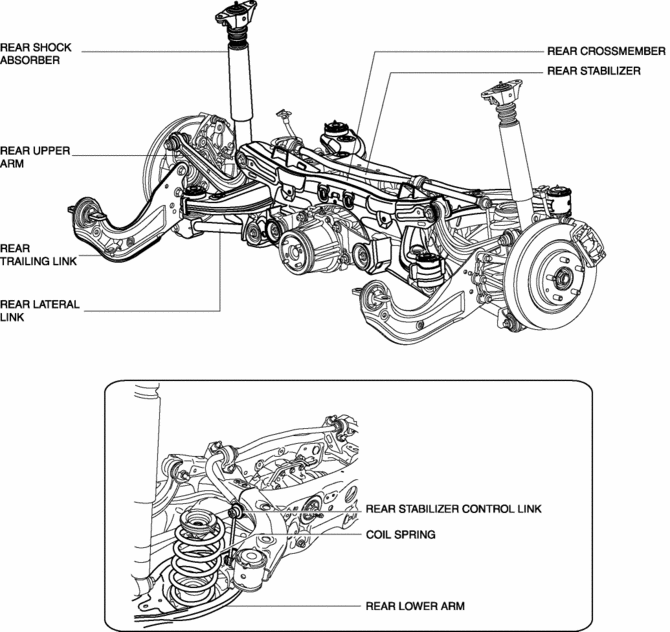
Mazda CX-5 Service & Repair Manual: Rear Suspension
Outline
-
E-type multi-link rear suspension has been adopted.
-
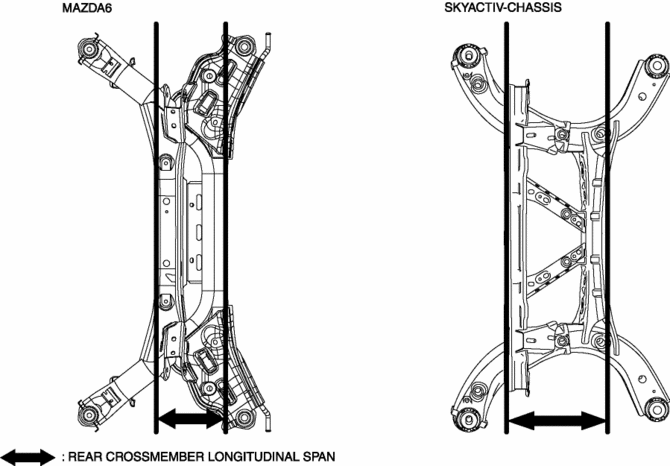
The longitudinal span of the rear crossmember was extended and the longitudinal offset of the rear lateral link attachment position was reduced.
-
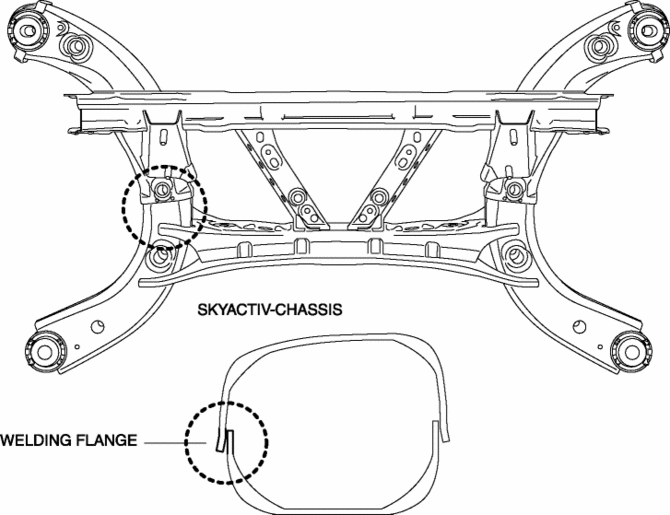
Welding flanges were removed from the rear crossmember to enhance the coupling rigidity of the welded sections and reduce the weight.
-
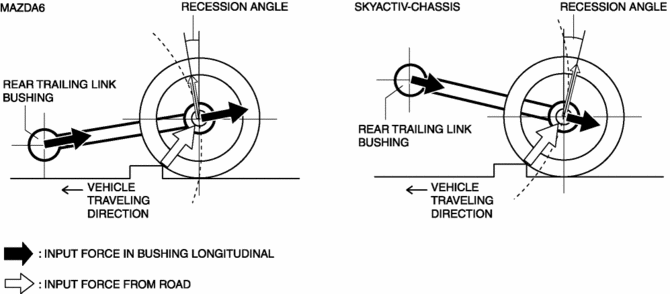
The installation position of the rear trailing link was moved upward so that the longitudinal impact from the road is more easily absorbed in the vertical movement of the rear trailing link. This reduces the longitudinal force input to the rear trailing link bush, improving the ride comfort.
STRUCTURAL VIEW
2WD
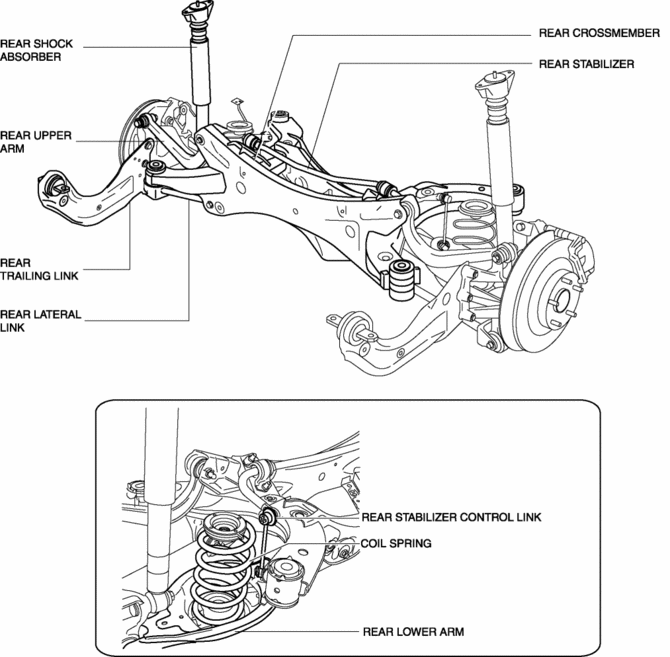
AWD
 Rear Stabilizer Removal/Installation [Awd]
WARNING:
Verify that the rear crossmember is securely supported by a jack. If the
rear crossmember falls off, it can cause serious injury or death, and damage
to the vehicle.
C ...
 Rear Upper Arm Removal/Installation [2 Wd]
WARNING:
Verify that the crossmember is securely supported by a jack. If the rear
crossmember falls off, it can cause serious injury or death, and damage to the
vehicle.
CAUTIO ...
Other materials:
Abbreviations
AAS
Active Adaptive Shift
ABS
Antilock Brake System
ABDC
After Bottom Dead Center
ACC
Accessories
AFS
Adaptive Front Lighting System
ALC
...
Wiper Bracket Removal [Panel Replacement]
Symbol Mark
Installation Procedure
1. When installing new parts, measure and adjust the body as necessary to conform
with standard dimensions.
2. Drill holes for the plug welding before installing the new parts.
3. After temporarily installing new parts, make sure the related parts fit p ...
Ambient Temperature Sensor [Full Auto Air Conditioner]
Purpose
The ambient temperature sensor detects the ambient temperature.
Function
The ambient temperature sensor converts the detected temperature to an electric
signal.
Construction
A thermistor-type ambient temperature sensor has been adopted.
The ambient ...
