Mazda CX-5 Service & Repair Manual: Rear Seat Back Frame Removal/Installation
CAUTION:
-
When performing the procedure with a rear seat removed from the vehicle, perform the procedure on a clean cloth so as not to damage or soil the seat.
6:4 Split Type
1. Remove the trunk board..
2. Remove the rear seat back..
3. Remove the headrest.
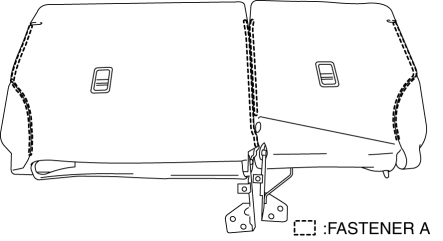
4. Open fasteners A.
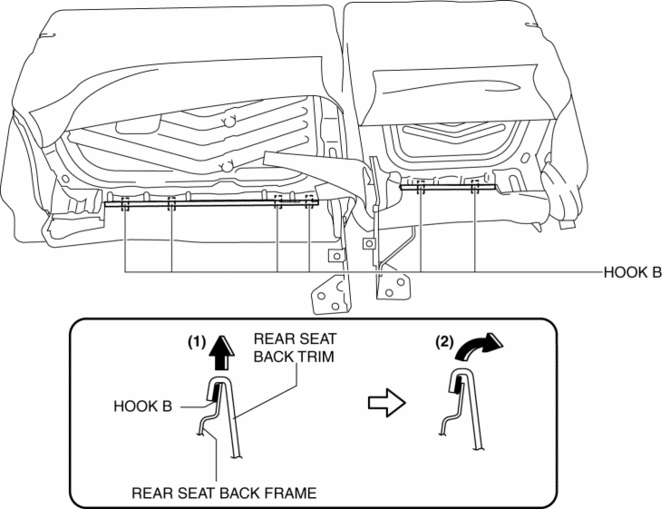
5. Slide hook B in the order of the arrows (1) and (2) shown in the figure, and set the rear seat back frames aside.
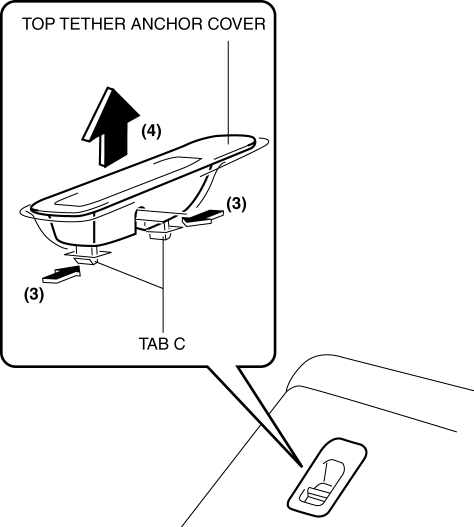
6. Release tabs C in the direction of the arrow (3) shown in the figure and remove the top tether anchor cover in the direction of the arrow (4).
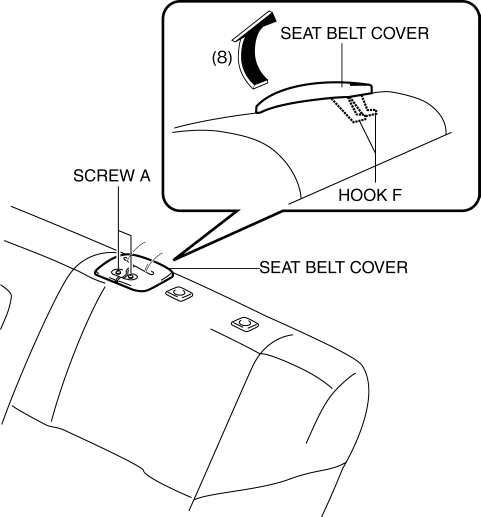
7. Remove screws A, and remove the seat belt cover in the direction of the arrow (5) shown in the figure while setting hooks D aside.

8. Remove screw B.
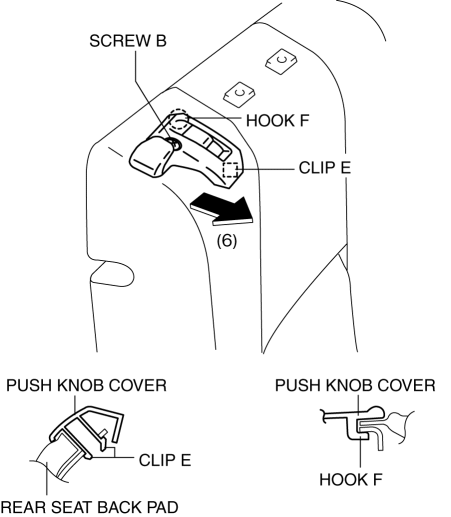
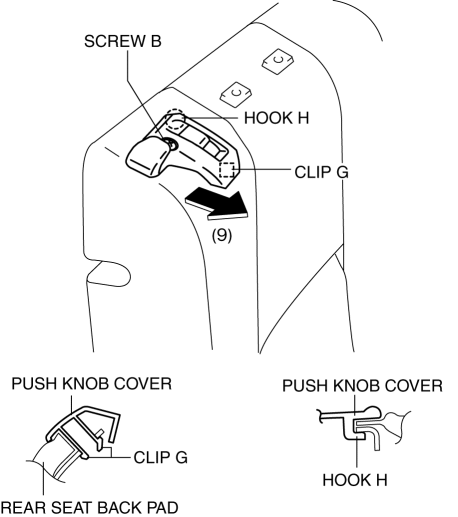
9. Remove clip E and remove the push knob cover in the direction of the arrow (6) shown in the figure while setting hook F aside.
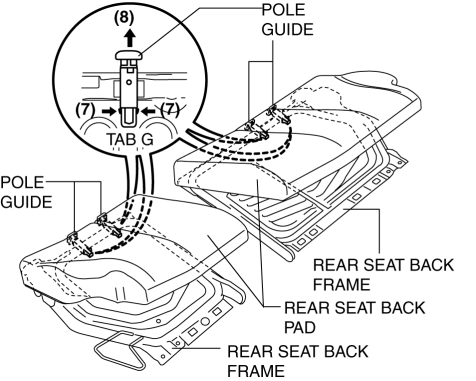
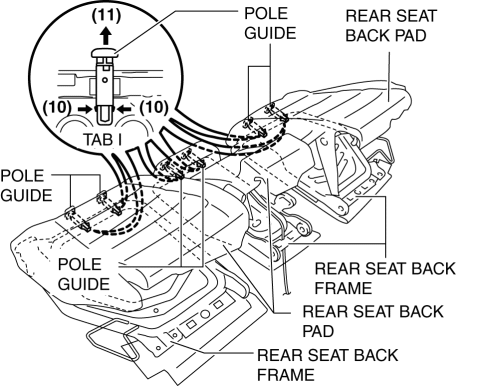
10. Peel back the rear seat back pad, and pull out the pole guide in the direction of the arrow (8) while releasing the tabs G in the direction of the arrow (7) shown in the figure.
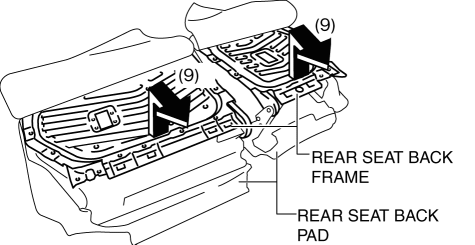
11. Pull the rear seat back frame in the direction of the arrow (9) shown in the figure, and remove it from the rear set back pad.
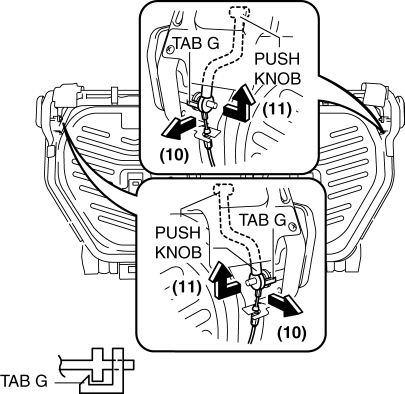
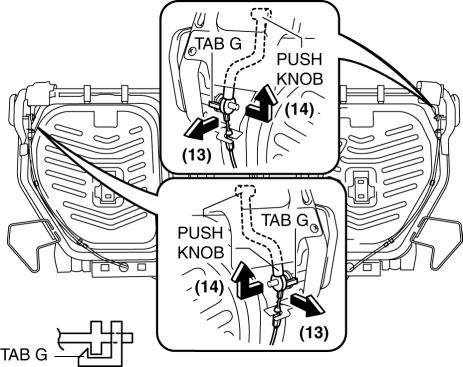
12. Remove tabs H in the direction of the arrow (10) shown in the figure and remove the push knob in the direction of the arrow (11).
13. Remove nuts, and then remove the rear center seat belt.

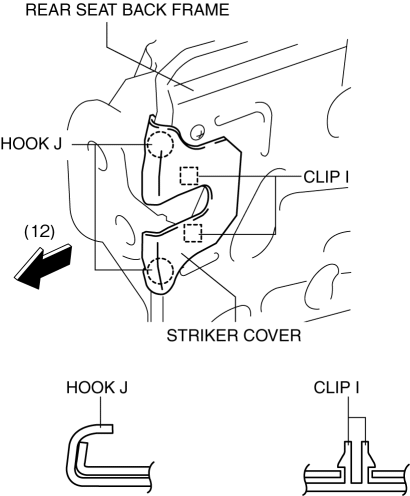
14. Remove the clips I, and then remove the striker cover in the direction of the arrow (12) while setting hooks J aside.
15. Install in the reverse order of removal.
4:2:4 Split Type
1. Remove the rear seat center armrest..
2. Remove the rear seat..
3. Remove the rear seat back..
4. Remove the headrest.
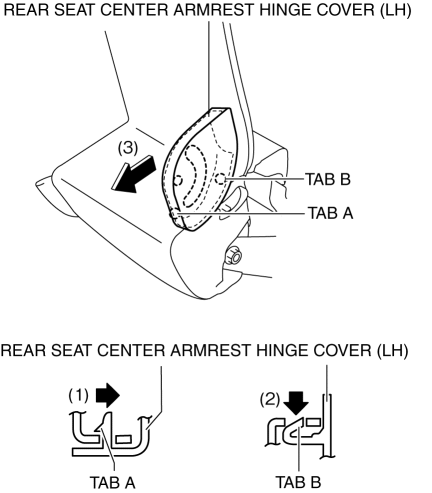
5. After releasing tab A in the direction of the arrow (1) shown in the figure, release tab B in the direction of the arrow (2) shown in the figure, and remove the rear seat center armrest hinge cover (LH) in the direction of the arrow (3).
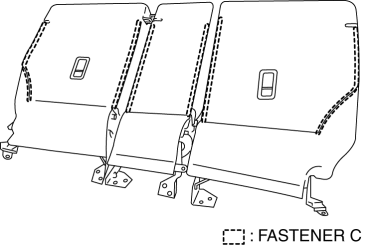
6. Open fasteners C.
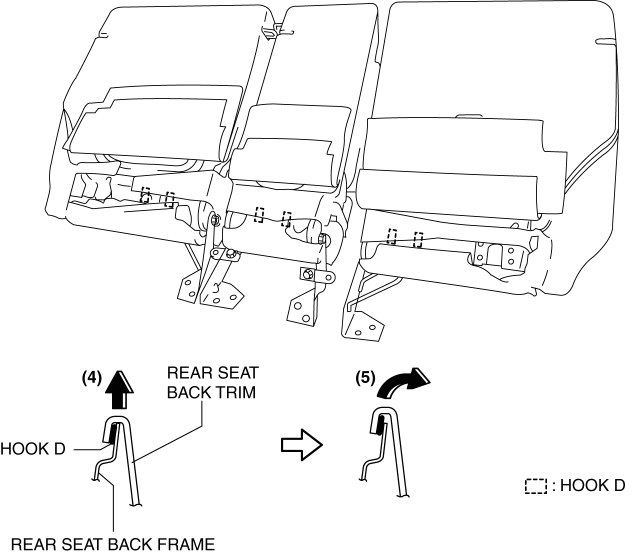
7. Slide hooks D in the order of the arrows (4) and (5) shown in the figure, and set the rear seat back frames aside.
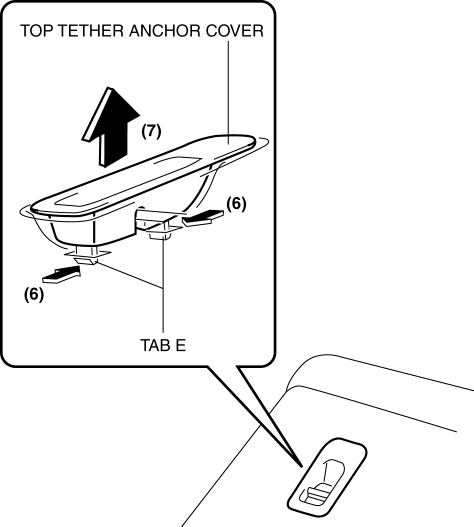
8. Release tabs E in the direction of the arrow (6) shown in the figure and remove the top tether anchor cover in the direction of the arrow (7).
9. Remove screws A, and remove the seat belt cover in the direction of the arrow (8) shown in the figure while setting hooks F aside.
10. Remove screw B.
11. Remove screw B, and clip G and remove the push knob cover in the direction of the arrow (9) shown in the figure while setting hook H aside.
12. Partially peel back the seat back pad, release tabs I in the direction of the arrow (10) shown in the figure and pull out the pole guide in the direction of the arrow (11).
13. Pull the rear seat back frame in the direction of the arrow (12) shown in the figure, and remove it from the rear set back pad.

14. Remove tabs J in the direction of the arrow (13) shown in the figure and remove the push knob in the direction of the arrow (14).
15. Remove clips K.
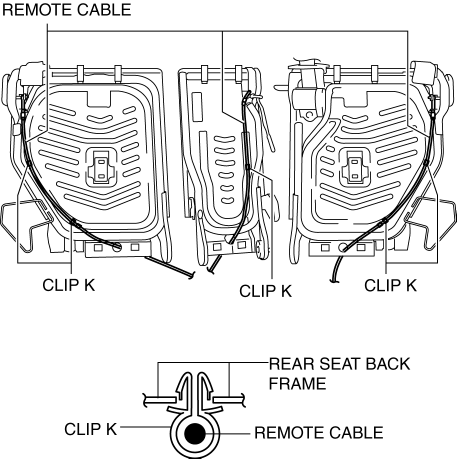
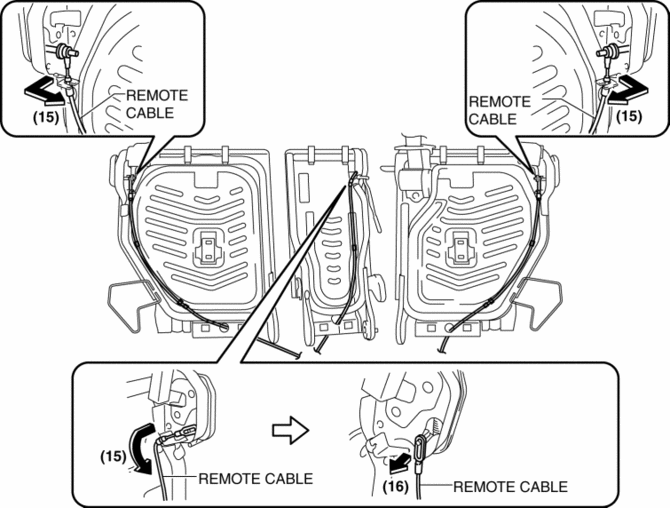
16. Remove the remote cable in the direction of the arrow (15) and (16) shown in the figure.
17. Remove screw C.
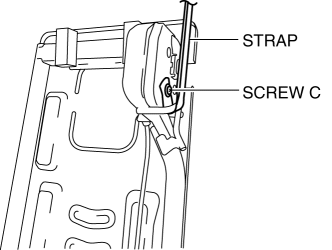
18. Remove the strap.
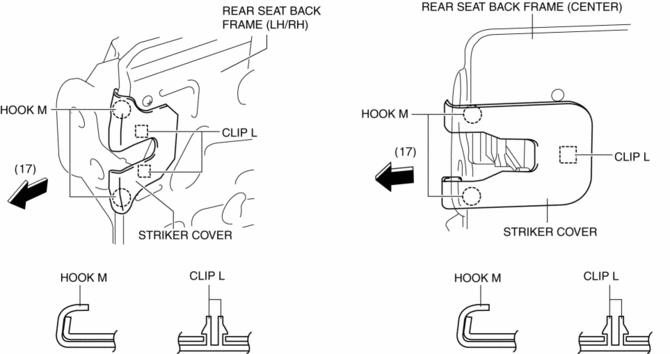
19. Remove the clips L, and then remove the striker cover in the direction of the arrow (17) while setting hooks M aside.
20. Remove nuts, and then remove the rear center seat belt.
21. Install in the reverse order of removal.
 Rear Seat
Purpose, Function
The following two types of rear seats have been adopted.
6:4 split-type seat
4:2:4 split-type seat
The following functions have been ado ...
 Rear Seat Back Removal/Installation
CAUTION:
When removing or putting in the rear seat, contact with the surrounding areas
of the vehicle could cause scratches and damage. When removing or putting in
the rear seat, always ...
Other materials:
Ambient Temperature Sensor [Manual Air Conditioner]
Purpose
The ambient temperature sensor detects the ambient temperature.
Function
The ambient temperature sensor converts the detected temperature to an electric
signal.
Construction
A thermistor-type ambient temperature sensor has been adopted.
The ambient ...
Fuel Injection Control System
Outline
Performs optimum fuel injection according to engine operation conditions.
The PCM determines the engine operation conditions based on the signals from
each input device and drives the fuel injectors at the optimal fuel injection
time (fuel injection amount) and the fuel ...
Wheels And Tires
Outline
An adhesive-type balance weights has been adopted to the outer side of the
aluminum alloy wheels. Due to this, a stylish wheel design is realized.
In consideration of the environment, steel balance weights have been adopted
to reduce the use of lead in the vehicle.
...
