Mazda CX-5 Service & Repair Manual: Rear ABS Wheel Speed Sensor Removal/Installation
1. Remove the trunk board..
2. Remove the trunk end trim..
3. Remove the rear scuff plate..
4. Remove the trunk side trim..
5. Disconnect the rear ABS wheel-speed sensor connector.
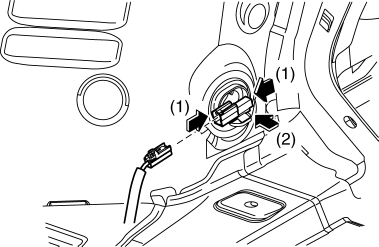
6. Press the rear ABS wheel-speed sensor tabs and press out the sensor toward the outside of the vehicle.
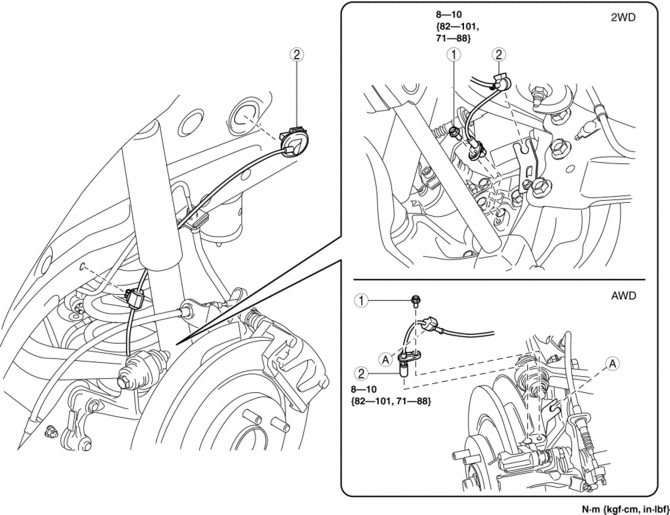
7. Remove in the order indicated in the table.
8. Install in the reverse order of removal.
9. After installation, verify that there is no twisting in the rear ABS wheel-speed sensor.
|
1 |
Bolt |
|
2 |
Rear ABS wheel-speed sensor (See Rear ABS Wheel-speed Sensor Removal Note.) |
Rear ABS Wheel-speed Sensor Removal Note
1. Pull aside the mudguard and remove the rear ABS wheel-speed sensor.
 Rear ABS Wheel Speed Sensor Inspection [Awd]
Installation Visual Inspection
1. Inspect the following items:
If there is any malfunction, replace the applicable part.
a. Excessive play of the ABS wheel-speed sensor
b. Deformation ...

Other materials:
Liftgate Hinge Removal/Installation
1. Disconnect the negative battery cable..
2. Remove the following parts:
a. Rear scuff plate.
b. Trunk end trim.
c. Trunk side trim.
d. C-pillar trim.
e. D-pillar trim.
f. Liftgate.
3. Remove fasteners.
4. While partially peeling back the rear part of the headliner, remove nut ...
Passenger Compartment Temperature Sensor Removal/Installation [Full Auto Air
Conditioner]
1. Disconnect the negative battery cable..
2. Remove the following parts:
a. Front scuff plate (driver-side).
b. Front side trim (driver-side).
c. Switch panel.
d. Decoration panel.
e. Shift lever knob (MTX).
f. Front console box.
g. Shift panel.
h. Upper panel.
i. Rear console. ...
Passenger Compartment Temperature Sensor Inspection [Full Auto Air Conditioner]
1. Measure the temperature around the passenger compartment temperature sensor
and measure the resistance between passenger compartment temperature sensor terminals
A and B.
If the characteristics of the passenger compartment temperature sensor are
not as shown in the graph, replace t ...
