Mazda CX-5 Service & Repair Manual: Parking/Front Turn Light Bulb Removal/Installation
Halogen Type
1. Disconnect the negative battery cable..
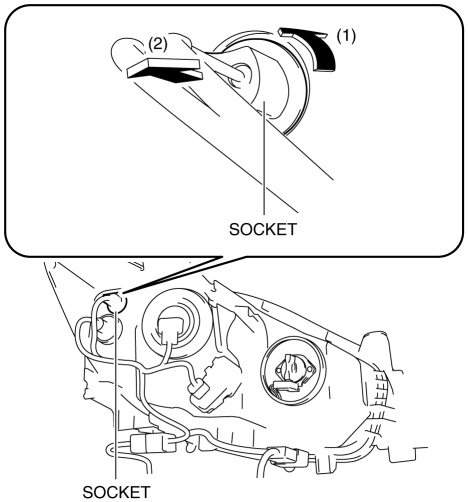
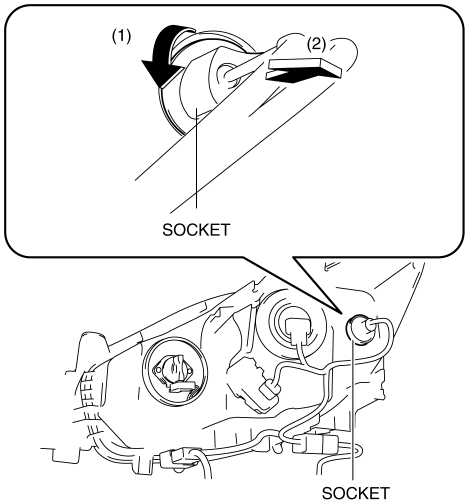
2. Rotate the socket in the direction of the arrow (1) shown in the figure and remove it from the front combination light in the direction of the arrow (2) shown in the figure.
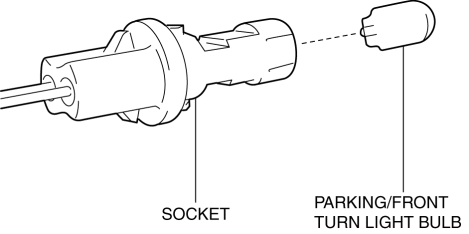
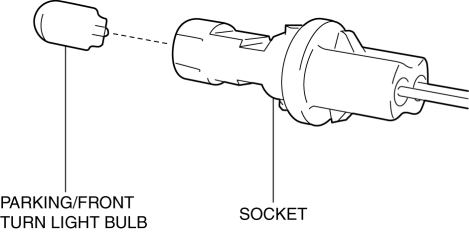
3. Remove the parking/front turn light bulb.
4. Install in the reverse order of removal.
Discharge Type
Parking/Front turn light bulb (LH)
1. Disconnect the negative battery cable..
2. Remove the air cleaner cover..
3. Remove the relay and fuse block upper cover..
4. Remove the nut and screw.

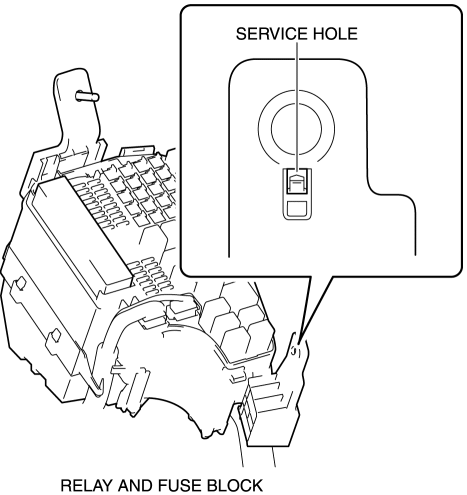
5. Insert a tape-wrapped flathead screwdriver into the service hole in the position shown in the figure.
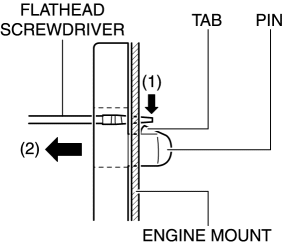
6. While pressing the pin tab in the direction of the arrow (1) shown in the figure using a flathead screwdriver, pull the pin in the direction of the arrow (2) shown in the figure to detach the pin tab and engine mount.
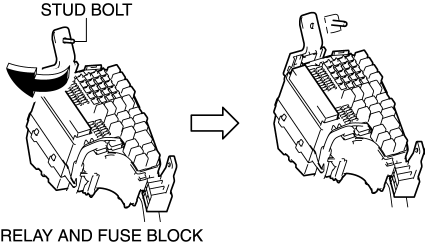
7. Pull out the relay and fuse block from the stud bolt and set it aside as shown in the figure.
8. Rotate the socket in the direction of the arrow (3) shown in the figure and remove it from the front combination light in the direction of the arrow (4) shown in the figure.

9. Remove the parking/front turn light bulb.
10. Install in the reverse order of removal.
Parking/Front turn light bulb (RH)
1. Disconnect the negative battery cable..
2. Remove the washer tank bracket..
3. Rotate the socket in the direction of the arrow (1) shown in the figure and remove it from the front combination light in the direction of the arrow (2) shown in the figure.
4. Remove the parking/front turn light bulb.
5. Install in the reverse order of removal.
 Lighting Systems
Outline
Front combination lights have been adopted with parts related to the front
exterior lights grouped and housed together.
The following systems have been adopted to the headlig ...
 Rear Turn Light Bulb Removal/Installation
1. Disconnect the negative battery cable..
2. Insert a tape-wrapped flathead screwdriver into the service hole in the position
shown in the figure.
3. Move the flathead screwdriver in the di ...
Other materials:
Dynamic Stability Control (DSC)
The Dynamic Stability Control (DSC) automatically controls braking and engine
torque in conjunction with systems such as ABS and TCS to help control side slip
when driving on slippery surfaces, or during sudden or evasive maneuvering, enhancing
vehicle safety.
Refer to ABS and TCS .
DS ...
Blind Spot Monitoring (Bsm) Control Module
Purpose
Controls the blind spot monitoring (BSM) system.
Function
The BSM control module emits microwaves to detect an oncoming vehicle's position
and speed information via the reflected microwaves.
The BSM system is controlled based on the detected vehicle positio ...
Audio Unit Personalization Features Setting Procedure
Door Locks Systems
1. Switch the ignition ON (engine off or on).
2. Turn the audio unit power on.
3. Select the following from the audio unit screen.
a. “Setup”
b. “Vehicle”
c. “Door Locks“
4. Select the following items and change the setting.
Advanced keyless entry system ...
