Mazda CX-5 Service & Repair Manual: Rear Turn Light Bulb Removal/Installation
1. Disconnect the negative battery cable..
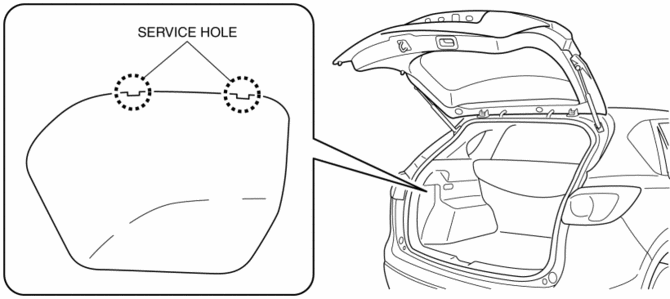
2. Insert a tape-wrapped flathead screwdriver into the service hole in the position shown in the figure.
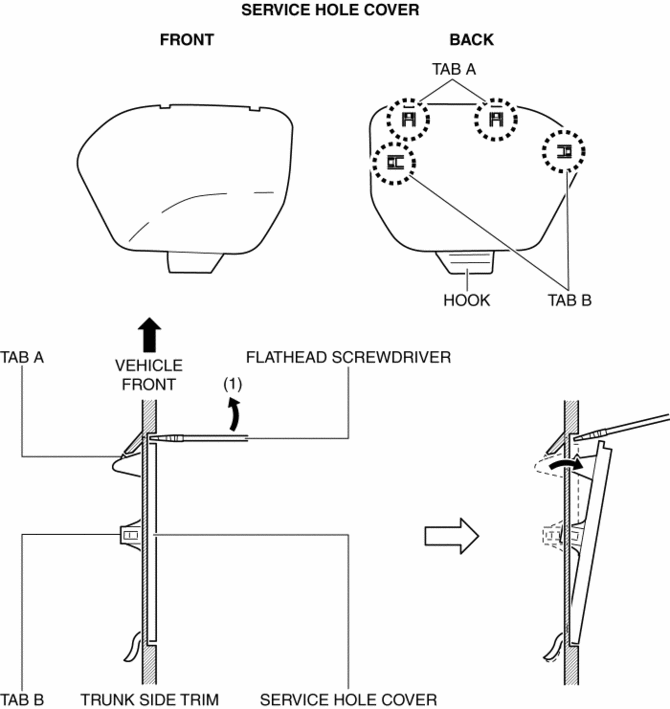
3. Move the flathead screwdriver in the direction of the arrow (1) shown in the figure, pull out the service hole cover, and detach the service hole cover tab and trunk side trim.
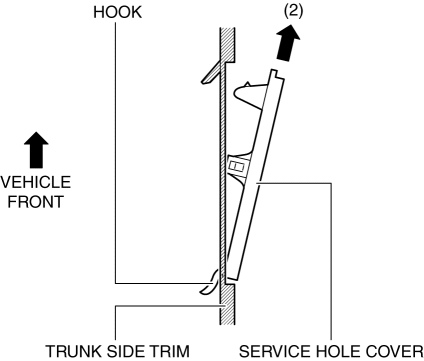
4. Pull out the service hole cover in the direction of the arrow (2) shown in the figure and pull out the service hole cover hook from the trunk side trim.
5. Remove the service hole cover.
6. Rotate the socket in the direction of the arrow (3) shown in the figure and remove it from the rear combination light in the direction of the arrow (4) shown in the figure.
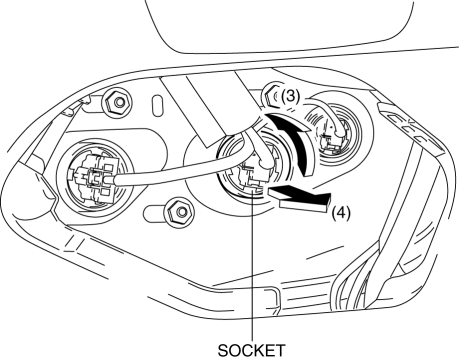
7. Remove the rear turn light bulb.
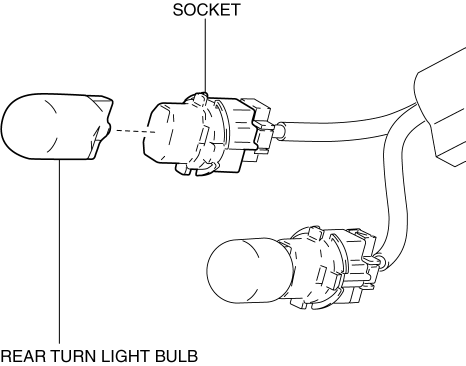
8. Install in the reverse order of removal.
 Parking/Front Turn Light Bulb Removal/Installation
Halogen Type
1. Disconnect the negative battery cable..
2. Rotate the socket in the direction of the arrow (1) shown in the figure and
remove it from the front combination light in the direction ...
 Side Turn Light
Purpose
The side turn lights are used to signal vehicles/people at the side of the
vehicle that the vehicle is going to make a right or left turn.
Function
The side turn lights ...
Other materials:
Torque Box Installation [Panel Replacement]
Symbol Mark
Installation Procedure
1. When installing new parts, measure and adjust the body as necessary to conform
with standard dimensions.
2. Drill holes for the plug welding before installing the new parts.
3. After temporarily installing new parts, make sure the related parts fit p ...
Vent Operation
Adjusting the Vents
Directing airflow
To adjust the direction of airflow, move the adjustment knob.
NOTE
hen using the air conditioner under humid ambient temperature conditions,
the system may blow fog from the vents. This is not a sign of trouble but a result
of humid air being suddenly co ...
Pressure Control Solenoid [Fw6 A EL, Fw6 Ax EL]
Purpose/Function
The pressure control solenoid adjusts the pressure control solenoid pressure
and controls the line pressure based on the control signal from the TCM.
Construction
The pressure control solenoid is installed to the solenoid control valve
body.
The pre ...
