Mazda CX-5 Service & Repair Manual: Oil Seal (Differential) Replacement [C66 M R]
1. Remove the front under cover No.2..
2. Drain the manual transaxle oil..
3. Disconnect the drive shaft (LH) from the MTX..
4. Disconnect the drive shaft (RH) from the MTX..
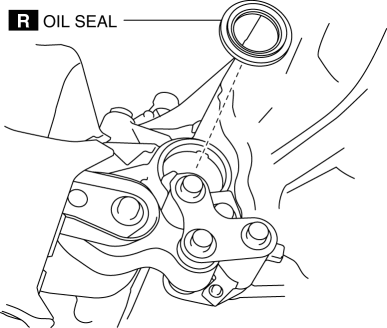
5. Remove the oil seal (LH).

6. Remove the oil seal (RH).
7. Using the SST
s and a hammer, tap a new oil seal (LH) in evenly until the SST
s contacts the transaxle case.
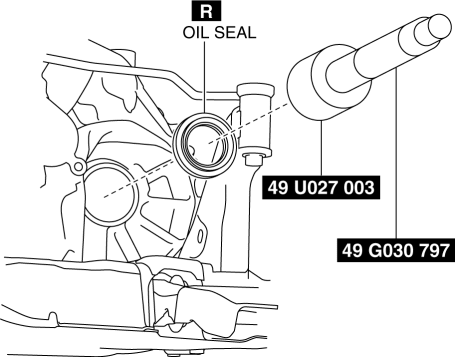
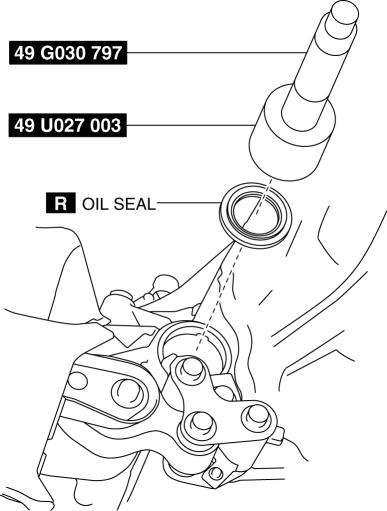
8. Using the SST
s and a hammer, tap a new oil seal (RH) in evenly until the SST
s contacts the transaxle case.
9. Coat the lip of each oil seal with transaxle oil.
10. Install in the reverse order of removal.
11. Add the specified amount of specified transaxle oil..
 Differential [Fw6 A EL, Fw6 Ax EL]
Purpose/Function
The differential absorbs the difference in the rotation speed between the
left and right driving wheels so that the vehicle drives smoothly when differences
occur due to ...
 Oil Seal (Differential) Replacement [Fw6 A EL, Fw6 Ax EL]
Transaxle Case Side
1. Remove the front under cover No.2..
2. Drain the ATF..
3. Disconnect the drive shaft (LH) from the transaxle..
CAUTION:
The oil seal is easily damaged by the shar ...
Other materials:
Turbine/Input Shaft Speed Sensor, Output Shaft Speed Sensor [Fw6 A EL, Fw6 Ax
EL]
Purpose/Function
The turbine/input shaft speed sensor detects the rotation speed of the input
shaft (low clutch drum).
The output shaft speed sensor detects the rotation speed of the output shaft
(primary gear).
The turbine/input shaft speed sensor and output shaft speed ...
Rear Body Control Module (Rbcm) Inspection
1. Disconnect the negative battery cable..
2. Remove the following parts:
a. Trunk board.
b. Trunk end trim.
c. Rear scuff plate (LH).
d. Trunk side trim (LH).
3. Remove the rear body control module (RBCM) from the body with the connector
connected..
4. Connect the negative battery c ...
Active Command Modes Inspection [Instrument Cluster]
1. Connect the M-MDS to the DLC-2.
2. After the vehicle is identified, select the following items from the initialization
screen of the M-MDS.
a. Select “DataLogger”.
b. Select “Modules”.
c. Select “IC”.
3. Select the simulation items from the PID table.
4. Perform the acti ...
