Mazda CX-5 Service & Repair Manual: Wiper Bracket Removal [Panel Replacement]
Symbol Mark

Installation Procedure
1. When installing new parts, measure and adjust the body as necessary to conform with standard dimensions.
2. Drill holes for the plug welding before installing the new parts.
3. After temporarily installing new parts, make sure the related parts fit properly.
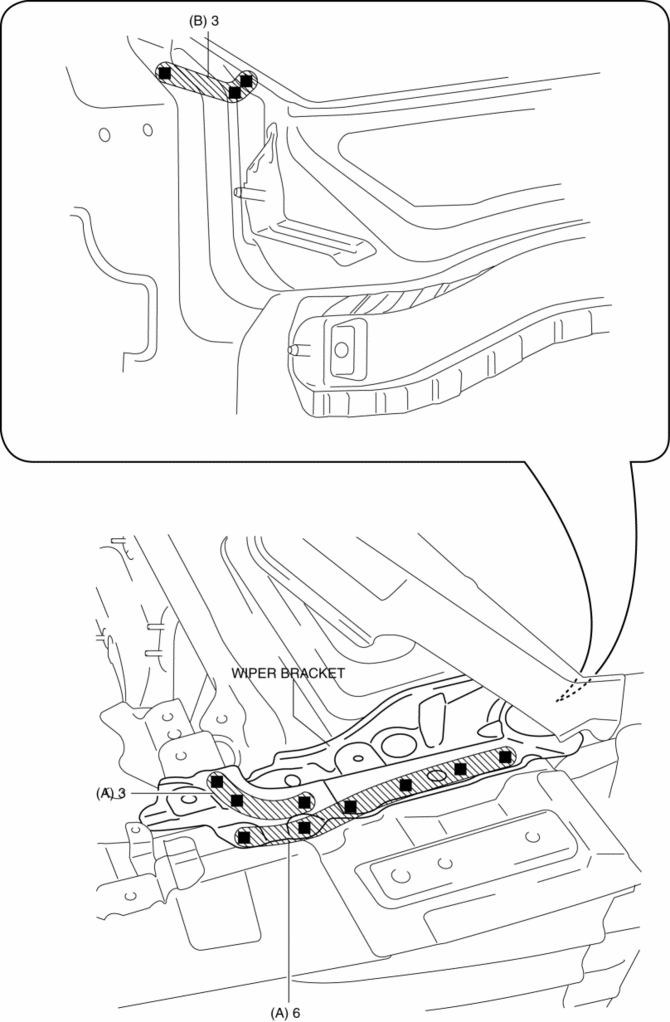
4. Plug weld the 9 locations indicated by (A) shown in the figure.
5. Plug weld the 3 locations indicated by (B) from the inside shown in the figure, then install the wiper bracket.
 Windshield Wiper System
Outline
Equipped with continuous (low/high), auto-stop, one-touch wiper, intermittent
wiper (without auto wiper system), auto wiper (with auto wiper system), and
synchronized washer and w ...
 Rain Sensor
Outline
The rain sensor detects the amount of rainfall and calculates the wiper operation
speed, and outputs a windshield wiper control signal to the front body control
module (FBCM) to p ...
Other materials:
Front Seat Back Trim Removal/Installation
WARNING:
Handling a side air bag improperly can accidentally operate (deploy) the
air bag, which may seriously injure you. Read the service warnings/cautions
in the Workshop Manual before handling the front seat (side air bag integrated)..
If the sliding mechanisms on both ...
Rear Turn Light Bulb Removal/Installation
1. Disconnect the negative battery cable..
2. Insert a tape-wrapped flathead screwdriver into the service hole in the position
shown in the figure.
3. Move the flathead screwdriver in the direction of the arrow (1) shown in the
figure, pull out the service hole cover, and detach the serv ...
Wiper Blades
CAUTION
●Hot waxes applied by automatic car washers
have been known to affect the wiper's ability to clean windows.
● To prevent damage to the wiper blades,
do not use gasoline, kerosene, paint thinner, or other solvents on or near them.
● When the wiper lever is in the ...
