Mazda CX-5 Service & Repair Manual: Oil Seal (Differential) Replacement [C66 M R]
1. Remove the front under cover No.2..
2. Drain the manual transaxle oil..
3. Disconnect the drive shaft (LH) from the MTX..
4. Disconnect the drive shaft (RH) from the MTX..
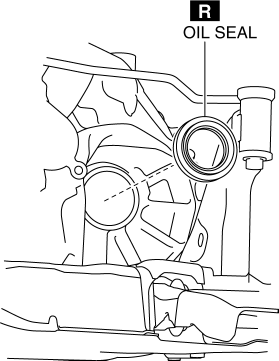
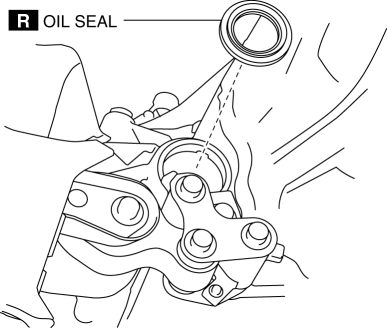
5. Remove the oil seal (LH).

6. Remove the oil seal (RH).

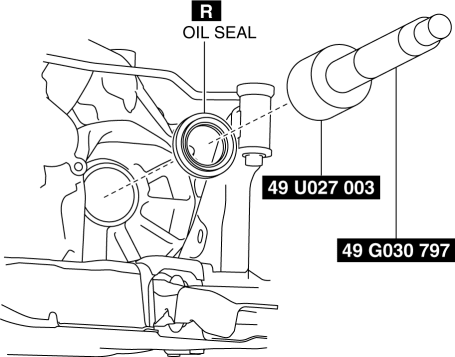
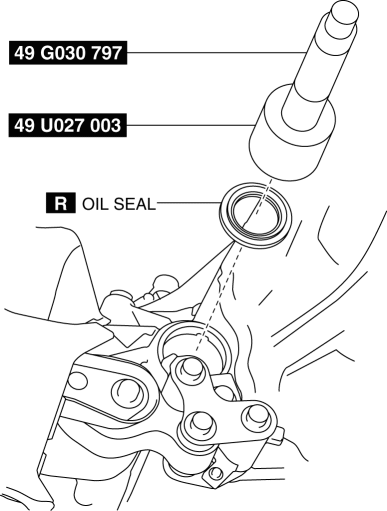
7. Using the SST
s and a hammer, tap a new oil seal (LH) in evenly until the SST
s contacts the transaxle case.

8. Using the SST
s and a hammer, tap a new oil seal (RH) in evenly until the SST
s contacts the transaxle case.

9. Coat the lip of each oil seal with transaxle oil.
10. Install in the reverse order of removal.
11. Add the specified amount of specified transaxle oil..
 Oil Seal (Coupling Component) Replacement
1. Drain the differential oil into a container.
2. Remove the coupling component..
3. Remove the oil seal from the differential carrier using a screwdriver or similar
tool.
4. Apply differenti ...
 Oil Seal (Differential) Replacement [Fw6 A EL, Fw6 Ax EL]
Transaxle Case Side
1. Remove the front under cover No.2..
2. Drain the ATF..
3. Disconnect the drive shaft (LH) from the transaxle..
CAUTION:
The oil seal is easily damaged by the shar ...
Other materials:
Blind Spot Monitoring (Bsm) Off Indicator Light
Purpose
The BSM OFF indicator light informs the driver that the Blind Spot Monitoring
(BSM) system is turned off or there is a malfunction in the system.
Function
The instrument cluster illuminates the BSM OFF indicator light based on the
BSM system off signal sent via a CA ...
Rear Center Seat Belt Removal/Installation
CAUTION:
The ELR (emergency locking retractor) has a spring that will unwind if the
retractor cover is removed. The spring cannot be rewound by hand. If this occurs,
the ELR will not work properly. Therefore, do not disassemble the retractor.
1. Press the release switch, then dis ...
Basic System
Outline
Integrated A/C unit adopted.
Sub-cooling system to multi-flow condenser adopted.
Structural View
Ventilation system
Refrigerant system
Flow Diagram
Ventilation system
A/C unit
Inside the vehicle
Display
CENTER ...
