Mazda CX-5 Service & Repair Manual: Knee Bolster Removal/Installation
1. Disconnect the negative battery cable..
2. Remove the following parts:
a. Driver-side front scuff plate.
b. Driver-side front side trim.
c. Switch panel.
d. Decoration panel.
e. Shift lever knob (MTX).
f. Front console box.
g. Shift panel.
h. Upper panel.
i. Rear console.
j. Side wall.
k. Front console.
l. Hood release lever.
m. Driver-side lower panel.
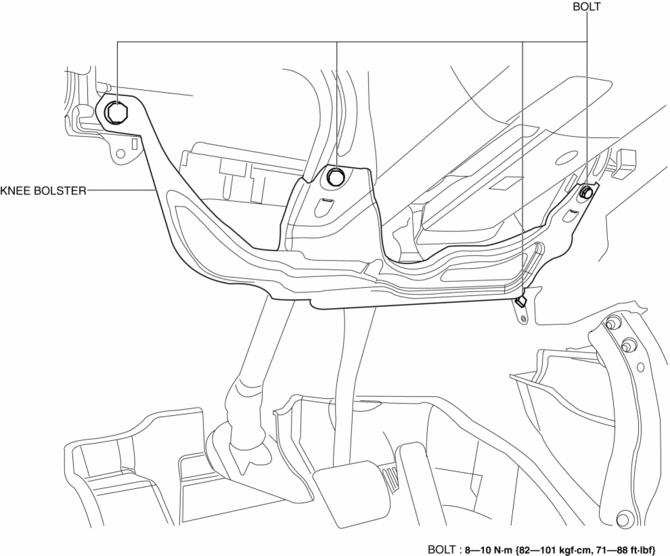
3. Remove bolts.
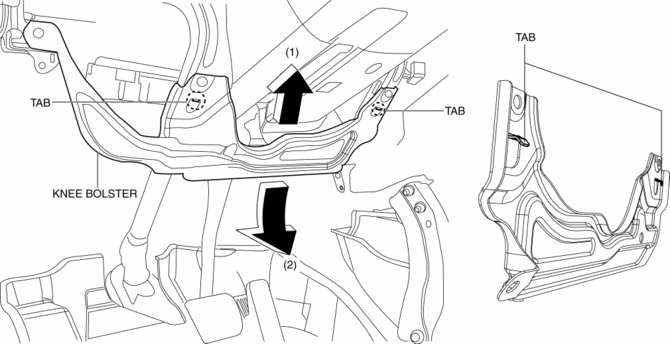
4. Pull the knee bolster in the direction of the arrow in the order of (1), (2) while detaching tabs.
5. Install in the reverse order of removal.
 Glove Compartment Removal/Installation
1. Push the glove compartment in the direction of the arrow (1) and remove hooks
A.
2. Pull the stay damper in the direction of the arrow (2) shown in the figure
and remove the hook B.
CAU ...
 Rear Console Disassembly/Assembly
1. Disassemble in the order indicated in the table.
1
Screw A
2
Rear console bracket
3
Screw B
4
...
Other materials:
Blower Unit Removal/Installation
1. Disconnect the negative battery cable..
2. Remove the following parts:
a. Front scuff plate (passenger-side).
b. Front side trim (passenger-side).
c. Dashboard under cover.
d. Glove compartment.
e. Decoration panel.
f. Lower panel (passenger-side).
3. Disconnect the blower motor c ...
Headliner
Purpose/Function
The headliner is equipped with a shock absorbing pad for driver's head protection
during a collision.
Construction
The front and rear side of the headliner is equipped with a shock absorbing
pad with a plastic rib-pad structure.
...
Front Door Speaker Removal/Installation
Without Bose®
NOTE:
If the procedure is performed while holding the front door speaker cone,
it could deform the cone causing a malfunction. Therefore, perform the procedure
while holding any part other than the cone.
1. Disconnect the negative battery cable..
2. Remove the f ...
