Mazda CX-5 Service & Repair Manual: Intake Air Temperature (Iat) Sensor Inspection
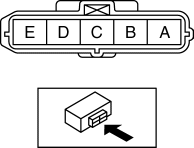
IAT Sensor No.1
Resistance inspection
NOTE:
-
Because the IAT sensor No.1 is integrated in the MAF sensor, replacing the IAT sensor No.1 includes replacement of the MAF sensor/IAT sensor No.1.
1. Disconnect the negative battery cable..
2. Disconnect the MAF sensor/IAT sensor No.1 connector.
3. Measure the resistance between MAF sensor/IAT sensor No.1 terminals A and B.
-
If not as specified, replace the MAF sensor/IAT sensor No.1..
|
IAT (°C {°F}) |
Resistance (Kilohms) |
|
?20 {?4} |
13.7—16.6 |
|
20 {68} |
2.49—2.79 |
|
60 {140} |
0.622—0.703 |

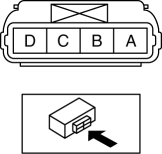
IAT Sensor No.2
Resistance inspection
NOTE:
-
Because the IAT sensor No.2 is integrated in the MAP sensor, replacing the IAT sensor No.2 includes replacement of the MAP sensor/IAT sensor No.2.
1. Disconnect the negative battery cable..
2. Disconnect the MAP sensor/IAT sensor No.2 connector.
3. Remove the MAP sensor/IAT sensor No.2..
4. Measure the resistance between MAP sensor/IAT sensor No.2 terminals A and B.
-
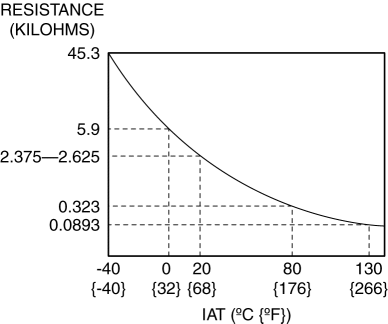
If not as specified, replace the MAP sensor/IAT sensor No.2..
|
IAT (°C {°F}) |
Resistance (Kilohms) |
|
0 {32} |
Approx. 5.9 |
|
20 {68} |
2.375—2.625 |
|
80 {176} |
Approx. 0.323 |
|
130 {266} |
Approx. 0.0893 |
 Heated Oxygen Sensor (HO2 S)
Purpose/Function
Detects the oxygen concentration (theoretical air/fuel ratio) in the exhaust
gas as basic information for mainly determining the fuel injection amount and
as information ...
 Intake Air Temperature (Iat) Sensor
IAT Sensor No.1
Purpose/Function
Detects the IAT before it passes through the throttle body as basic information
for mainly determining the fuel injection amount.
Detects the IAT be ...
Other materials:
Starter Interlock Switch [Skyactiv G 2.0]
Purpose, Function
The starter interlock switch mechanism prevents vehicle surge when the engine
is started, enhancing safety. The engine cannot be started unless the clutch
is depressed.
Construction
The mechanism is provided with a starter interlock switch on the circuit
...
Low Fuel Warning Light
Purpose
The low fuel warning light warns the driver that the remaining fuel level
is low.
Function
The instrument cluster calculates the fuel quantity based on the following
CAN signals, and if a remaining fuel amount of approx. 10 L {2.6 US gal, 2.2
Imp gal} (fuel gauge ...
Mirror Base Installation
1. Cut away all of the original sealant using a razor.
WARNING:
Using a razor with bare hands can cause injury. Always wear gloves when using
a razor.
2. Clean and degrease the ceramic coating on the glass and the base.
CAUTION:
Keep the area free of dirt and grease, and ...
