Mazda CX-5 Service & Repair Manual: Heated Oxygen Sensor (HO2 S) Removal/Installation
WARNING:
-
A hot engine and exhaust system can cause severe burns. Turn off the engine and wait until they are cool before removing the exhaust system.
CAUTION:
-
Do not allow flammable objects such as the taping for bundling wiring harness to come into contact with the exhaust manifold and silencer.
NOTE:
-
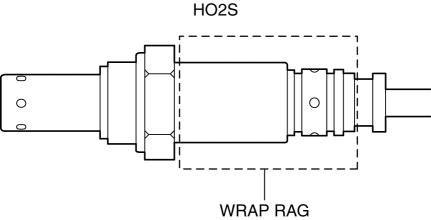
If penetrant lubricating spray penetrates the airflow hole of the HO2S, it could cause interference with the HO2S function.
-
When removing the HO2S, wrap a rag around the lower position so that penetrant lubricating spray does not get sprayed into the airflow hole.


1. Disconnect the negative battery cable..
2. Lift up the vehicle.
3. Remove the floor under cover. (vehicles with floor under cover).
4. Remove the insulator and brace bar. (2WD).
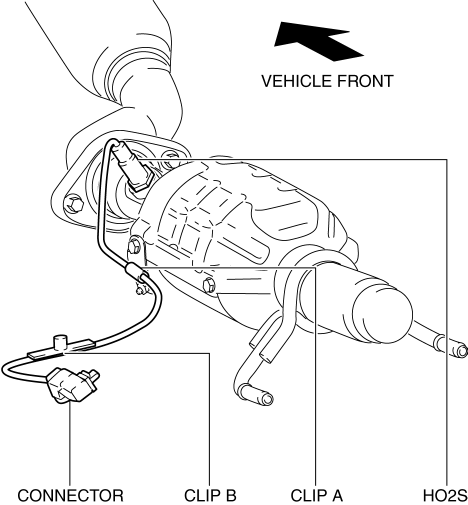
5. Disconnect the HO2S connector.
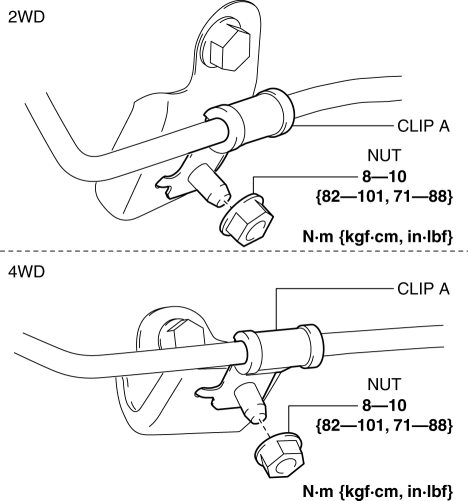
6. Remove the clip A from the bracket.

7. Remove the clip B.
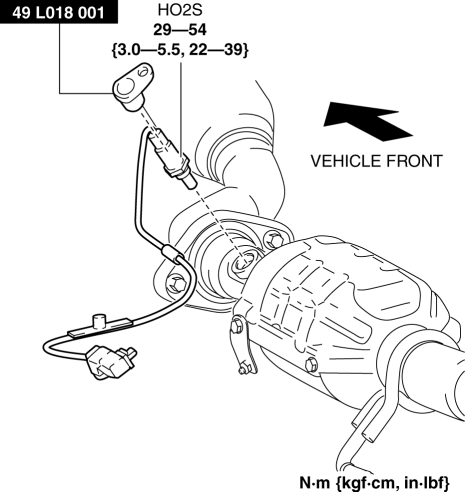
8. Remove the HO2S using the SST
.

9. Install in the reverse order of removal.
 Heated Oxygen Sensor (HO2 S) Inspection
HO2S Inspection
1. Connect the M-MDS to the DLC?2.
2. Switch the ignition ON (engine on).
3. Warm up the engine to normal operating temperature.
4. Access the following PIDs using the M-MDS..
...
 Heated Oxygen Sensor (HO2 S)
Purpose/Function
Detects the oxygen concentration (theoretical air/fuel ratio) in the exhaust
gas as basic information for mainly determining the fuel injection amount and
as information ...
Other materials:
Automatic Transaxle Shift Mechanism Removal/Installation
Selector Lever Removal/Installation
1. Disconnect the negative battery cable..
2. Remove the front console..
3. Disconnect the selector lever component connector.
4. Remove the selector cable (selector lever side)..
5. Remove the nuts from the selector lever.
6. Remove the knob.
...
Tire Maintenance
Improper or inadequate vehicle maintenance can cause tires to wear abnormally.
Here are some important maintenance points:
Tire Inflation Pressure
Inspect all tire pressure monthly (including the spare) when the tires are cold.
Maintain recommended pressures for the best ride, top handling, an ...
Power Windows
The ignition must be switched ON for the power windows to operate.
WARNING
Make sure the opening is clear before closing a window:
Closing power windows are dangerous. A person's hands, head, or even neck could
be caught by the window and result in serious injury or even death. This warning ...
