Mazda CX-5 Service & Repair Manual: Fuel Pump Unit Removal/Installation
WARNING:
-
Fuel is very flammable liquid. If fuel spills or leaks from the pressurized fuel system, it will cause serious injury or death and facility breakage. Fuel can also irritate skin and eyes. To prevent this, always complete the “Fuel Line Safety Procedure”, while referring to “BEFORE SERVICE PRECAUTION”.
-
A person charged with static electricity could cause a fire or explosion, resulting in death or serious injury. Before draining fuel, make sure to discharge static electricity by touching the vehicle body.
CAUTION:
-
Disconnecting/connecting the quick release connector without cleaning it may cause damage to the fuel pipe and quick release connector. Always clean the quick release connector joint area before disconnecting/connecting using a cloth or soft brush, and make sure that it is free of foreign material.
1. Complete the “BEFORE SERVICE PRECAUTION”..
2. Using the following procedure:
CAUTION:
-
Because the fuel surface is higher than the fuel pump unit installation surface, if the set plate is removed, it may result in fuel leakage. If the fuel gauge level indicates 1/2 or more, refer to the fuel draining procedure and drain 20 liters of fuel.
-
Fuel gauge indicates 1/2 or more
-
Drain the fuel..
-
Fuel gauge indicates less than 1/2
-
Disconnect the negative battery cable..
3. Remove the following part:
-
6:4 split type
-
Remove the rear seat cushion..
-
4:2:4 split type
-
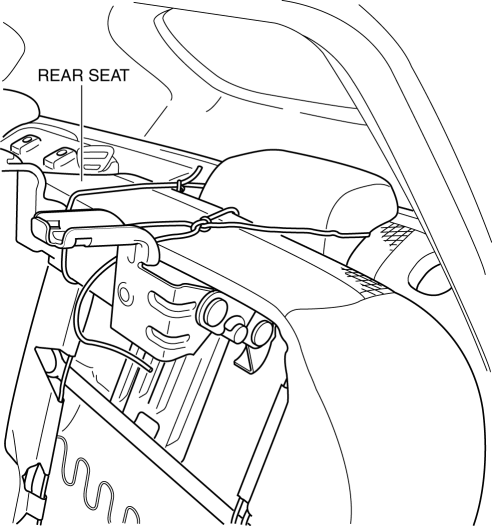
Set the rear seat aside as shown in the figure..
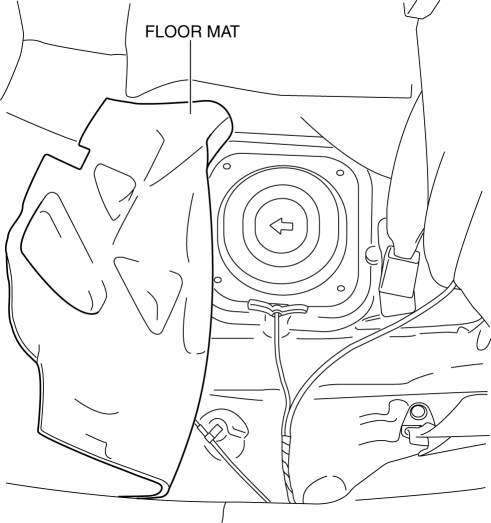
4. Partially peel back the floor mat as shown in the figure.
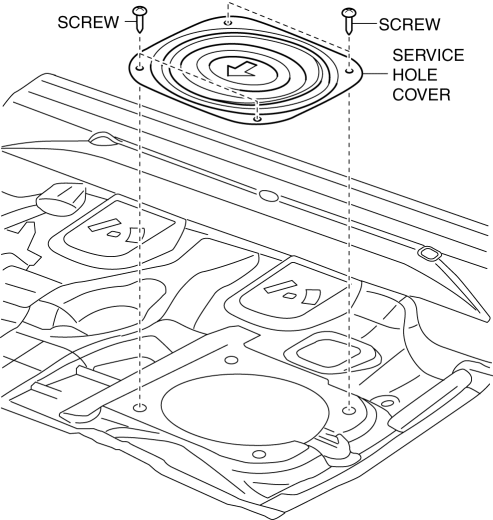
5. Remove the service hole cover.
6. Set the pressure control valve out of the way (U.S.A. and CANADA)..
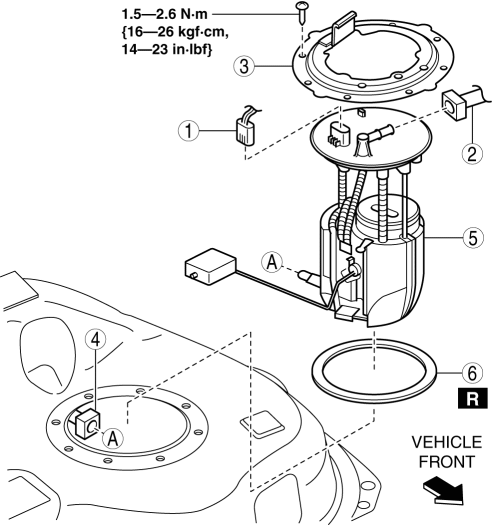
7. Remove in the order indicated in the table.
2WD
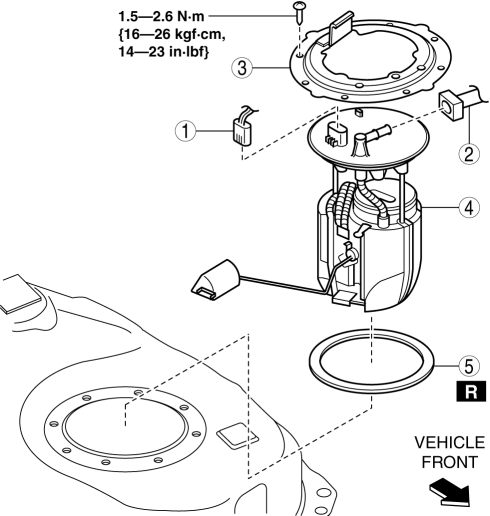
|
1 |
Fuel pump unit connector |
|
2 |
Quick release connector (See QUICK RELEASE CONNECTOR REMOVAL/INSTALLATION [SKYACTIV-G 2.0].) |
|
3 |
Set plate |
|
4 |
Fuel pump unit |
|
5 |
Packing |
AWD
|
1 |
Fuel pump unit connector |
|
2 |
Quick release connector (See QUICK RELEASE CONNECTOR REMOVAL/INSTALLATION [SKYACTIV-G 2.0].) |
|
3 |
Set plate |
|
4 |
Quick release connector (See QUICK RELEASE CONNECTOR REMOVAL/INSTALLATION [SKYACTIV-G 2.0].) |
|
5 |
Fuel pump unit |
|
6 |
Packing |
8. Install in the reverse order of removal.
9. Complete the “AFTER SERVICE PRECAUTION”..
 Fuel Pump Unit Inspection
Continuity Inspection
1. Disconnect the negative battery cable..
2. Disconnect the fuel pump unit connector.
3. Inspect for continuity between fuel pump unit terminals B—D.
If there ...
 Fuel Pump Unit
Purpose, Function
Supplies fuel in the fuel tank to the high pressure fuel pump.
Based on the control signal from the PCM, the fuel pump operates by the operation
of the fuel pump re ...
Other materials:
Rear Bumper Disassembly/Assembly
1. Disassemble in the order indicated in the table.
1
Screw
2
Reflector
3
Rear bumper face
2. Assemble in the reverse order of disassembly. ...
Rear Door Garnish Removal/Installation
WARNING:
Using a utility knife with bare hands can cause injury. Always wear gloves
when using a utility knife.
Front
1. Using a tape-wrapped fastener remover, remove clips A in the direction of
arrow (1), (2) shown in the figure.
2. Remove the double-sided adhesive tape in the ...
Dynamic Stability Control (DSC)
The Dynamic Stability Control (DSC) automatically controls braking and engine
torque in conjunction with systems such as ABS and TCS to help control side slip
when driving on slippery surfaces, or during sudden or evasive maneuvering, enhancing
vehicle safety.
Refer to ABS and TCS .
DS ...
