Mazda CX-5 Service & Repair Manual: Climate Control Unit Removal/Installation [Manual Air Conditioner]
Removal
1. Disconnect the negative battery cable..
2. Remove the following parts:
a. Shift lever knob (MTX).
b. Glove compartment.
c. Front console box.
d. Shift panel.
e. Upper panel.
f. Rear console.
g. Side wall.
h. Decoration panel.
i. Front console.
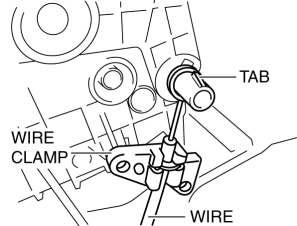
3. Press the tab down, then slide the wire off the link.
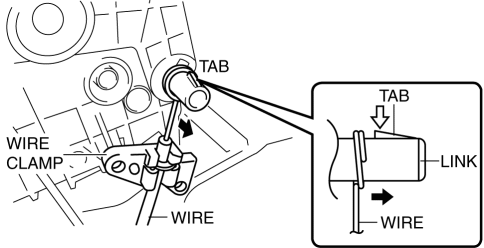
4. Remove the wire from the wire clamp.
5. Remove in the order indicated in the table.
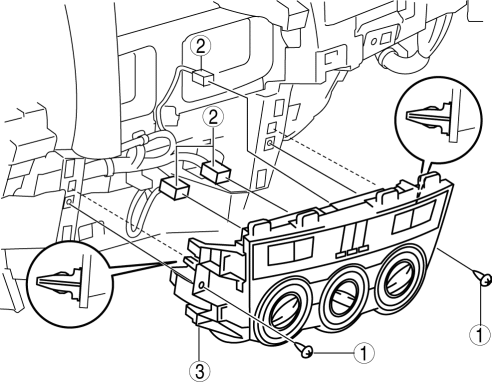
|
1 |
Screw |
|
2 |
Connector |
|
3 |
Climate control unit |
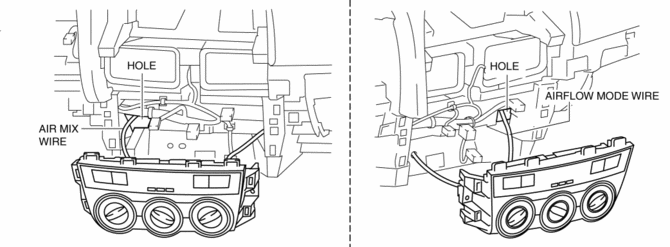
6. Pull out the air mix wire and airflow mode wire from the dashboard.
Install
1. Pass each wire through the hole on the dashboard as shown in the figure.
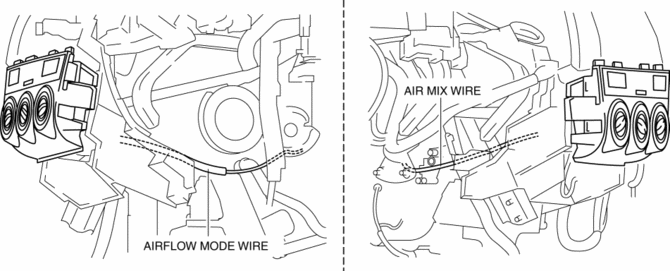
2. Route each wire as shown in the figure.
3. Install in the order indicated in the table.
|
1 |
Connector |
|
2 |
Climate control unit |
|
3 |
Screw |
4. Connect each wire to links and install it to the wire clamps.
5. Verify that the dial operation is correct by fully turning each of the dials from one end to the other.
6. Install the following parts:
a. Front console.
b. Decoration panel.
c. Side wall.
d. Rear console.
e. Upper panel.
f. Shift panel.
g. Front console box.
h. Glove compartment.
i. Shift lever knob (MTX).
7. Connect the negative battery cable..
 Climate Control Unit Removal/Installation [Full Auto Air Conditioner]
NOTE:
The climate control unit prior to replacement stores the vehicle specification
information.
The new climate control unit does not store any vehicle specification information.
...
 Climate Control Unit [Manual Air Conditioner]
Purpose
The climate control unit performs air conditioning according to the operation
by the users and the driving conditions of the vehicle.
Function
The climate control unit d ...
Other materials:
Steering Angle Sensor Inspection
1. Remove the column cover..
2. Connect the plus (+) end of a tester to steering angle sensor terminal A and
the minus (-) end of the tester to terminal B (GND).
3. Switch the ignition ON (engine off or on).
4. Turn the steering wheel to the left and right.
5. Verify that the voltage f ...
Hazardous Driving
WARNING
Be extremely careful if it is necessary to downshift on slippery surfaces: Downshifting
into lower gear while driving on slippery surfaces is dangerous. The sudden change
in tire speed could cause the tires to skid.
This could lead to loss of vehicle control and an accident.
When driv ...
Air Filter
Purpose
The air filter removes pollen and dust in the intake air and purifies air
flowing into the cabin.
Function
The air filter removes pollen and dust using a dust collecting filter.
Construction
The air filter is installed to the blower unit.
It ...
