Mazda CX-5 Service & Repair Manual: Auto Leveling Sensor Inspection
1. Disconnect the negative battery cable..
2. Remove the auto leveling sensor..
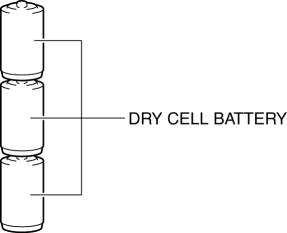
3. Prepare three dry cell batteries (1.5 V
).
4. Connect the three dry cell batteries in a series.
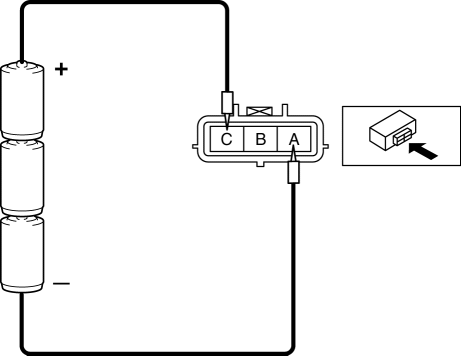
5. Connect the positive pole of the dry cell battery to auto leveling sensor terminal C, and the negative pole to terminal A.
6. Connect the tester as shown in the figure with approx. 4.5 V
of voltage applied between auto leveling sensor terminals A and C, and measure the voltage at auto leveling sensor terminal B.
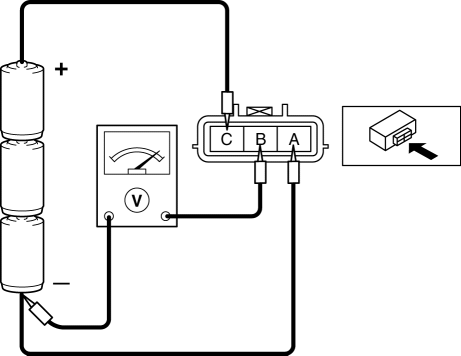
7. When slowly moving the auto leveling sensor link up and down, verify that the voltage fluctuates linearly between 0.5—4.5 V
as shown in the figure.

-
If the voltage cannot be verified as indicated in the graph, replace the auto leveling sensor.
 Auto Leveling Sensor
Purpose
Detects the vehicle height and outputs it to the AFS control module.
Function
Changes the detected vehicle height into a voltage value and outputs it to
the AFS control ...
 Auto Leveling Sensor Removal/Installation
1. Disconnect the negative battery cable..
2. Disconnect the connector.
3. Remove the bolts.
4. Remove the auto leveling sensor.
5. Install in the reverse order of removal.
6. Pe ...
Other materials:
Service Cautions
Injury/damage Prevention Precautions
Depending on the vehicle, the cooling fan may operate suddenly even when
the ignition is switched to off. Therefore, keep hands and tools away from the
cooling fan even if the cooling fan is not operating to prevent injury to personnel
or damage t ...
Rear ABS Wheel Speed Sensor Inspection [2 Wd]
Installation Visual Inspection
1. Inspect the following items:
If there is any malfunction, replace the applicable part.
a. Excessive play of the ABS wheel-speed sensor
b. Deformation of the ABS wheel-speed sensor
Clearance Inspection
1. Remove the ABS wheel-speed sensor.
2. M ...
Brake
Brake System
Foot Brake
Your Mazda has power-assisted brakes that adjust automatically through normal
use.
Should power-assist fail, you can stop by applying greater force than normal
to the brake pedal. But the distance required to stop will be greater than usual.
WARNING
Do not coast wi ...
