Mazda CX-5 Service & Repair Manual: Audio Unit Removal/Installation
Removal
1. Disconnect the negative battery cable.
2. Remove the decoration panel..
3. Remove the bolt.
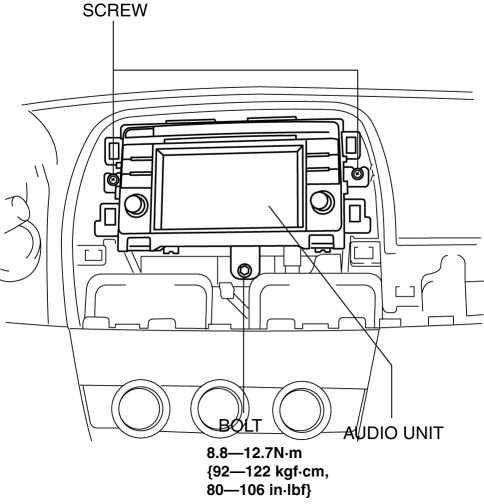
4. Remove the screws.
NOTE:
-
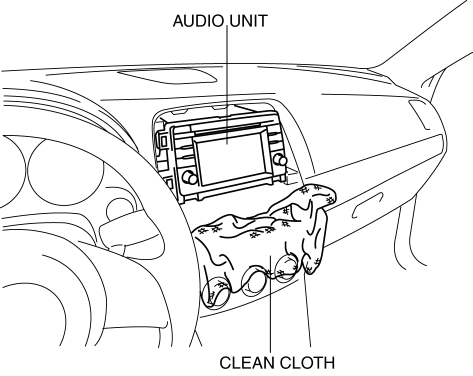
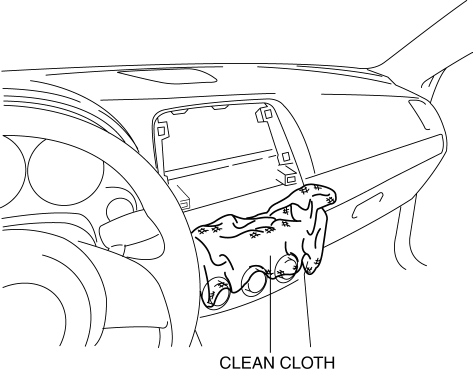
When removing the audio unit, the audio unit could interfere with the climate control unit and scratch the climate control unit. Perform the servicing by spreading a cloth in the position indicated in the figure.
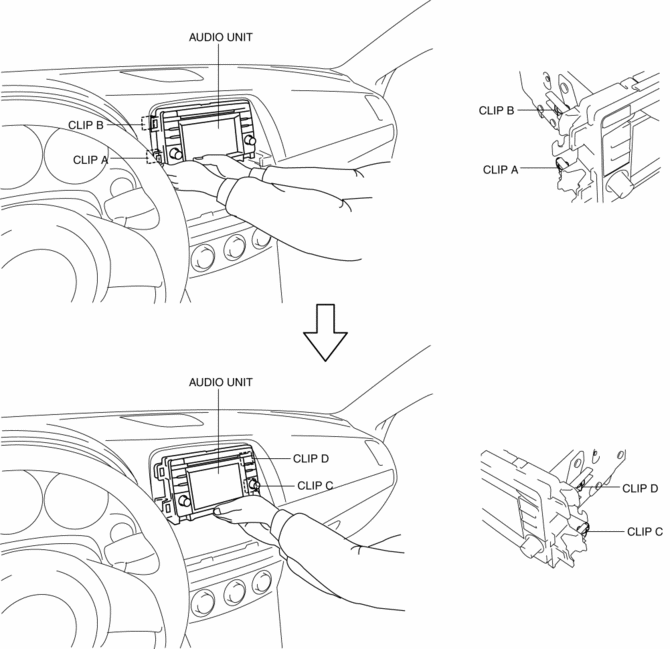
5. Hold the audio unit in the position shown in the figure and pull it outward to disengage clips A, B, C, and D from the instrument panel.
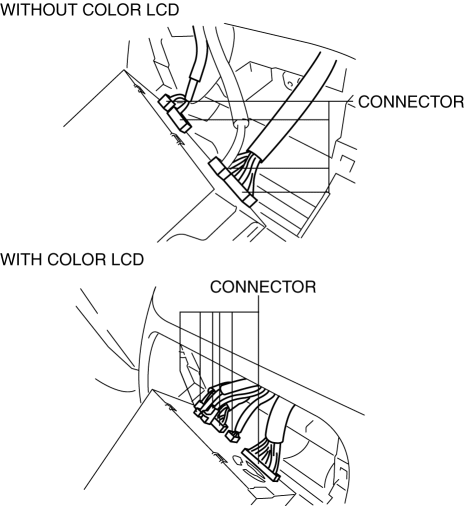
6. Disconnect the connectors.
7. Remove the audio unit.
Installation
NOTE:
-
When installing the audio unit, the audio unit could interfere with the climate control unit and scratch the climate control unit. Perform the servicing by spreading a cloth in the position indicated in the figure.
1. Connect all the connectors.

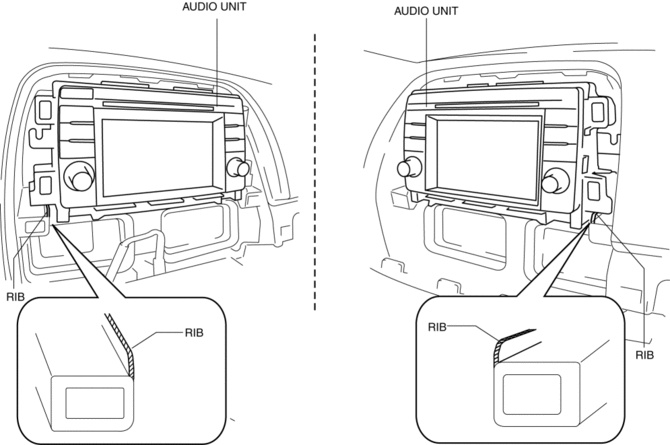
2. Temporarily position the audio unit on the ribs and align the hole positions of the instrument panel with clips.
3. Press the audio unit in the position shown in the figure and engage clips to the instrument panel.
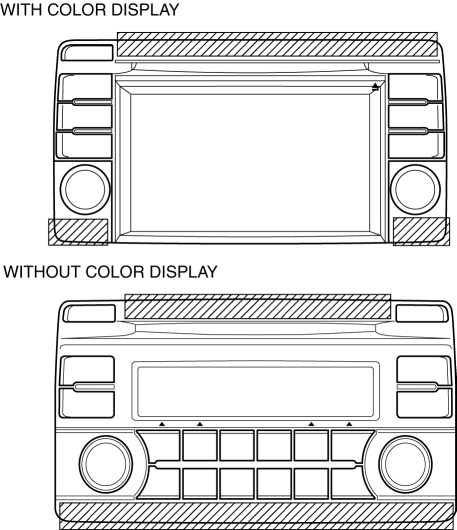
CAUTION:
-
If the audio unit switch area and screen are pressed it could cause a malfunction.
4. Install the screws.

5. Install the bolt.
6. Install the Decoration panel..
7. Connect the negative battery cable..
 Audio Unit Personalization Features Setting Procedure
Door Locks Systems
1. Switch the ignition ON (engine off or on).
2. Turn the audio unit power on.
3. Select the following from the audio unit screen.
a. “Setup”
b. “Vehicle”
c. “D ...
 Auxiliary Jack/Usb Port
NOTE:
“iPod” is a registered trademark of Apple Inc. in the United States and other
countries.
Purpose, Function
The Auxiliary jack/USB port outputs the audio signals of co ...
Other materials:
Repairable Range Of Polypropylene Bumpers [Plastic Body Parts]
The three types of damaged bumpers shown below are considered repairable. Although
a bumper which has been damaged greater than this could also be repaired, it should
be replaced with a new one because such repair would detract from the looks and
quality of the bumper. In addition, such repair ...
Shift Pressure Control (Learning Control) [Fw6 A EL, Fw6 Ax EL]
Outline
The TCM optimizes the hydraulic pressure for clutch engagement and disengagement
through learning correction of the clutch engagement pressure.
NOTE:
The clutch engagement pressure learning value stored in the TCM is not cleared
even if the negative battery termina ...
Filament Repair
1. Clean the filament using isopropyl alcohol.
2. Attach tape to both sides of the filament.
3. Using a small brush or marking pen, apply silver paint.
4. After 2—3 min, carefully remove the tape without damaging the applied
area.
CAUTION:
Do not operate the rear window defro ...
