Mazda CX-5 Service & Repair Manual: Airflow Mode Actuator Removal/Installation [Full Auto Air Conditioner]
1. Disconnect the negative battery cable..
2. Remove the following parts:
a. Dashboard under cover.
b. Glove compartment.
3. Disconnect the airflow mode actuator connector.
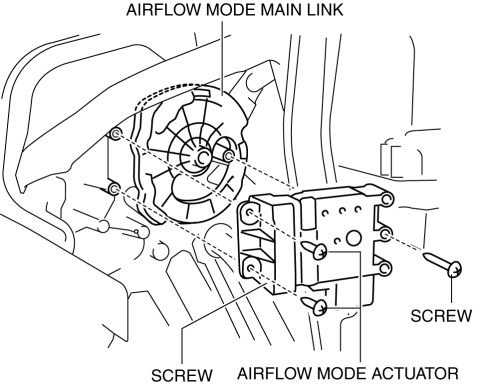
4. Remove the screw.
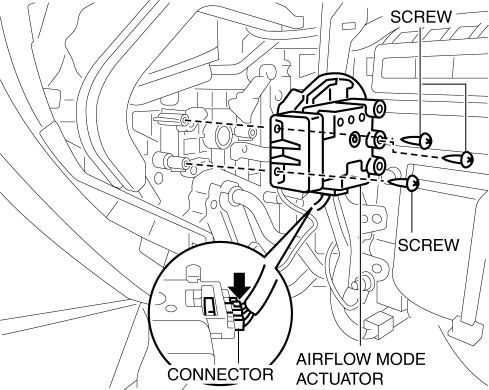
5. Remove the airflow mode actuator.
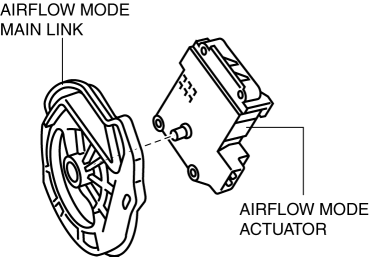
6. Remove the airflow mode main link.
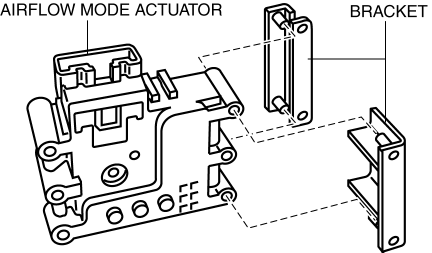
7. Remove the bracket.
8. Install in the reverse order of removal..
Airflow Mode Actuator Installation Note
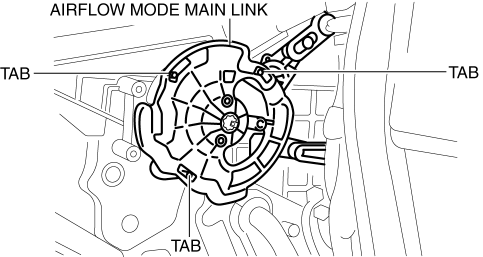
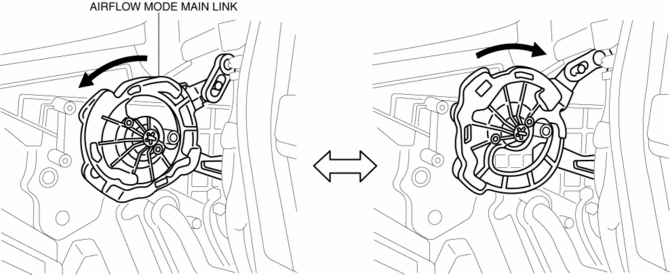
1. Align the airflow mode main link and the airflow mode sub link projection as shown in the figure.
2. When lightly pressing the airflow main link to rotate it in the direction of the arrow, verify that the airflow mode door switches to the position for each mode.
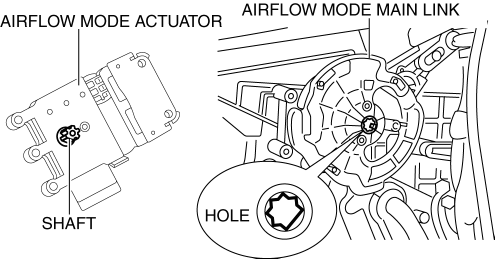
3. Align the airflow mode main link installation hole with the shape of the airflow mode actuator shaft, and install while holding the airflow mode main link.
 Airflow Mode Actuator Inspection [Full Auto Air Conditioner]
CAUTION:
If the lever position exceeds the operation range shown in the figure, the
circuit in the actuator could be damaged. Always perform an actuator operation
inspection with the lev ...
 Airflow Mode Actuator [Full Auto Air Conditioner]
Purpose
The airflow mode actuator moves the mode door in the A/C unit to switch the
air vent.
Function
Door open/close function
The airflow mode actuator drives the motor based ...
Other materials:
Audio Unit (With Color LCD)
NOTE:
“iPod” is a registered trademark of Apple Inc. in the United States and other
countries.
Purpose
The audio unit controls the CD, radio, exterior input devices (AUX/USB/iPod)
and the display.
Function
Records the following items which the user has set ...
Power Window Subswitch Removal/Installation
1. Disconnect the negative battery cable..
2. Remove the cover A.
3. Insert a tape-wrapped fastener remover shown in the figure and remove the
tab B in the direction of arrow (1).
4. Slide the power window subswitch cover in the direction of the arrow (2) shown
in the figure and re ...
Lap Pre Tensioner Seat Belt [Two Step Deployment Control System]
Purpose
The lap pre-tensioner seat belts retract and tighten the seat belt webbing
to protect the front passengers during a collision.
Function
The lap pre-tensioner seat belts operate (deploy) based on the operation
signal from the SAS control module to instantly retract a ...
