Mazda CX-5 Service & Repair Manual: Air Fuel Ratio (A/F) Sensor Inspection
A/F Sensor Inspection
1. Connect the M-MDS to the DLC?2.
2. Switch the ignition ON (engine on).
3. Warm up the engine to normal operating temperature.
4. Access the following PIDs using the M-MDS..
-
VSS (Vehicle speed)
-
RPM (Engine speed)
-
O2S11 (A/F sensor output current)
5. Drive the vehicle and decelerate the engine speed by releasing the accelerator pedal fully when the engine speed is 3,000 rpm or more
.
6. Verify that the A/F sensor output current (PID: O2S11) is 0.25 mA or more
while decelerating as shown in the figure.
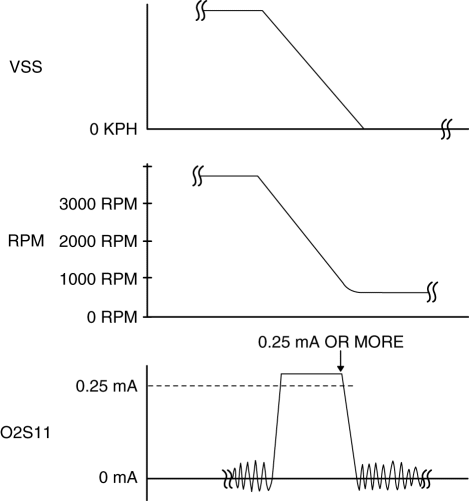
-
If not as specified, replace the A/F sensor..
A/F Sensor Heater Inspection
WARNING:
-
A hot engine and exhaust system can cause severe burns. Turn off the engine and wait until they are cool before removing the exhaust system.
1. Disconnect the negative battery cable..
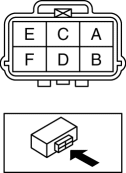
2. Disconnect the A/F sensor connector.
3. Measure the resistance between A/F sensor terminals A and E.
-
If not as specified, replace the A/F sensor..
-
A/F sensor heater resistance
-
1—10 ohms [normal temperature]
 Air Fuel Ratio (A/F) Sensor Heater Control
Outline
Based on the control of the A/F sensor heater, a stabilized oxygen concentration
is detected even at low exhaust temperatures, and feedback control of fuel injection
even at cold ...
 Air Fuel Ratio (A/F) Sensor Removal/Installation
WARNING:
A hot engine and exhaust system can cause severe burns. Turn off the engine
and wait until they are cool before removing the exhaust system.
CAUTION:
Do not allow fla ...
Other materials:
Rear Door Checker Removal/Installation
1. Fully close the rear door glass.
2. Disconnect the negative battery cable..
3. Remove the rear door trim..
4. Remove the rear door speaker..
5. Remove bolt.
6. Remove nuts.
7. Pull out the rear door checker from the rear speaker installation hole.
8. Install in the reverse ...
AUX/USB/iPod mode
Audio can be heard from the vehicle's speakers by connecting a commercially available
portable audio unit to the auxiliary jack.
A commercially-available, non-impedance (3.5 ) stereo mini plug cable is required.
Contact an Authorized Mazda Dealer for details.
In addition, audio can be playe ...
Ignition Switch
Push Button Start Positions
The system operates only when the driver is in the vehicle or within operational
range while the key is being carried.
Each time the push button start is pressed, the ignition switches in the order
of off, ACC, and ON. Pressing the push button start again from ON sw ...
