Mazda CX-5 Service & Repair Manual: Switch Panel Removal/Installation
1. Disconnect the negative battery cable..
2. Remove the car-navigation unit. (with car-navigation system).
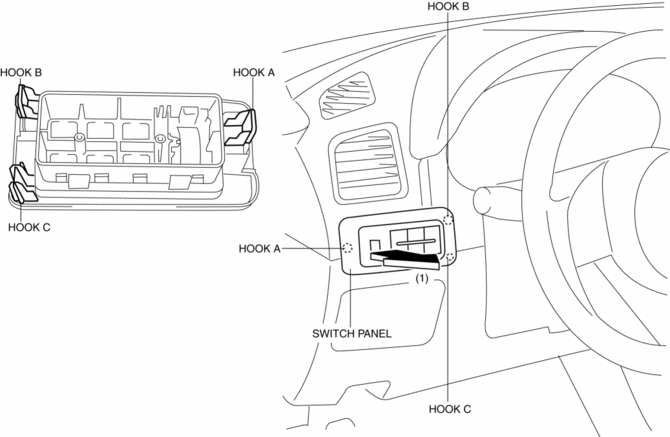
3. Insert your hand from the lower side of the lower panel (without car-navigation system) or the area where the car-navigation unit was installed (with car-navigation system), press the switch panel in the direction of the arrow (1) shown in the figure and remove it while detaching hook A and B and hook C.
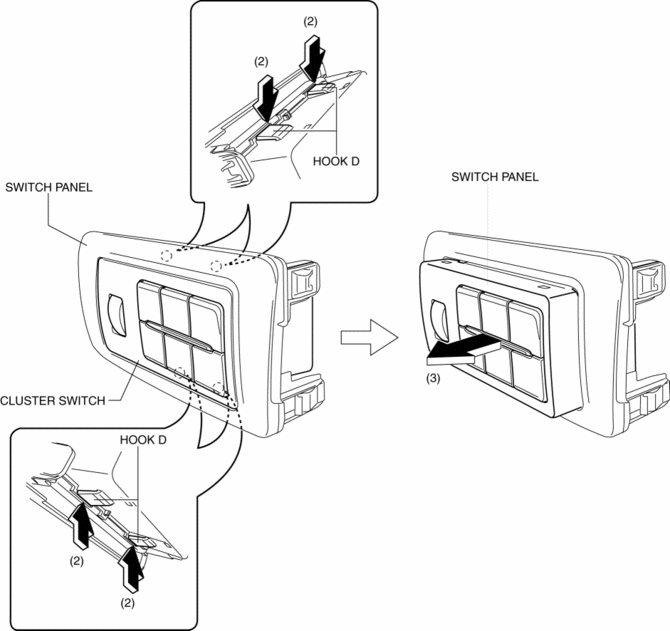
4. Disconnect the cluster switch connector.
5. Remove the cluster switch in the direction of the arrow (3) while detaching hooks D in the direction of the arrow (2).
6. Install in the reverse order of removal.
 Side Wall Removal/Installation
1. Pull the side wall in the direction of the arrow in the order of (1), (2)
and remove it while detaching hooks A and clip B.
2. Pull the side wall in the direction of the arrow (3) and remov ...
 Upper Panel Removal/Installation
1. Disconnect the negative battery cable..
2. Remove the following parts:
a. Front console box.
b. Shift lever knob (MTX).
c. Shift panel.
3. Open the console lid.
4. Remove the button, th ...
Other materials:
Rear Body Control Module (Rbcm) Removal/Installation
CAUTION:
If configuration is not performed when the rear body control module (RBCM)
is replaced with a new one, the vehicle specification information is not stored
in the rear body control module (RBCM) and the system will not operate normally.
When performing configuration, it ...
Main Fuse Removal/Installation
1. Disconnect the negative battery cable..
2. Insert a tape-wrapped flathead screwdriver into the service hole in the position
shown in the figure.
3. Move the flathead screwdriver in the direction of the arrow (1) shown in the
figure, pull up the main fuse cover in the direction of the ...
Air Bag System Warning Alarm [Two Step Deployment Control System]
Purpose
The air bag system warning alarm notifies the driver that a malfunction occurred
in the air bag system instead of the air bag system warning light.
Function
If a malfunction occurs in the air bag system while the air bag system warning
light cannot illuminate, the a ...
