Mazda CX-5 Service & Repair Manual: Steering Gear And Linkage
Purpose/ Function
-
The rotational movement input from the intermediate shaft is converted to a linear movement in the horizontal direction of the steering rack by the rack and pinion mechanism, and then transmitted to the tires and wheels.
Construction
-
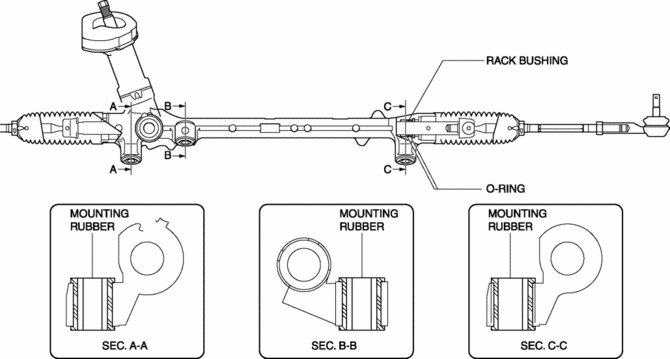
A size and weight-reduced rack and pinion system steering gear has been adopted.
-
Response and handling stability have been improved by the heightened support rigidity due to the integration of the steering gear mounts (three locations) and gear housing.
-
By using a higher steering gear ratio (15.5), the steerability has been improved.
-
By using O-rings on the support yoke and rack bushing, quietness has been improved.
Operation
-
The rotational movement input from the steering shaft is converted to a linear movement in the horizontal direction of the steering rack by engaging the pinion shaft connected to the steering shaft and teeth of the steering rack. This linear movement is transmitted via the inner and outer ball joints to the steering knuckle to steer the tires left or right.

Fail-safe
-
Function not equipped.
 Torque Sensor
Purpose/ Function
The torque sensor detects the steering torque and the steering direction,
and outputs the signal to the Electric Power Steering (EPS) control module (CM).
Constructio ...
 Steering Gear And Linkage Assembly
CAUTION:
To prevent damage to the steering gear, secure it to the vise using a copper
plate or clean cloth.
1. Assemble in the order shown in the figure.
1
...
Other materials:
Fuel Pump Relay
Purpose, Function
Controls the fuel pump on/off according to control signals from the PCM.
The fuel pump is operated only at engine start or when the engine is running
to improve safety.
Construction
The fuel pump relay is installed in the relay and fuse block.
...
Room Light Control System
Outline
The room light control system changes the illumination condition and illumination
level of the interior lights (door position) according to whether the doors
are opened/closed and locked/unlocked.
The room light control system is controlled by the rear body control modul ...
Door Module Panel
Purpose, Function
Styrofoam door module panels have been adopted for reducing vehicle weight.
Construction
Styrofoam is applied to the door module panels (shaded areas) during manufacture.
...
