Mazda CX-5 Service & Repair Manual: Magnet Clutch [Full Auto Air Conditioner]
Purpose
-
The magnetic clutch transmits the rotation force from the engine to the shaft in the A/C compressor.
Function
-
The magnetic clutch engages or disengages the magnetic clutch and the A/C turns on or off by switching the power transmission from the engine.

Construction
-
The magnetic clutch is installed to the A/C compressor.
-
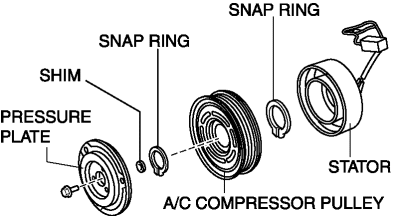
The magnetic clutch consists of the following parts:

-
Pressure plate
-
A/C compressor pulley
-
Stator
-
Snap ring
-
Shim
Operation
Magnetic clutch disengagement
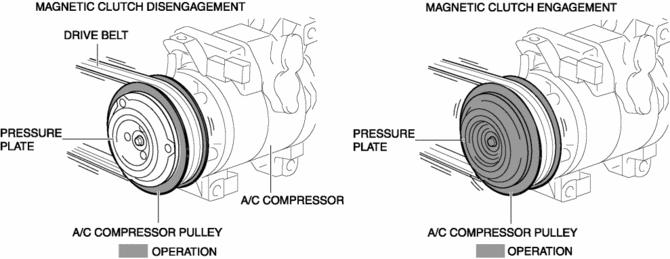
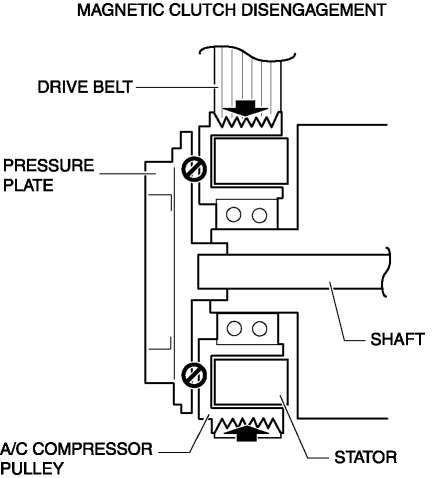
1. If there is no energization in the magnetic clutch stator from the A/C relay, the pressure plate cannot be engaged with the A/C compressor pulley because the magnetic clutch stator does not operate.

2. The rotation force from the drive belt is only transmitted to the A/C compressor pulley and the pulley spins.
Magnetic clutch engagement
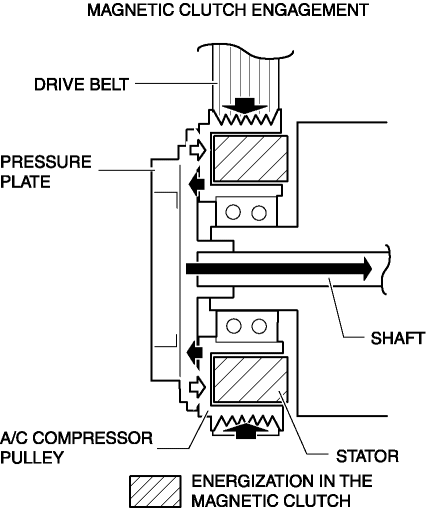
1. If there is energization in the magnetic clutch stator from the A/C relay, the magnetic clutch stator operates and the pressure plate is engaged with the A/C compressor pulley.

2. The rotation force from the drive belt is transmitted to the compressor shaft through the pressure plate from the A/C compressor pulley.
Fail-safe
-
Function not equipped.
 Heater, Ventilation And Air Conditioning
Abbreviation
AAS
Active Adaptive Shift
ABS
Antilock Brake System
ABDC
After Bottom Dead Center
ACC
...
 Magnet Clutch [Manual Air Conditioner]
Purpose
The magnetic clutch transmits the rotation force from the engine to the shaft
in the A/C compressor.
Function
The magnetic clutch engages or disengages the magnetic clut ...
Other materials:
Rear Seat Back Trim Removal/Installation
6:4 Split Type
1. Remove the trunk board..
2. Remove the rear seat back..
3. Remove the headrest.
4. Remove the rear seat back frame..
5. Remove the C rings in the order of (1), (2), (3), and (4) shown in the figure,
and remove the rear seat back trim from the rear seat back pad.
CA ...
Meter Hood Removal/Installation
1. Disconnect the negative battery cable..
2. Remove the upper column cover.
3. Using a phillips screwdriver, remove fasteners.
NOTE:
When pulling up the shaft of fasteners using a phillips screwdriver, the
shaft will not be pulled up if it is rotated by pressing the driver. To pull ...
Crash Zone Sensor [Standard Deployment Control System]
Purpose
The crash zone sensor detects an impact during a frontal or frontal offset
collision to the vehicle.
Function
The crash zone sensor converts the detected impact to an electrical signal.
Construction
The crash zone sensor is built into the clutch sensor.
...
