Mazda CX-5 Service & Repair Manual: Solar Radiation Sensor Removal/Installation [Full Auto Air Conditioner]
NOTE:
-
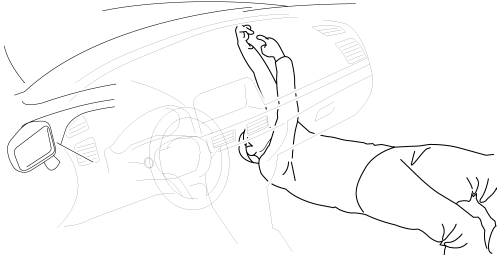
When removing the solar radiation sensor, perform the procedure in the posture shown in the figure.
1. Disconnect the negative battery cable..
2. Remove the following parts:
a. Front scuff plate (passenger-side).
b. Front side trim (passenger-side).
c. Dashboard under cover.
d. Front heat duct (passenger-side).
e. Glove compartment.
f. Decoration panel.
g. Lower panel (passenger-side).
h. Blower unit.
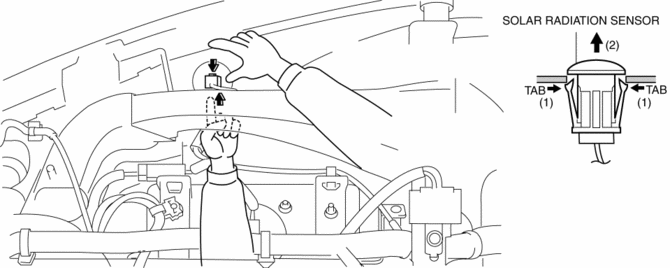
3. Press the tab from the inside of the dashboard and press out the solar radiation sensor as shown in the figure.
4. Disconnect the solar radiation sensor connector.
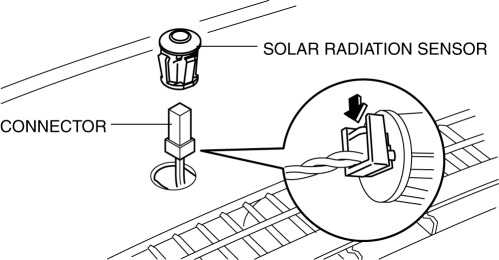
5. Remove the solar radiation sensor.
6. Install in the reverse order of removal.
Solar Radiation Sensor Installation Note
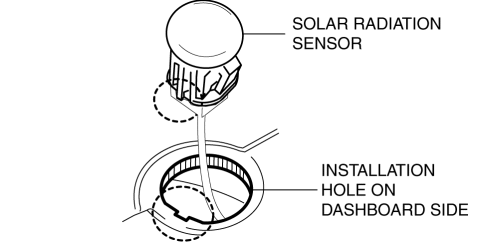
1. Align the shape of the solar radiation sensor with the shape of the installation hole on the dashboard side, and install as shown in the figure.
 Solar Radiation Sensor Inspection [Full Auto Air Conditioner]
1. Shine a fluorescent light or expose the solar radiation sensor to natural
sunlight.
2. Connect the positive (+) lead to terminals B, C and negative (-) lead to terminal
A of the solar radiati ...
 Solar Radiation Sensor [Full Auto Air Conditioner]
Purpose
The solar radiation sensor detects the sunlight intensity emitted to the
cabin.
Function
The solar radiation sensor converts the detected solar radiation amount to
an ...
Other materials:
Sirius Satellite Radio Unit
Purpose
Satellite radio programming can be listened to.
Function
The voltage signal sent from the center roof antenna (SIRIUS satellite radio
antenna) is output to the audio unit.
Construction
The SIRIUS satellite radio unit is installed to the interior of the glo ...
Clutch Cover Inspection [C66 M R]
1. Remove the clutch cover..
2. Perform the following procedures to inspect the clutch cover.
If it exceeds the maximum specification, replace the clutch cover..
a. Measure the wear of the diaphragm spring fingers.
Clutch cover diaphragm spring fingers maximum depth
0.6 ...
Rear Wiper Arm And Blade Adjustment
1. Switch the ignition ON (engine off or on).
2. Operate the rear wiper.
3. Verify that the rear wiper is operating and stop the rear wiper.
4. Verify that the rear wiper is stopped at the auto-stop position.
5. Remove the rear wiper arm and blade..
6. Install the rear wiper arm to the ser ...
