Mazda CX-5 Service & Repair Manual: Shift Control Module Removal/Installation [C66 M R]
Removal
1. Shift the shift lever to the neutral position.
2. Remove the plug hole plate..
3. Disconnect the negative battery cable..
4. Remove the air cleaner and air hose as a single unit..
5. Remove the battery and battery tray..
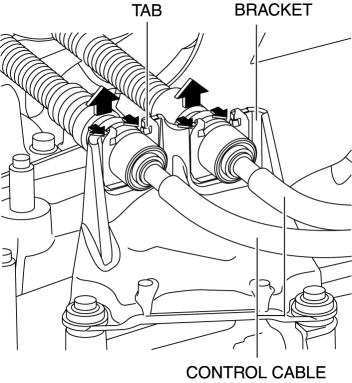
6. Disconnect the control cable from the transaxle.
a. Pull the lock pin in the direction of the arrow shown in the figure and release the control cable end lock.
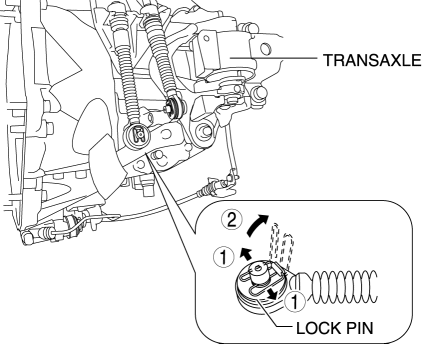
b. Press the tabs on the control cable and disconnect the control cable from the bracket on the transaxle.
7. Remove the neutral switch in the order shown in the figure
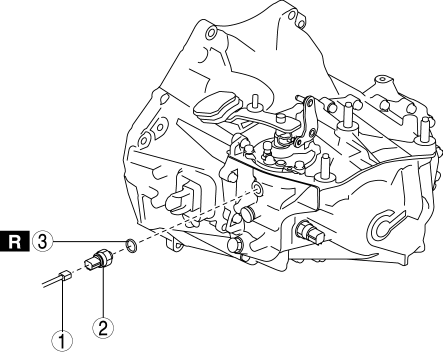
|
1 |
Connector |
|
2 |
Neutral switch |
|
3 |
Gasket |
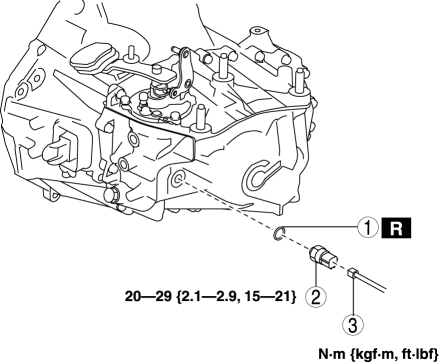
8. Remove the detent ball pin in the order shown in the figure
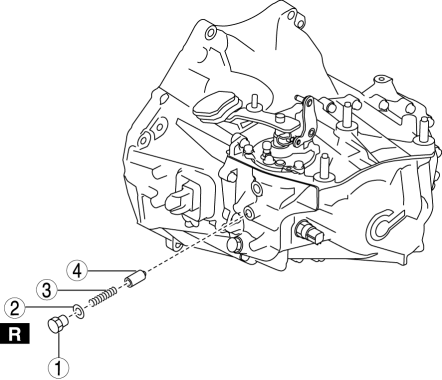
|
1 |
Plug |
|
2 |
Gasket |
|
3 |
Spring |
|
4 |
Detent ball pin |
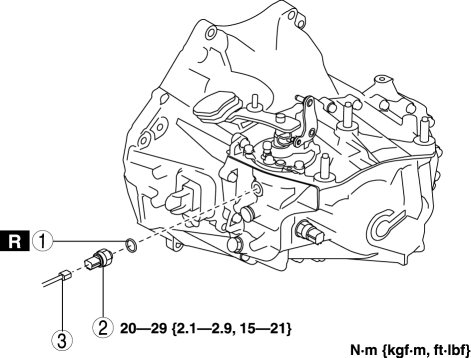
9. Remove the back-up light switch in the order shown in the figure
|
1 |
Connector |
|
2 |
Back-up light switch |
|
3 |
Gasket |
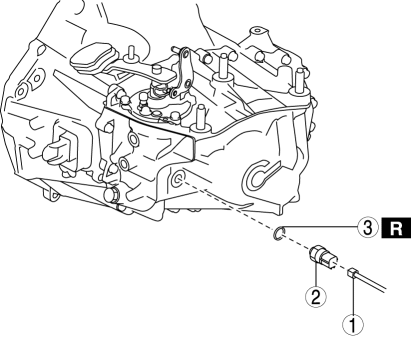
10. Remove the shift control module in the order shown in the figure
|
1 |
Breather |
|
2 |
Shift control module |
|
3 |
O-ring |
Installation
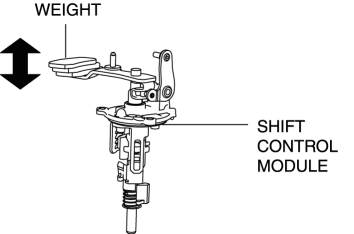
1. Verify that the shift control module is in the neutral position.
NOTE:
-
If the shift control module is in the neutral position, the shift lever with the weight can be moved up and down to a large extent.
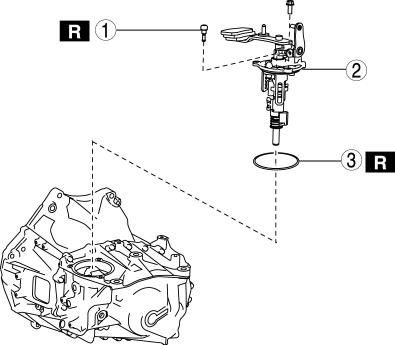
2. Install the shift control module in the order shown in the figure
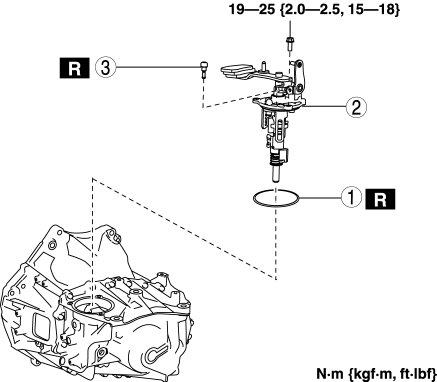
|
1 |
O-ring |
|
2 |
Shift control module |
|
3 |
Breather |
3. Install the back-up light switch in the order shown in the figure
|
1 |
Gasket |
|
2 |
Back-up light switch |
|
3 |
Connector |
4. Install the detent ball pin in the order shown in the figure
|
1 |
Detent ball pin |
|
2 |
Spring |
|
3 |
Gasket |
|
4 |
Plug |
5. Install the neutral switch in the order shown in the figure
|
1 |
Gasket |
|
2 |
Neutral switch |
|
3 |
Connector |
6. Connect the control cable to the transaxle.
7. Make sure that the shift lever can be shifted smoothly.
8. Install the battery tray and battery..
9. Install the air cleaner and air hose as a single unit..
10. Connect the negative battery cable..
11. Install the plug hole plate..
 Shift And Select Mechanism [C66 M R]
Purpose, Function
The shift and select mechanism moves the shift fork to change gears according
to the operation of the shift lever in the cabin.
Construction
Shift control module ...
 Shift Lock System Inspection
Shift-Lock System Inspection
1. Switch the ignition ON (engine off).
2. Shift the selector lever to the P position.
3. Verify that the selector lever cannot be shifted from P to R position when
...
Other materials:
Shift Lock System [Fw6 A EL, Fw6 Ax EL]
Purpose, Function
The shift-lock system operates when the ignition is switched to ON and the
brake pedal is not depressed, and inhibits the selector lever from being shifted
from the P position to other positions.
If the shift-lock cannot be released by the normal operation, it ...
Restraints SST
49 H066 002
Deployment tool
49 B066 004
Adapter harness
49 L066 002
Adapter harness
49 G066 003
Adapter harness
49 N088 0A0
Fuel and Thermometer checker
...
Front Oil Seal Replacement
WARNING:
A hot engine can cause severe burns. Turn off the engine and wait until it
is cool before servicing.
1. Remove the front under cover No.2..
2. Remove the splash shield..
3. Remove the drive belt..
4. Remove in the order indicated in the table.
5. Install in the reve ...
