Mazda CX-5 Service & Repair Manual: Refrigerant Pressure Sensor [Manual Air Conditioner]
Purpose
-
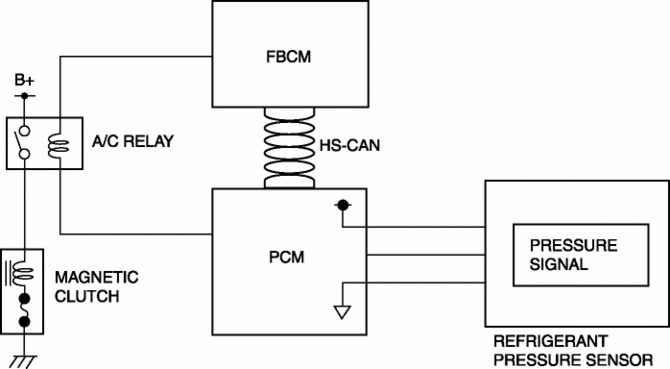
The refrigerant pressure sensor detects the refrigerant pressure in the refrigerant cycle.
Function
-
The refrigerant pressure sensor converts the detected refrigerant pressure to an electric signal and sends it to the PCM.

Construction
-
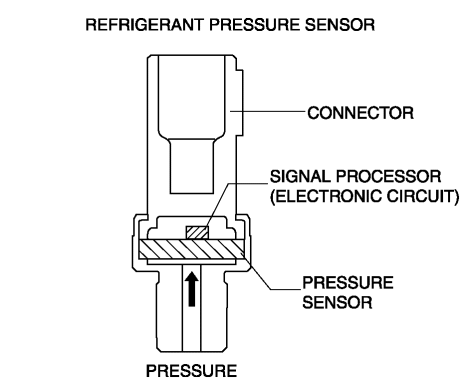
The refrigerant pressure sensor is installed on the cooler pipe.

-
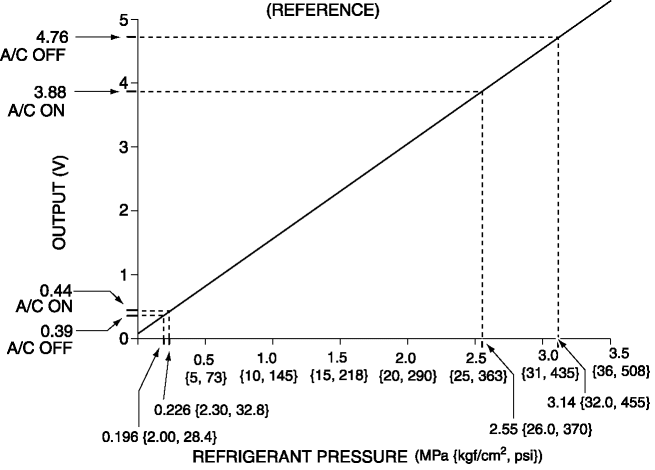
A capacitance type refrigerant pressure sensor, which converts refrigerant pressure into a linear electric signal, has been adopted.
-
Consists of a pressure detecting part and signal processing part.
-
The pressure detecting part is a variable capacity condenser, which changes capacitance according to the pressure.
-
The signal processing part detects the capacitance of pressure detecting part, converts it to voltage, then outputs it to the climate control unit.

Operation
Capacitance type
-
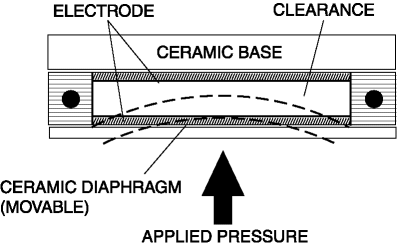
There is a clearance between the movable ceramic diaphragm and the ceramic base, and each side has an electrode.
-
When pressure is applied from the ceramic diaphragm side, the ceramic diaphragm deforms, and the clearance between the electrodes changes. As a result, capacitance is changed and pressure is detected.

Fail-safe
-
Function not equipped.
 Refrigerant Pressure Sensor [Full Auto Air Conditioner]
Purpose
The refrigerant pressure sensor detects the refrigerant pressure in the refrigerant
cycle.
Function
The refrigerant pressure sensor converts the detected refrigerant pre ...
 Engine Assembly
...
Other materials:
Turn Signal/Hazard Warning Indicator Lights
Purpose
Notifies the driver that a turn light, the hazard warning lights are flashing.
Function
Flashes according to the turn switch and hazard warning switch operations.
Construction
Displayed in the instrument cluster.
Operation
Turn system
1. When th ...
Brake Pedal Inspection
Pedal Height Inspection
1. Measure the distance from the center of the upper surface of the pedal pad
to the insulator and verify that it is as specified.
If not within the specification, inspect the following items and repair or
replace the applicable part if there is any malfunct ...
Liftgate Recess Removal/Installation
1. Insert a tape-wrapped flathead screwdriver in the position indicated by the
arrow in the figure and detach hooks A.
2. Remove the liftgate recess in the direction of the arrow shown in the figure
avoiding hooks B.
3. Install in the reverse order of removal. ...
