Mazda CX-5 Service & Repair Manual: Rear Trailing Link Removal/Installation
1. Remove the floor under cover..
2. Disconnect the rear parking cable..
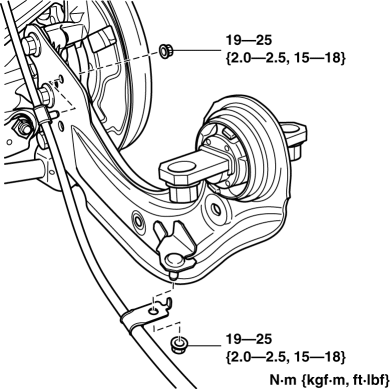
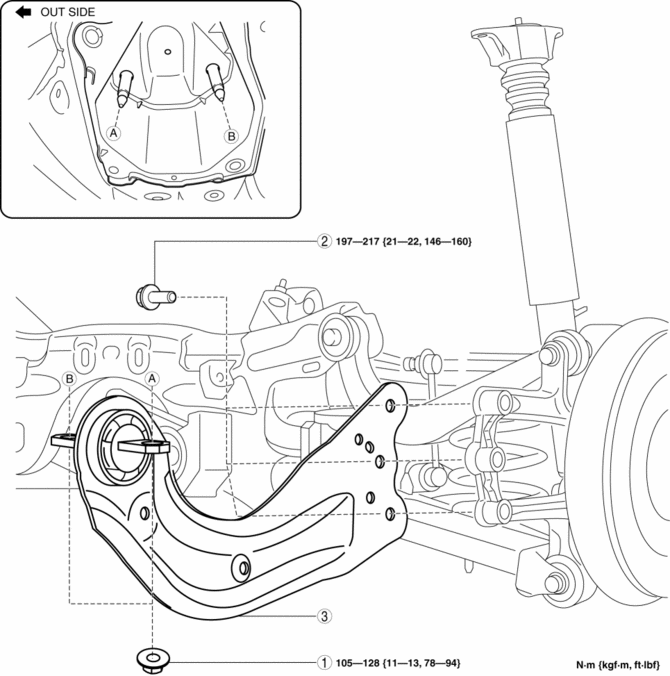
3. Remove in the order indicated in the table.
4. Install in the reverse order of removal.
5. Inspect the wheel alignment and adjust it if necessary..
|
1 |
Rear trailing link installation nut |
|
2 |
Rear trailing link installation bolt |
|
3 |
Rear trailing link (See Rear Trailing link Installation Note.) |
Rear Trailing link Installation Note
1. Install the rear trailing link installation bolts using a jack.
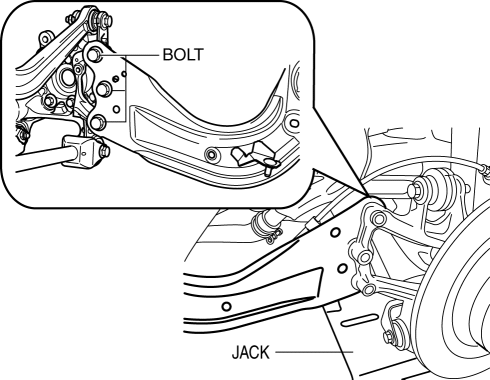
2. Install the rear trailing link installation nut.
 General Procedures (Suspension)
Wheel and Tire Installation
1. When installing the wheels and tires, tighten the wheel nuts in a criss-cross
pattern to the following tightening torque.
Tightening torque
108—14 ...
 Rear Wheel Hub Bolt Replacement
1. Remove the brake calliper component and suspend it out of the way using a
cable.
2. Remove the disc plate.
3. Remove the wheel hub bolt using the SST as shown in the figure.
4. Place ...
Other materials:
Steering Gear And Linkage Assembly
CAUTION:
To prevent damage to the steering gear, secure it to the vise using a copper
plate or clean cloth.
1. Assemble in the order shown in the figure.
1
Steering gear
2
Mounting rubber
(See Mounting Rubber Assembly Not ...
Keyless Entry System
This system uses the key buttons to remotely lock and unlock the doors and the
liftgate.
The system can start the engine without having to take the key out of your purse
or pocket.
It can also help you signal for attention.
Operating the theft-deterrent system is also possible on theft-deterr ...
Suspension Abbreviations
AAS
Active Adaptive Shift
ABS
Antilock Brake System
ABDC
After Bottom Dead Center
ACC
Accessories
AFS
Adaptive Front Lighting System
ALC
...
