Mazda CX-5 Service & Repair Manual: Purge Solenoid Valve Removal/Installation
1. Disconnect the negative battery cable..
2. Remove the plug hole plate..
3. Remove the air cleaner and air hose as a single unit..
4. Disconnect the high pressure fuel pump connector.
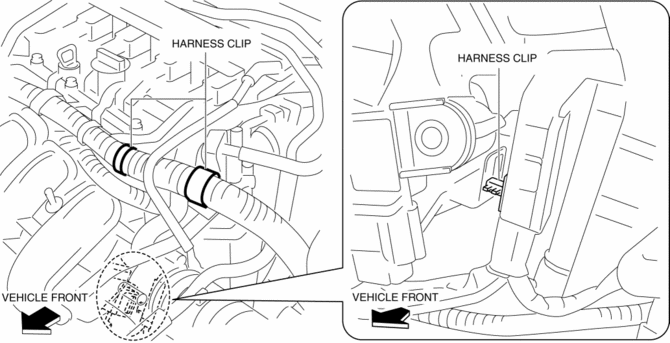
5. Disconnect the harness clip as shown in the figure.
6. Remove in the order indicated in the table.
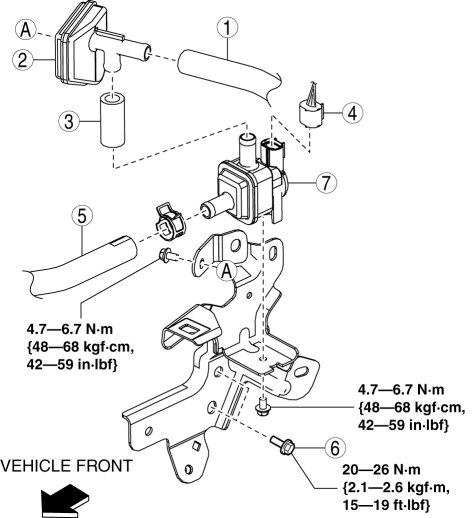
|
1 |
Evaporative hose No.1 (See Evaporative Hose No.1 Installation Note.) |
|
2 |
Catch tank |
|
3 |
Evaporative hose No.2 |
|
4 |
Purge solenoid valve connector |
|
5 |
Evaporative hose No.3 (See Evaporative Hose No.3 Installation Note.) |
|
6 |
Purge solenoid valve bracket installation bolt |
|
7 |
Purge solenoid valve (See Purge Solenoid Valve Installation Note.) |
7. Install in the reverse order of removal.
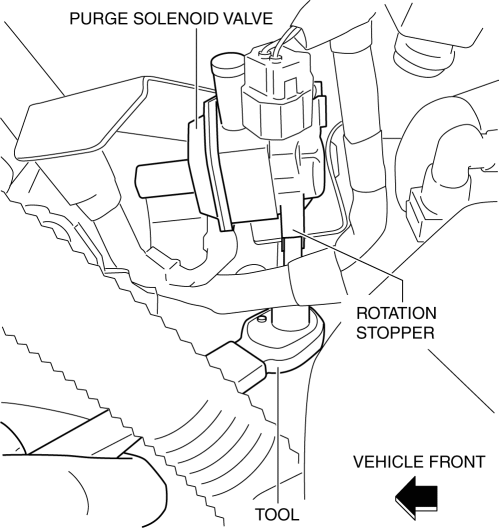
Purge Solenoid Valve Installation Note
1. Temporarily install the purge solenoid valve to the bracket.
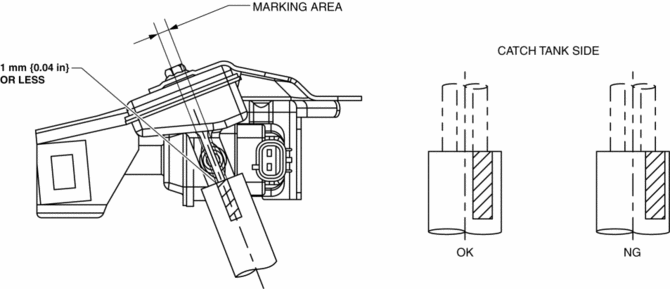
2. Lift up and tighten the purge solenoid valve as shown in the figure.
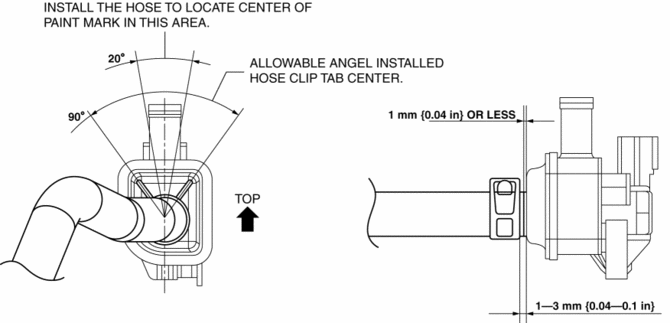
Evaporative Hose No.3 Installation Note
1. Install the evaporative hose No.3 as shown in the figure.
Evaporative Hose No.1 Installation Note
1. Install the evaporative hose No.1 as shown in the figure.
 Purge Solenoid Valve Inspection
Airflow Inspection
1. Disconnect the negative battery cable..
2. Remove the purge solenoid valve..
3. Inspect airflow between the ports under the following conditions.
...
 Purge Solenoid Valve
Purpose, Function
Introduces evaporative gas absorbed by the charcoal canister to the intake
manifold.
The purge solenoid valve opens according to the control signal from the PCM.
...
Other materials:
Rocking the Vehicle
WARNING
Do not spin the wheels at more than 56 km/h (35 mph), and do not allow anyone
to stand behind a wheel when pushing the vehicle: When the vehicle is stuck, spinning
the wheels at high speed is dangerous. The spinning tire could overheat and explode.
This could cause serious injuries.
...
Side Step Molding Removal/Installation
1. Set the rear over fender aside..
2. Insert a tape-wrapped flathead screwdriver shown in the figure and remove
the clip A in the direction of arrow (1).
3. Slide the side step molding in the direction of the arrow (2) shown in the
figure and remove clips B from side step molding.
4. ...
Front Accessory Socket Removal/Installation
1. Disconnect the negative battery cable..
2. Remove the front console..
3. Insert a tape-wrapped flathead screwdriver into the gap between the cap tab
and socket.
4. Move the flathead screwdriver in the direction of the arrow (1) shown in the
figure, press the front accessory socket i ...
