Chevrolet Spark manuals

Mazda CX-5 Service & Repair Manual: Power Window System Preliminary Inspection [Power Window System]

Mazda CX-5 Service & Repair Manual / Body / Glass & Windows / Power Window System Preliminary Inspection [Power Window System]

Manual Open/Close Function Inspection


STEP

INSPECTION

ACTION

1

  • Switch the ignition ON (engine off or on).

  • Operate the power window using the manual open/close function on the power window main switch.

  • Does the power window operate properly?

Yes

Go to the next step.

No

  • Inspect the power window main switch and the wiring harness.

  • Repair or replace malfunctioning parts.

2

  • Set the power cut switch to the UNLOCK position.

  • Operate the power window using the power window subswitch.

  • Does the power window operate properly?

Yes

Go to the next step.

No

  • Inspect the power window subswitch and the wiring harness.

  • Repair or replace malfunctioning parts.

3

  • Power-cut switch ON (with power-cut switch pressed)

  • Operate all power windows other than the driver side.

  • Does the power window operate properly?

Yes

  • Inspect the power cut switch and the wiring harness.

  • Replace the power window main switch.

No

  • Manual open/close function is normal.

  • Perform the auto open/close function inspection.


Auto Open/Close Function (Driver’s Side) Inspection


STEP

INSPECTION

ACTION

1

  • Switch the ignition ON (engine off or on).

  • Operate the power window using the auto open /close function on the power window main switch.

  • Does the power window operate properly?

Yes

Go to the next step.

No

  • If the power window automatically opens during the closing operation:

    • Go to No.6 DOOR GLASS REVERSES EVEN THOUGH THE GLASS DOES NOT ENCOUNTER A FOREIGN OBJECT WHILE IT IS MOVING UP IN AUTOMATIC MODE [POWER WINDOW SYSTEM].

  • Others:

    • Go to No.1 THE AUTO OPEN/CLOSE FUNCTION ON THE DRIVER'S SIDE POWER WINDOW IS INOPERATIVE [POWER WINDOW SYSTEM].

2

  • Operate the power window main switch to the close position while the power window is opening.

  • Does the power window operation stop?

Yes

Go to the next step.

No

Replace the power window main switch (power window control unit is malfunctioning.)

3

  • Operate the power window main switch to the open position while the power window is closing.

  • Does the power window operation stop?

Yes

  • Auto open/close function is normal.

  • Perform the IG-OFF timer function inspection.

No

  • Replace the power window main switch (power window control unit is malfunctioning.)


IG-OFF Timer Function Inspection


STEP

INSPECTION

ACTION

1

  • Close all doors.

  • Switch the ignition from ON (engine off or on) to off (LOCK).

  • Operate the power window main switch within 40 s after

    switching the ignition to LOCK position.

  • Does the power window operate?

Yes

Go to the next step.

No

  • Inspect the door switches and related wiring harness.

  • If above parts are normal, replace the power window main switch, then go to the next step.

  • If the above parts are malfunctioning repair or replace the malfunctioning part(s), then go to the next step.

2

  • Open any door.

  • Switch the ignition from ON (engine off or on) to off (LOCK).

  • Operate the power window main switch within 40 s after

    switching the ignition LOCK position.

  • Does the power window operate?

Yes

  • Inspect the door switches and related wiring harness.

  • If above parts are normal, replace the power window main switch, then go to the next step.

  • If the above parts are malfunctioning repair or replace the malfunctioning part(s), then go to the next step.

No

Go to the next step.

3

  • Close all doors.

  • Switch the ignition from ON (engine off or on) to off (LOCK).

  • Operate the power window main switch within 60 s after

    switching the ignition to LOCK position.

  • Does the power window operate?

Yes

Replace the power window main switch (power window control unit is malfunctioning.)

No

  • IG-OFF timer function operation is normal.

  • Perform the auto reverse pinch protection function inspection.


Auto Reverse Pinch Protection Function Inspection


STEP

INSPECTION

ACTION

1

  • Switch the ignition ON (engine off or on).

  • Fully open the driver’s side power window.

  • Insert a wooden hammer (thickness: 10 mm {0.39 in} or more)

    as shown below. Then, close the power window.

  • Verify that the power window opens 200 mm {7.87 in}

    after contacting the hammer and the operation stops.

  • Does auto reverse pinch protection function operate properly?

Yes

Auto reverse pinch protection function is normal.

No

Go to the next step.

2

  • Does the power window open before contacting the hammer?

Yes

Go to No.6 DOOR GLASS REVERSES EVEN THOUGH THE GLASS DOES NOT ENCOUNTER A FOREIGN OBJECT WHILE IT IS MOVING UP IN AUTOMATIC MODE [POWER WINDOW SYSTEM].

No

  • Initialize the power window main switch.

NOTE:

  • Before initializing the power window main switch, cut off the power supply to the power window main switch for 60 s

    . Then, reconnect it again after 60 s

    :

    • Disconnect the negative battery cable.

    • Disconnect the power window main switch connector.

    • Remove the fuse for the power window system.


Power Window System Initialization Procedure
NOTE: If the following operations have been performed, initial setting is reset, and auto up/down operation are disabled. Therefore, performing initial setting is necessary. ...

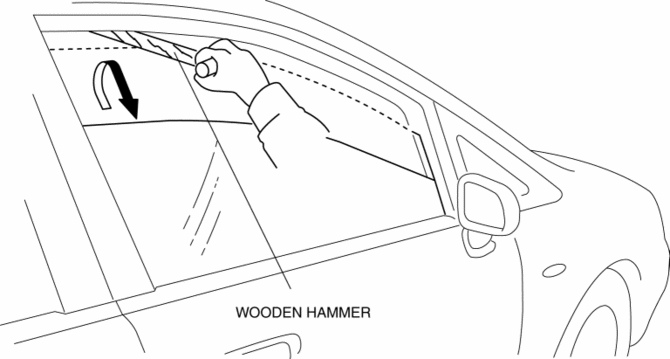
Quarter Window Glass Installation
WARNING: Using a razor with bare hands can cause injury. Always wear gloves when using a razor. CAUTION: If a door is opened or closed when all the window glass is closed, the ...

Other materials:

Check Valve Removal/Installation
Except U.S.A. And CANADA 1. Remove the floor under cover.. 2. Remove in the order indicated in the table. 1 Evaporative hose 2 Check valve 3. Install in the reverse order of removal. ...

Headliner Removal/Installation
1. Disconnect the negative battery cable.. 2. Remove the following parts: a. Sunroof seaming welt (with sunroof system). b. A-pillar trim. c. Front map light. d. Sunvisor. e. Front scuff plate. f. Rear scuff plate. g. B-pillar lower trim. h. Adjust anchor cover. i. Upper anchor i ...

Front Bumper Reinforcement Removal/Installation
1. Disconnect the negative battery cable.. 2. Remove the following parts: a. Seal board upper. b. Front bumper. c. Front combination light. d. Set plate. e. Energy-absorbing form. f. Front under cover No.1. g. Bumper stiffener lower. 3. Support the shroud panel using a jack. CAUT ...

© 2016-2025 Copyright www.mcx5.org