Mazda CX-5 Service & Repair Manual: Manual Transaxle Shift Mechanism Removal/Installation [C66 M R]
1. Disconnect the negative battery cable..
2. Remove the shift lever using the following procedure:
a. Remove the upper panel..
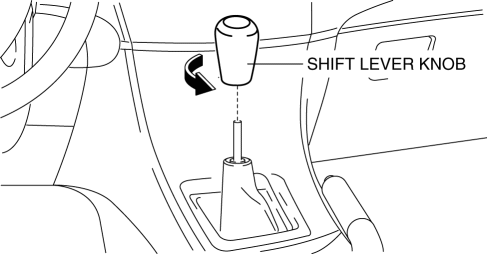
b. Remove the shift lever knob.
c. Remove the shift panel..
d. Remove the side wall..
e. Remove the rear console..
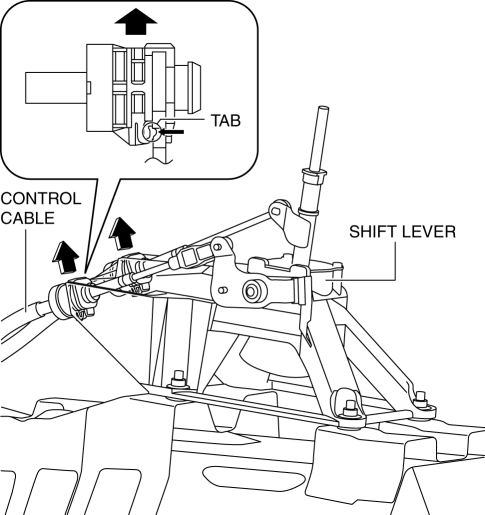
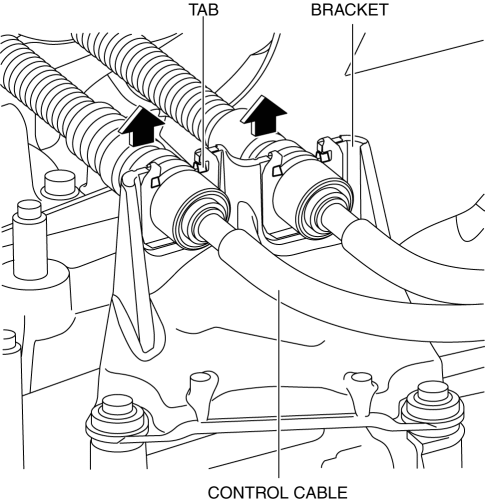
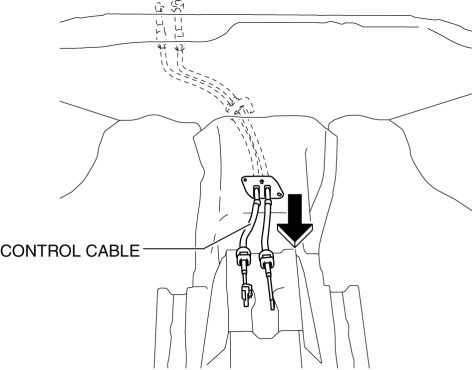
f. Press the tabs on the control cable as shown in the figure and disconnect the shift lever from the control cable.
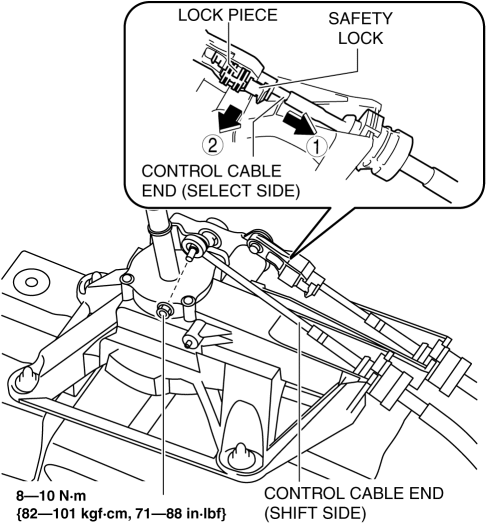
g. Disconnect the control cable end from shift lever as shown in the figure.
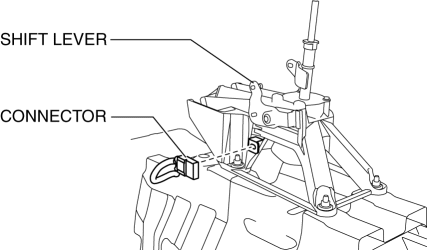
h. Disconnect the connector from shift lever as shown in the figure.
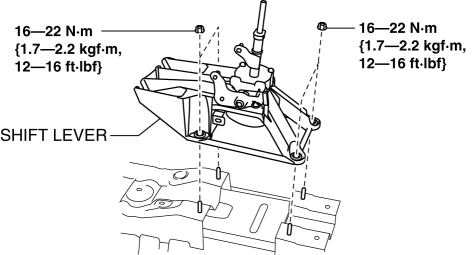
i. Remove the shift lever.
3. Remove the control cable using the following procedure:
a. Remove the air cleaner component. (ex: air cleaner, air hose).
b. Remove the battery component. (ex: battery, battery tray and PCM component).
c. Remove the control cable end from the MTX.
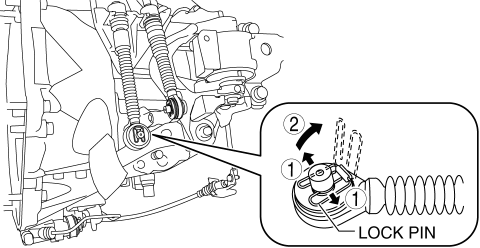
i. Pull the lock pin in the direction of the arrow shown in the figure and release the control cable end (MTX side) lock.
ii. Remove the control cable end from the MTX.
d. Press the tabs on the control cable and disconnect the control cable from the bracket.
e. Remove the fastening nut for the control cable.
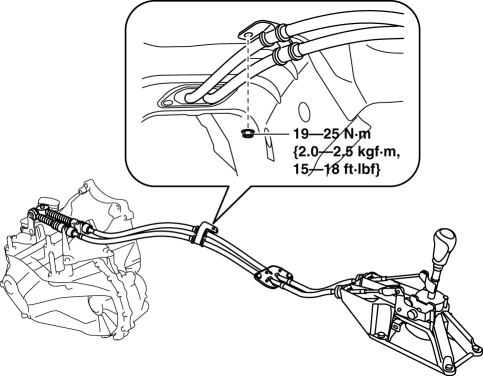
f. Remove the fastening nuts for the grommet.
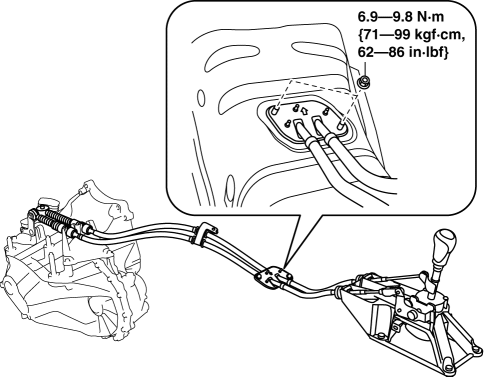
g. Remove the control cable.
4. Install in the reverse order of removal.
 Manual Transaxle Removal/Installation [C66 M R]
Removal
1. Disconnect the negative battery cable..
2. Remove the plug hole plate..
3. Remove the front under cover No.2..
4. Remove the front under cover No.1..
5. Remove the splash shield.. ...
 Manual Transaxle [C66 M R]
Purpose, Function
The MTX converts the drive force (speed, torque, rotation direction) input
from the engine according to the shift lever operation inside the vehicle.
Construction
...
Other materials:
Keyless Entry System
This system uses the key buttons to remotely lock and unlock the doors and the
liftgate.
The system can start the engine without having to take the key out of your purse
or pocket.
It can also help you signal for attention.
Operating the theft-deterrent system is also possible on theft-deterr ...
Constant Monitoring
The following components of the air bag systems are monitored by a diagnostic
system:
• Crash sensors, and diagnostic module (SAS
unit)
• Front air bag sensors
• Air bag modules
• Side crash sensors
• Air bag/Front seat belt pretensioner system
warning light
• Fron ...
Start Stop Unit Configuration (Using Read/Write Function)
NOTE:
When performing configuration, it is necessary to read the vehicle specification
information from the start stop unit before replacing it. Connect the M-MDS
to the vehicle and perform vehicle identification before removing the start
stop unit. The vehicle specification informa ...
