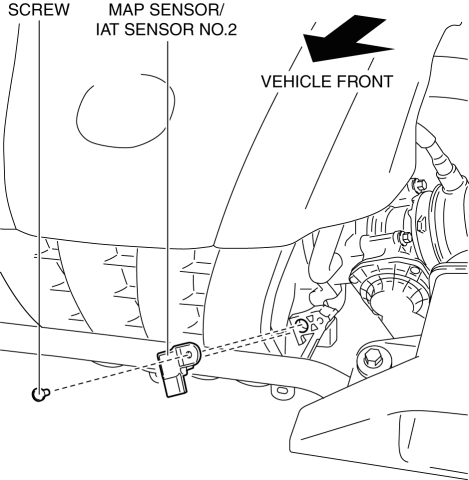
Mazda CX-5 Service & Repair Manual: Manifold Absolute Pressure (Map) Sensor/Intake Air Temperature (Iat) Sensor No.2 Removal/Installation
NOTE:
-
Because the IAT sensor No.2 is integrated in the MAP sensor, replacing the IAT sensor No.2 includes replacement of the MAP sensor/IAT sensor No.2.
1. Disconnect the negative battery cable..
2. Disconnect the MAP sensor/IAT sensor No.2 connector.
3. Remove the MAP sensor/IAT sensor No.2.

4. Install in the reverse order of removal.
 Manifold Absolute Pressure (Map) Sensor
Purpose/Function
Detects the intake air pressure introduced into the cylinder as basic information
for mainly determining the fuel injection amount.
Detects the intake air pressure i ...
 Mass Air Flow (MAF) Sensor Inspection
Visual Inspection
1. Remove the MAF sensor/IAT sensor No.1..
2. Visually inspect the MAF sensor for the following:
Damage, cracks, soiling
Rusted sensor terminal
Bent sensor ...
Other materials:
Headlight High Beam Indicator Light
Purpose
Notifies the user that the headlights (HI) are illuminated.
Function
Illuminates when the headlight (HI) or parking illumination conditions are
met.
Construction
Displayed in the instrument cluster.
Operation
1. When the light switch is operat ...
Driver Side Air Bag Module Removal/Installation [Standard Deployment Control
System]
WARNING:
Handling the air bag module improperly can accidentally deploy the air bag
module, which may seriously injure you. Read the air bag system service warnings
and cautions before handling the air bag module..
NOTE:
The driver-side air bag module is installed to the ...
Hood
WARNING
Always check that the hood is closed and securely locked:
A hood that is not closed and securely locked is dangerous as it could fly open
while the vehicle is moving and block the driver's vision which could result in
a serious accident.
Opening the Hood
1. With the vehicle parke ...
