Mazda CX-5 Owners Manual: Hood
WARNING
Always check that the hood is closed and securely locked:
A hood that is not closed and securely locked is dangerous as it could fly open while the vehicle is moving and block the driver's vision which could result in a serious accident.
Opening the Hood
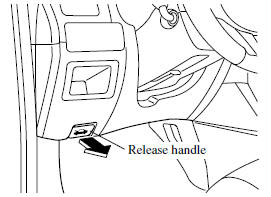
1. With the vehicle parked, pull the release handle to unlock the hood.
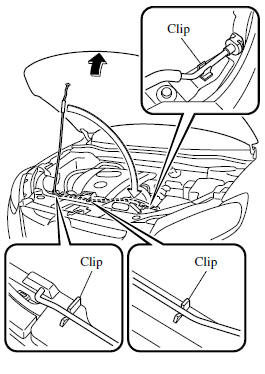
2. Insert your hand into the hood opening, slide the latch lever to the right, and lift up the hood.
3. Grasp the support rod in the padded area and secure it in the support rod hole indicated by the arrow to hold the hood open.

Closing the Hood
1. Check under the hood area to make certain all filler caps are in place and all loose items (e.g. tools, oil containers, etc.) have been removed.
2. Lift the hood, grasp the padded area on the support rod, and secure the support rod in the clip. Verify that the support rod is secured in the clip before closing the hood.
3. Lower the hood slowly until it rests in the unlocked position, and then remove your hands. Push the front center edge of the hood downward until a latching sound is heard, and the hood closes completely.
 Owner Maintenance Precautions
The owner or a qualified service technician should make these vehicle inspections
at the indicated intervals to ensure safe and dependable operation.
Bring any problem to the attention of an Author ...

Other materials:
Pre Tensioner Seat Belt [Two Step Deployment Control System]
Purpose
The pre-tensioner seat belt retracts and tightens the seat belt webbing to
protect the front passengers during a collision.
Function
The pre-tensioner seat belts operate (deploy) based on the operation signal
from the SAS control module to instantly retract and tigh ...
After Service Precaution
WARNING:
Fuel line spills and leakage are dangerous. Fuel can ignite and cause serious
injuries or death and damage. When installing the fuel hose, perform “Fuel Leakage
Inspection” described below.
A person charged with static electricity could cause a fire or explosion,
...
Catalytic Converter
Purpose, Function
Purifies contaminants in the exhaust gas by utilizing the chemical reactions
of the three-way catalytic converter.
A WU-TWC and a TWC have been adopted.
WU-TWC
The three-way catalyst is integrated with the exhaust manifold.
Because the c ...
