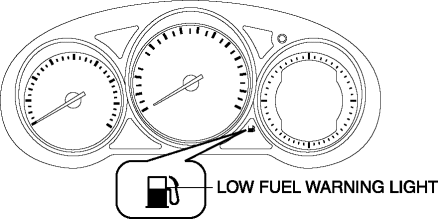
Mazda CX-5 Service & Repair Manual: Low Fuel Warning Light
Purpose
-
The low fuel warning light warns the driver that the remaining fuel level is low.
Function
-
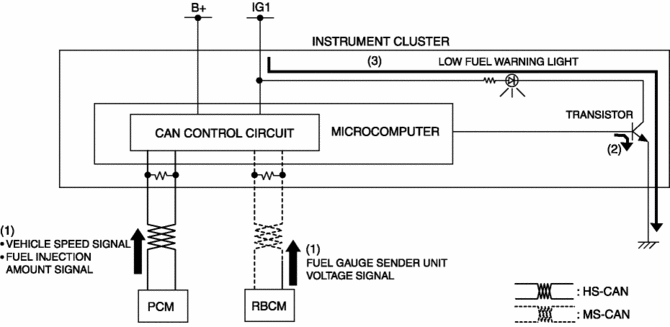
The instrument cluster calculates the fuel quantity based on the following CAN signals, and if a remaining fuel amount of approx. 10 L {2.6 US gal, 2.2 Imp gal} (fuel gauge displays remaining two segments) is detected, the low fuel warning light illuminates.
-
Fuel gauge sender unit voltage signal sent from rear body control module (RBCM)
-
Fuel injection amount signal, vehicle speed signal sent from PCM
Construction
-
The instrument cluster microcomputer controls the low fuel warning light illumination on/off based on the remaining fuel amount calculation that is calculated by the instrument cluster.
-
The low fuel warning light is set in the instrument cluster.
Operation
-
When the ignition is switched ON (engine off or on) the instrument cluster receives (1) the fuel gauge sender unit voltage signal from the rear body control module (RBCM), and the fuel injection amount signal from the PCM.
-
The instrument cluster turns the transistor on (2) if the calculated remaining fuel amount based on each signal is approx. 10 L {2.6 US gal, 2.2 Imp gal}.
-
When the transistor turns on, a ground circuit with the low fuel warning light is established and the low fuel warning light illuminates (3).
Fail-safe
-
Function not equipped.
 High Pressure Fuel Pump
Purpose, Function
Applies pressure to fuel sent from the fuel pump equipped on the fuel tank,
and then pumps it to the fuel delivery pipe.
Fuel is sectioned and pumped by the up and ...
 No.27 Fuel Refill Concerns
27
FUEL REFILL CONCERNS
DESCRIPTION
Fuel tank does not fill smoothly.
POSSIBLE CAUSE
...
Other materials:
Automatic Transaxle Shift Mechanism [Fw6 A EL, Fw6 Ax EL]
Outline
A sport AT-type shift mechanism has been adopted for all models.
An electric shift-lock system has been adopted to prevent driver mis-operation.
A manual shift-lock release system has been adopted to ensure emergency bypass
if shifting operations cannot be performed ...
Clutch Disc Inspection [C66 M R]
Operation Inspection
1. Inspect the lining surface for discoloration and grease adhesion.
2. Inspect the torsion spring for weakness and the rivets for looseness.
3. Using a vernier caliper, measure the depth between the lining surface and
the rivet head.
Minimum clutch disc thicknes ...
Air Mix Actuator [Full Auto Air Conditioner]
Purpose
The air mix actuator moves the air mix door in the A/C unit to adjust the
temperature of the air blown from the air vent.
Function
Door open/close function
The air mix actuator drives the motor based on the signals from the climate
control unit and moves the air mi ...
